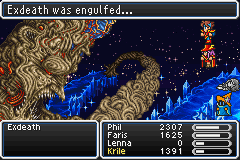
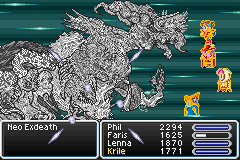
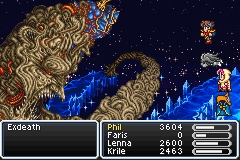
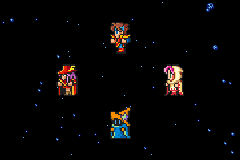
Okay, now what have I gotten myself into here?
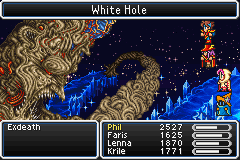
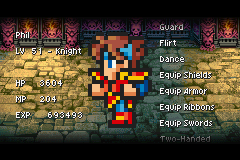
Tree Exdeath's signature move is White Hole, which has a chance of inflicting both Stone and Dead status on a warrior. We have some but not perfect protection against it. Phil has the Aegis Shield for immunity; they all have Angel Rings for 10% evade, and Shell status cuts its chance by 50% (I think.)
White Holes #1 and #2 missed, but the third hit Lenna. Fortunately she had gotten all four Shells up. We have no legal way to restore Lenna from either stone or death status, so it's onward without her. Krile dumped her entire load of Flare magic, and along with the Brave Blade hits and Faris handling the healing...
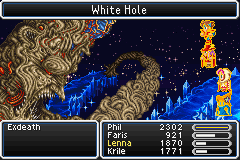
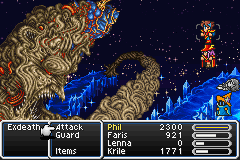
We did beat Exdeath Tree on the first try. After only three White Hole attempts. It does seem reasonable to get to Neo Exdeath by simply retrying our way through the White Hole gauntlet.
I didn't really expect to win missing a white mage and having expended Krile's magic on the first form. The finishing moves were a Dispel then Flare on Krile for a one-hit 2300 kill, then more Dispels and physical attacks against the top two warriors.
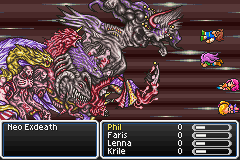
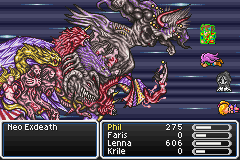
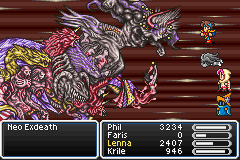
Let's go over the parts of Neo Exdeath in more detail again, largely cribbing from Solo the Monk.
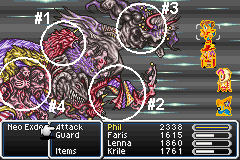
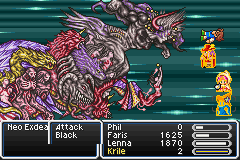
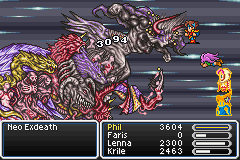
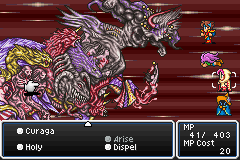
#1 I call the "Shoulder", the infamous caster of Grand Cross, which inflicts a random status ailment on all warriors, up to Stone and Dead.
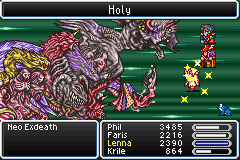
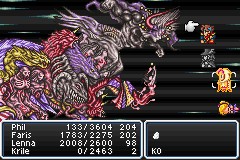
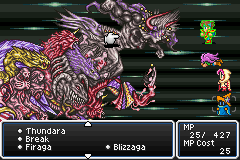
#2 is the "Hand", which casts Almagest, 1500 Holy element damage to all warriors.
#3 is the "Head", which does physical Fight moves and an occasional Dispel.
#4 is the "Back", which does Delta Attack (a stoning move), a variety of elemental attacks, and also Dispels.
Part #4 lacks the Heavy flag in the code, so an Odin summon from the Magic Lamp kills it instantly. Standard procedure for Sullla's solo characters but wildly out of bounds for our FF1 adventurers. This party has no way at all to take advantage of the non-Heavy weakness. It is immune to Dead status. So we have to kill all the parts fair and square.
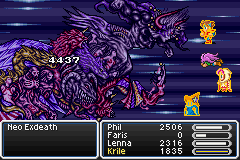
WAIT, there is another missing immunity among the pieces. Part #2 lacks STONE immunity. It does have Magic Evade of 80% and level of 67... but could that work? I made a save state at the beginning of the Neo Exdeath form just to experiment with that...
Holy crapoly, yes! (I bet any class can do this with Shoat from the Magic Lamp!)
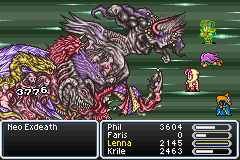
Sullla writes that Almagest isn't a big threat. The attack deals 1500 magic damage to all targets. That is chump change for a solo overleveled monk or dragoon or whatever boasting 9000 HP and access to Elixirs. It is most definitely a problem for a full party that has barely over 1500 HP apiece. I'm absolutely jumping on the opportunity to one-hit-kill one of the parts, especially when it can be done at a low MP cost. (I haven't figured out yet how many Flares to spend at the tree and how many to save for Neo Exdeath.)
Of course the Grand Cross part is by far the most dangerous and must go down first.
So attempt #2 made it past the tree with no White Hole hits, and lasted a while against Neo Exdeath. I didn't get to Break the Almagest part because a Grand Cross inflicted Berserk (!) status on Krile. I got the Grand Cross part reduced more than halfway with Phil's attacks and some Holy spells (with Faris doing the healing), but then lost to a Dispel-Flare combo for a one-hit 2300 kill on Lenna, then just too much damage accumulating on the other two.
Try #3 lost to two White Hole hits.
Try #4 lost to a White Hole right away on Lenna.
#5 made it past the tree... and landed Break on the Almagest part on the first try! Now we're in business!
Here comes Grand Cross...
What a bad roll. Phil dead, Krile critical, Lenna asleep. ![]()
We actually survived for a while and dealt almost 40k damage, but then a second Grand Cross hit dealing Dead to Krile. I held out for a while even after that - but the limiting factor was Faris running out of healing magic. (Krile was also out of Flare power too anyway.)
I made about ten more tries, but it seemed this battle wasn't winnable. Another big stumbling block was the Meteors from Tree Exdeath. About half the time, one of the mages would get hit by double meteors and go down. If it wasn't the Meteors or Grand Cross, what would kill me is Dispel knocking off the Armor/Shell protection and then a Holy spell or something hitting for over 2000 damage.
Really, once again here the answer is to go level up. We need more HP and more MP and just a bit more damage.
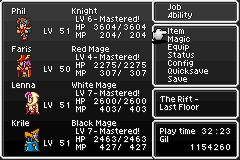
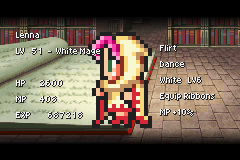
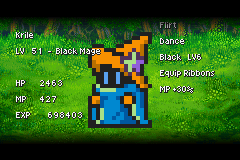
I worked out a target level of 51 for several reasons. Bartz and Krile would pick up attack and magic multipliers at that level, 24 up from 21 and 17 up from 15. And the level cap in the original Final Fantasy is 50, so this goes just one better than that. And it would take about 90 minutes, the length of both my laptop battery and of Saturday Night Live that was just coming on. ![]()
After three or four more tries, made it past the White Hole tree. With the added damage multipliers, it was now possible to cleanly strip the tree's last 10,000 HP in one round (4000 from Flare, 3500 from Holy, 2500 from Phil) and avoid the meteors almost every time.
Krile started casting Breaks at the Almagest part but didn't hit. When we got the Grand Cross part down about halfway, Krile switched to Flares on it instead.
Grand Cross #1 - that's poison, mute, unknown or nothing, toad. Grand Cross #2 - that's Condemn, mini, poison, poison.
The next Holy killed the Grand Cross part! But that would be as far as we got. Krile had run out of magic, and then Faris died to a combo of Dispel - Almagest - physical attack. Could not recover from that and Phil's doom clock.
Okay, adjust tactics again. With my higher HP totals now, I really can withstand Almagest and undo the damage with cure spells. The first target has to be the Grand Cross part with our full power.
Now let's delve a bit more into the AI of the Grand Cross part. The Algorithms Guide lists it as thus. (By the way, whenever Sullla says he looked at the code, he means J.L.Tseng's Algorithms FAQ. Sullla isn't disassembling and reading 65816 or ARM7 CPU assembler code from the ROM binary.)
Nothing
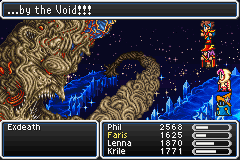
Display Text: The laws of physics are broken!
Nothing
Grand Cross
Nothing
Nothing
Dispel
Nothing
Condition:HP < 30000{
Display Text: The laws of physics are broken!
Nothing
Grand Cross
Nothing
Nothing
Fight
Dispel
Nothing
Nothing
}
Condition:HP < 15000{
Display Text: The laws of physics are broken!
Change Music??
Nothing
Change Music??
Grand Cross
Set V00=01
Nothing
}
What does this mean? Reading from the top, it casts Grand Cross on its fourth turn of battle. But look at that conditional that starts with HP < 30000. When the part is dropped below that threshold, it restarts a new AI routine. I now discovered that our party had enough offense to breach that 30K HP threshold before Grand Cross launched! In our three rounds of combat, we could do 10K per round between Flare/Holy/Brave Blade. That started the second routine, on which it casts Grand Cross on its third turn. Can we deal another 15K damage before that hits... yes we can! And the same for the last 15K life. So on the whole, we could bring just barely enough offense to stop Grand Cross from ever firing at all!
That's the last hit to kill it. (Faris had just died to a Dispel - physical combo.) The next target was the Delta Attack part in the far back. Once that is down, the Almagest and physical parts pose no cheap instant-kill threat, so Phil alone should be able to wear them down with Lenna supporting with heals.
Except... that once again the problem is running out of magic. We knocked off half the life of the back part, but then both the white and black mages ran out of juice. Since that part is in the back row, it would take Phil another twenty rounds of combat to finish its last 30K HP. And we could not outrace that before Delta Attack did land on someone. (We actually couldn't even outrace Almagest's damage with the Healing Staff alone and not Cure 3 spells.)
I made a few more tries again, but there was still no winning this fight. And I don't think the answer is to level up more either. HP is the only stat to add large boosts with higher levels. I need MP and damage, but it takes four entire levels just to add one more shot of Flare and one more multiplier.
With a heavy heart I conceded that this variant was not winnable at any reasonable level and number of retries. Gold Hairpins to halve MP use came to mind; I never decided whether they were within bounds or not for the variant; but they do not feel like a proper oldschool FF1style solution. No, it's time to make just a small adjustment to the variant rules and in wholehearted FF1 style. What is the biggest advantage that FF1 parties have that we lack?
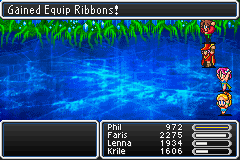
Ribbons.
We should have them. There's nothing wrong with any of its properties. The Ribbon provides status immunity to Darkness, Poison, Toad, Dead, Mute, Berserk, Aging, and Stone (White Hole and Delta Attack). FF5 just doesn't let our classes equip them. Dancers only. But the job ability system lets us work around that.
What I am going to do is earn ABP in the Dancer job until the Light Warriors learn the ability to Equip Ribbons. Then they go back to their normal classes with Equip Ribbons in the second ability slot. Since there are only three Ribbons in FF1, only three warriors get to do this. Faris is the obvious exception as the most expendable hero plus also has Dualcast occupying the ability slot.
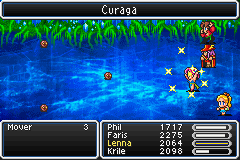
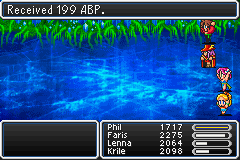
Fortunately, I only had to look at those silly costumes for about five minutes. Mastering Dancer took just two encounters with "Movers", which are weak to fire and cure spells (undead) and score 199 ABP. They are supposed to be a 1/64 rare encounter, but there is a quasi-glitch with the RNG in the GBA version that makes Movers always appear as your second enemy encounter after you save and reset and load.
Now the Tree Exdeath battle really felt like CHAOS from FF1! Just like his CRACK spell of instant death, White Hole has a chance of killing my one unRibboned warrior. Just scary enough to keep me on the edge of my seat. But now I could save all my magic for the second form.
Faris did fall to White Hole but I pressed on anyway. Without Faris, some of Lenna's turns had to be spent on healing, and I couldn't stop Grand Cross from going off twice before we killed the part. It landed Slow status on Phil - a not insignificant blow - but nothing else discernible.
Krile landed the Break on the Almagest part on her third try. Now to wear down the physical and Delta parts. But I couldn't pull it off from there. Lenna ran out of healing magic, and yet again could not keep up with the Healing Staff alone. We need Faris and a full team to do this.
Many more tries ensued. I eventually figured out this final adjustment to strategy: Even though it's possible to keep Grand Cross from ever launching, that takes too much mojo. I do need to go after the Breakable part first. Just hope to survive one roll of Grand Cross, which is not unreasonable with the Ribbon immunities. After Grand Cross fires once, the monster must cycle through eight rounds of combat until it comes again, leaving me plenty of time to work on Break and healing and buffs. Then blast the party's full power into it to knock it through the 30K and 15K HP reset thresholds.
I came agonizingly close on this one: hit Break on the bottom Almagest part early, survived one Grand Cross with the worst result being a Condemn on Faris, and killed off the Grand Cross part. For the first time, only two parts were left! Krile then ran dry on magic with the back part halfway down to 30K HP. Phil fought on, and over twenty rounds of combat brought the front (physical) part one hit away from death. Lenna was healing and replacing Dispelled buffs this whole time. But Lenna ran out of magic too, and the Healing Staff alone still could not quite keep up. We died with the back part under 10K HP.
At this point I succumbed to impatience and created a save state after the Tree battle. There's no more strategy or adjustments to be made there. Just retry until all the random factors go my way: about a 50-50 shot for all the White Holes to miss Faris, a 2/3 shot to not get Condemn from the one time Exdeath would pass through that part of the AI routine, and about a 3/4 shot that the turns would line up properly to deal the last 10k damage and skip the Meteors.
On my fourth try from that save state, Krile landed the Break on her first try! One Grand Cross hit and let me off easy. Condemn status on Krile is of no importance, she'll blast out all her Flares before that happens. Then Delta Attack nailed Faris. ![]() Still, that's the same place we were in before - Phil and Lenna left against the last two boss parts. Nope, that try didn't work either.
Still, that's the same place we were in before - Phil and Lenna left against the last two boss parts. Nope, that try didn't work either.
Several more tries later, Krile landed the Break early again. (I was now simply retrying if the Break didn't land before the first Almagest.)
Grand Cross hit once; it did something nasty to Faris, I forget exactly what, but she died from physical hits right after. But the other three warriors were all okay and we killed the Grand Cross shoulder. Halfway home.
And Krile surviving to this stage of the battle would ultimately make the difference. She dumped out her magic, then stayed in the back row defending. Between Armor status, back row, the Defend command, and a good old Guardian Dagger, physical attacks would do almost nothing to her. Yes, the success of this battle hinged on a BLACK MAGE PLAYING MEAT SHIELD!
We followed the plan from here. Lenna healed, using the heal staff as much as possible, only resorting to Cure 3 when it would heal 1500+ for all three party members or 3000+ for Phil. Whenever Dispel hit, replacing Shell and Armor was the first priority usually ahead of healing. I don't just need to stay alive, I need to stay alive in the most MP-efficient way possible, which means preventing damage ahead of time with cheap buffs. Krile defended and Phil slowly wore down the front part 3000 HP at a time then the back part by 1500s.
This crazy scary moment, when Phil got nailed with Dispel - Vacuum Wave - Flare between turns and left perched under 200 HP! Cure 3 to the rescue! Looks like we needed every one of those extra levels!
Now the back part is down to 6000 HP. Exdeath's two parts just cast Dispel - Dispel, removing my buffs, but it's time for a sprint to the finish. Lenna has just enough juice to put one more Holy into that back part, and Krile kept just enough magic for that one last Firaga to kill both parts.
Except that Lenna's Holy killed the back part! I must have missed recording a hit somewhere! Well, now it's Phil's turn... and he MISSED the front part! I was ready to start screaming at the Meteors (though there was a fair chance for at least one warrior to get missed and survive), but Exdeath didn't cast them.

Krile's turn and put that tank on 0 MP for the victory!
Afterthoughts: I loved this variant. It really did work to recapture the oldschool feel of Final Fantasy 1, and hit the perfect sweet spot on challenge level. Many fights needed preparation and thought and refinement, but not tens of hours or hundreds of attempts (once we added the Ribbons for Neo Exdeath.) And we needed just the right amount of level grinding.
I'm also starting to understand Sullla's satisfaction with running job-limited variants (solos). The job system does have lots of powerful combos. But once you've seen them in action, they're the same every time. X-Fight-Spellblade-Dual Wield will always be the king of weapon attacks and Dualcast-Quick-Dualcast-Dualcast-five Meteors will always be queen of magic. I did indeed find the game more interesting in trying to get the most out of a limited set of options.
Now for a few words on party composition. I was surprised at how weak the fighter was without Double Grip until he picked up the Brave Blade, which made him competitive but still underpowered compared to FF1. In FF1, the fighter is so easy mostly because of his great absorb armor and HP total. In FF5, status ailments and instant kills dominate the threat department; sheer physical damage not so much especially with Armor spells. In hindsight, I believe a Monk would have done better.
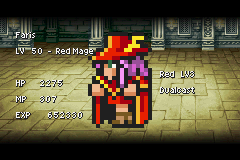
And the Red Mage did become a liability in the end game. By the third world, her role was entirely reduced to a poor man's White mage. All she ever did was cast Armor and Cure 2. She did shine in world one and played key roles in fights like Atomos. But I think every fight could have been won without her. (We'd have to use a non-Galuf character as the BM to handle the Purobolos fight.)
The White Mage however is one hundred percent essential. Neo Exdeath was not remotely possible without Shell and Cure 3; and on offense with Holy she is even better than the Black Mage (same damage as Flare for half the MP.)
The Black Mage was about ninety-five percent essential. She provided almost all the offense in the entire second half of world 2 (conspicuously the first Exdeath fight) when the fighter is still hurting for a good weapon and the WM doesn't have Holy. And of course she could singlehandedly beat most anything with an elemental weakness. And the BM is almost the only way to solve Omniscient; without one you'd have to go the tedious Mute+physical route. But in the end game, the better MP efficiency of Holy and much greater versatility makes the White Mage superior to the BM.
If I were to try this variant again, I think I'd go Monk - White Mage - White Mage - Black Mage. I feel this party would be significantly stronger, with the Monk dealing more damage than the fighter at most stages, and double Armor/Shell/Cure/Holy backing him up. Another option is Monk-Monk-WM-BM (you can get extra Kaiser Knuckles from a random enemy in Istory Falls), trying to win through better offense instead. Or even Monk-Monk-WM-WM, which would have tons of survivability to plow through just about any fight (albeit with a couple serious road blocks in Purobolos and Omniscient.)
That's all for now; this report is way too long already. ![]()