So, now how to set up Faris for the final battle? All of these are competing for space:
- White magic, for raising and curing and healing the Grand Cross status effects
- Blue magic, Mighty Guard
- Time magic, Haste/Slow
- Summon magic, Golem and Carbuncle
- Steal, if I want a Ragnarok to play with (ok, that's silly)
- Mix, for pretty much everything
Of them, Mix was the highest priority. It does pretty much everything under the sun, including almost simulating an Item command. (Importantly, it provides access to an Elixir effect to restore MP.) And I planned to use the Tree part of the battle to raise everybody's levels via mixes.
White magic also seems indispensable. Nothing compares with Cure 3 for damage restoration, not even mixes that can hit only one ally at a time.
And believe it or not, everything else is expendable. Mighty Guard is convenient, but the effects can be cast by both white and mix magic. So can Haste. Golem might be nice, but I actually never trained Faris as a summoner, so she doesn't have the ability for it.
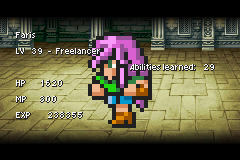
So actually, I had Faris be a Bare instead of a Mime. Two abilities is enough, plus this gives her access to free healing via Heal Staff (the Mime doesn't have a fight command), and a Ribbon. Once again, let's run down the list of essential mixes:
Turtle Shell + Eyedrop = Haste
Holy Water + Antidote = Level+10 (Samson Power)
Turtle Shell + Antidote = Halve Defense of target (Split Shell)
Phoenix Down + Dragon Fang = Shell and Protect
Dragon Fang + Potion = Level+20 (limited by supply of Dragon Fangs)
Holy Water + Phoenix Down = Life Shield (immune to death status, meaning Grand Cross)
Dragon Fang + Maiden's Kiss = Dragon's Kiss (Heavy flag)
Elixir + Dragon Fang = Double Max HP
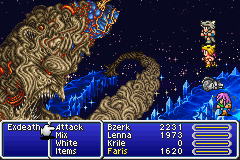
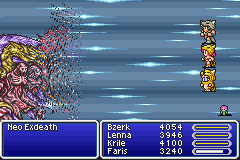
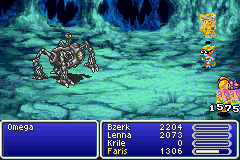
White Hole hit Krile, but Faris had plenty of time to cast all her mixes. Soon all four characters boasted an insane array of buffs. Shell and Protect, Haste, extra levels, and double HP. Also I once used an Elixir ON EXDEATH, to give me more time for buffing before Neo Exdeath!
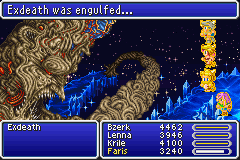
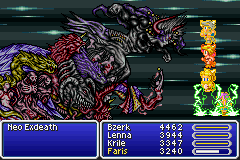
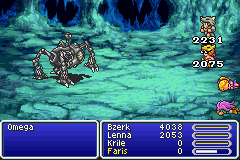
Look at those monster HP totals. The Neo Exdeath part of the battle began... and he hit Faris with Dispel, taking out some of the buffs (Haste, Shell, Protect.) She reapplied the latter two with white magic, several times through the battle.
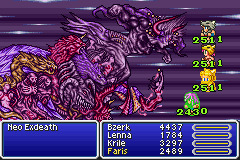
Now, this party doesn't get to use Odin to vaporize one part instantly. (Faris cannot inflict Dead status on enemies.) So we have to take on all four parts. This included Grand Cross, but the Mix buffs prevented all the worst statuses, and I got off lightly.
Grand Cross #1: Toad on Bartz, Mini on Lenna, no other effect.
Grand Cross #2: Sleep on Bartz, Toad on Lenna, Condemn (ticking death clock) on Krile.
Grand Cross #3: Zombie on Lenna, Darkness on Krile, Mini on Faris.
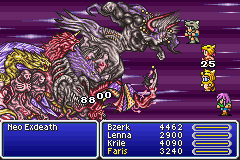
But the whole time, superbuffed Bartz was dishing out 8800 damage per turn with the Chicken Knife. (This did not go up with a couple more level-increasing mixes. I think the GBA version truly caps level at 99, unlike how mixes can go to 255 in the SNES version. Too bad, I wanted him to score a 9999.) That was plenty of damage, taking out three pieces of Neo Exdeath.
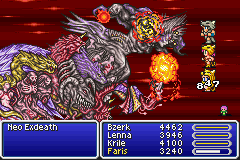
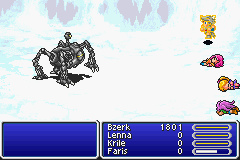
Here come the meteors. But everybody is Shelled with gargantuan HP, and that is really no threat.
Victory.
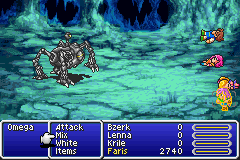
Oh but of course I'm going for Omega and Shinryuu. Let's shamelessly crib from Newton the Chemist, detailing Omega's attacks and our answers.
Atomic Ray/Emission: Fire element direct-damage attacks. Resist Fire mix or Flame Ring.
Rainbow Wind: Inflicts Mute and Darkness status. Mute is irrelevant vs berserkers and Mix, and Darkness is easily fixed.
Blaster: Instant-death attack. Countered by Dragon's Kiss mix.
Maelstrom: A Weak attack that drops HP to less than 10. Countered by Dragon's Kiss.
Quake: Countered by Float status, cast before the battle.
Rocket Punch: Countered by Dragon's Kiss.
Mustard Bomb: A non-elemental direct damage attack, 3000/1500 damage without or with Shell status. This is Omega's most dangerous attack against this party, but it only appears as a counterattack when he gets hit.
Circle/Encircle: Another instant death attack, blocked by Dragon's Kiss.
Surge Beam/Wave Cannon: Deals damage equal to 50% of Max HP, cannot be dodged or avoided. The only answer is healing items.
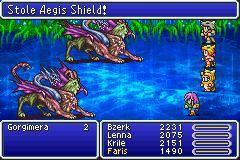
Delta Attack: Petrification attack. An Aegis Shield can block this, but I only have two of them. That was just a temporary problem, though.
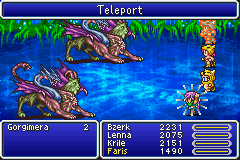
Yes, you can steal Aegis Shields from an enemy in the Void. I set up to get a guaranteed steal with zero danger. Faris equipped the Masamune to always go first, Time Magic, and Steal. So each fight, she could cast Quick, try to steal, then simply cast Reset if the steal failed (reversing the MP spent on Quick!) And when the steal eventually succeeded, just Teleport/Exit out of battle.
So for Omega, Faris gets the Mix and White abilities, of course. Equip a Masamune (easy Haste without mixing), Aegis Shield, Ribbon, Rainbow Dress (protects against Confuse!), Flame Ring. I had the cash thanks to the Gil Turtle side quest back in world two.
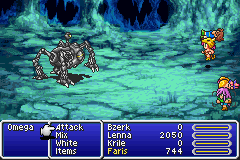
Very shortly into the battle, Omega cast Maelstrom on characters that already had HP Leak inflicted! Well, Faris will have to concentrate on buffing herself first, then one berserker at a time.
So, on herself Faris laid down Haste (via Masamune), Dragon's Kiss, Life Shield, Dragon Armor, three Samson Powers, Giant Drink, and Life Water (Regen), interspersing lots of healing via X-Potion whenever she took damage. BTW, I discovered that Blaster does NOT get countered by Dragon's Kiss. It does by Life Shield (Phoenix Down + Holy Water.)
Eventually Faris had time to raise Bartz the berserker and start pumping him with the same buffs, plus a Resist Fire (Faris had a Flame Ring.) Bartz died again to Blaster before Life Shield landed, then got revived again. Eventually Faris got down all those same mixes on Bartz.

But I had a problem. Bartz was doing 0 damage to Omega! 127 attack with the Chicken Knife should be boosted to exactly 190 with the Berserker attack bonus. Omega's physical defense is also 190. So it seems to be all but impossible to beat that defense and actually deal straight physical damage to Omega. (Bolt-3 and Spellblade Bolt-3, the usual answers, set defense to 0 on a target with lightning weakness.)
But of course, the Chemist has an answer to everything. As we know, the Turtle Soup (Split Shell) mix halves a target's defense. And the critical bit here is that it always hits - it is NOT SUBJECT TO MAGIC EVADE. Three Split Shells later...
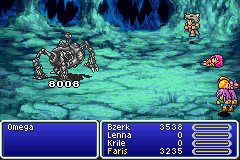
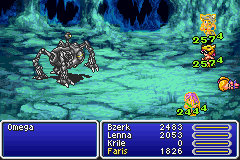
Bam, Bartz is dealing 8000 damage. Now Faris revived Lenna too and started buffing her up to max, throwing in monster healing when needed. But then...
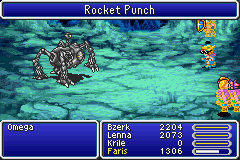
FARIS DOWN! FARIS DOWN! FARIS DOWN! She had been at max HP. Omega launched a Wave Cannon (half of max HP in damage), then Bartz landed a hit with the Chicken Knife, and Omega responded with a fatal Mustard Bomb at Faris. Nuts nuts nuts. There was nothing I could have done about that. Wave Cannon always hits for half of max HP no matter what, and there's nothing to do against Mustard Bomb besides Shell status which she had.
Time to pray for a miracle. Can Bartz manage about two more hits? The fatal combo here would be two Wave Cannons in a row, without an Atomic Ray between to heal him, or enough time for his Regen to kick in.
There's one Wave Cannon, uh oh.

Bartz swings and connects for 9350 damage...
and Omega blows up! VICTORY!
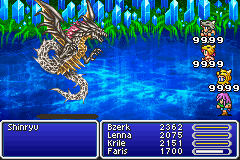
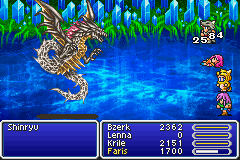
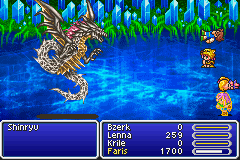
Now for Shinryuu, and I'm going to try an extra challenge here. Going to do this WITHOUT MIX. (Omega was not possible without Mix. Mixing Dragon's Kiss is the only answer to Encircle in the entire game. And besides Turtle Soup, the only other way to chop his 190 defense is the Blue spell Guard-Off, which will never hit between the level-based hit formula and Omega's 95% magic evade.)
But Shinryuu is just about trivially easy with Mix. Seriously, all we have to do is let Tidal Wave kill the three Berserkers, then do whatever Newton the Chemist did. All the elemental and instant death attacks can be countered by mixes. And as a bonus, our Faris can even equip an Aegis Shield to cover up Newton's one weak point in the stoning Delta Attack attack. Then revive a Berserker and apply all the same mixes to him, just like we did to Omega. So let's try it without Mixing.
A difficulty here is that you can actually run from Shinryuu, so the Chicken Knife cannot be used. The Assassin Dagger was the best available substitute. The other two berserker weapons were the Thor Hammer (usefully Back Row OK) and the Rune Axe.
The Nudists did this battle by grinding until their HP totals exceeded 4000, at level 49. That would take many more levels for this group, without the Monk job's both higher base HP and HP +30% ability. I want to do this here without level grinding as well.
That means Shinryuu's Snowstorm attack is a critical problem. It deals enormous damage, 2750 even with Shell status, enough to one-hit anybody on this team. So the only solution is to gain some elemental immunity to it. There are two such items: Ice Shields or Flame Rings. Unfortunately, the Ice Shield is not an option, as Aegis Shields are mandatory as the only way to block the Demon's Eye stoning attack.
That means I must equip Flame Rings, which also conveniently absorb Atomic Ray. But that means no Coral Ring, so Tidal Wave is going to kill me. Or is it? I think we already have the answer, actually...
Yes! The Aegis Shield can block Tidal Wave! So it's just a matter of retrying until it misses Faris. To complete the equipment setup, the berserkers each equipped Diamond Helms for resistance to Shinryuu's lightning-element Thunder attack. Once again, let's blatantly steal from Newton's list of superboss attacks.
Tidal Wave: Only used at the start of the fight, so retry until the Aegis Shield blocks it.
Fight: Armor status and healing.
Maelstrom: Drops HP to critical. Without mixing, the only answer is healing, plus the Aegis Shield has a chance of making it miss.
Roulette: Instant death. Ribbon will protect Faris, but the berserkers are vulnerable.
Snowstorm: Immune by Flame Ring.
Atomic Ray: Absorb by Flame Ring.
Thunder: Low lightning element damage, 1/4 of max HP, neutralized to 1/8 by Diamond Helm.
Level 2 Old: Have an odd level.
Level 3 Flare: Have a level not divisible by 3.
Poison Breath: Low poison-element damage, around 400 and not threatening.
Demon's Eye/Evil Eye: Stone status, defendable by Aegis Shield.
The abilities to equip on Faris were obvious. She has to be a Bare not Mimic, since she needs a Ribbon, and the Items command, to restore magic via Elixir. White is also indispensable. And Time, so that's all there is to that.
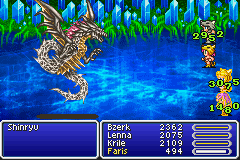
So let the battle begin, after a few tries to get the Aegis Shield to block Tidal Wave. Faris now buffed herself with Haste, Protect, Shell, Regen (two buffs per turn by using Quick), then started reviving berserkers. They kept getting killed again very quickly, though.
Eventually I worked out the secret. Don't try to buff the berserkers.
The zerks in the front row would get killed by a single hit from Shinryuu, regardless of their current HP total or Armor status or any other buffs. So a single Fight or Roulette could wipe out five or six turns worth of raising and healing and buffing. Rather, the best approach was to just let them die and Phoenix Down them back to life. They were all immune to all of Shinryuu's big elemental spells via equipped items, so often they would get several hits in before getting killed again.
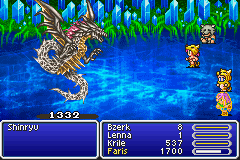
Put another way, nothing ever did an amount of damage between 500 and death. Rather, the key for Faris was simply to keep as many berserkers as possible on their feet just to serve as alternative targets. Whenever more than one was dead, she would go Quick - Phoenix Down - Phoenix Down in one turn.
 And Shinryuu would do the healing for me half the time too, with Atomic Ray.
Now, Faris with buffs cannot be killed immediately. She is immune via equipment to all the big attacks, Atomic Ray and Snowstorm and Roulette and Demon's Eye. The small attacks (Thunder and Poison Breath) are just 400 damage and can be healed away. And her 1700 HP is enough to survive a 1400 damage physical hit by virtue of back row and Armor status. So Faris could only be killed by a two-hit combo, either Fight - Fight or Maelstrom and something else. And the Aegis Shield provided 33% evasion against both of those. So the chances were pretty low of Shinryuu pulling a perfect combination of moves, and Faris could stay alive almost indefinitely.
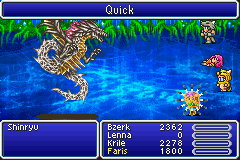
Meanwhile, the Berserkers dished out damage on autopilot. Quick saw a lot of use for extra actions. One trick was to go Quick - spell - Elixir when magic ran low to restore it essentially for free while still taking another action this turn. Often that action was to cast Dispel against Shinryuu's Mighty Guard when possible.
With Newton, Sullla complained that Shinryuu gets two actions in a row as part of his AI script. But there is a loophole there in the player's favor. The results of the first action are NOT processed before the second action. If the first action would kill somebody, he doesn't die until after the second action is finished. Shinryuu would often waste the second action entirely by Fighting somebody who had already taken lethal damage or a Roulette.
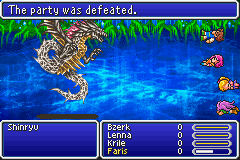
We dealt somewhere around 30,000 damage to Shinryuu... then lost the battle because I ran out of Phoenix Downs. Faris resorted to the Raise spell for a while, but then I also ran out of Elixirs to recover magic, having only about 10 left after mixing a bunch in the Omega fight. Ethers could not keep up, and eventually Faris ate a Fight - Fight combination as the only warrior standing. (Later I read that the Sage Staff item casts Raise when used in battle - that could have given me the win.)
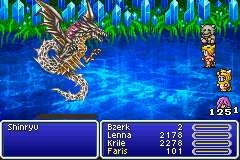
So I exited the Cleft to refresh that item supply. On the way back in, some fighting took Krile and Faris from level 40 to 41, to dodge L2 Old which had been a minor thorn.
Also I thought of a couple more adjustments. Faris should wield the Chicken Knife as a weapon, just for the +5 Agility. And she should use the Blink/Image spell, which makes the next two physical attacks miss her and significantly cut down on the chances of a one-two punch killing her.
I lost one other attempt (besides the Tidal Wave auto-retries) when Faris did eat a Maelstrom/Fight combo.
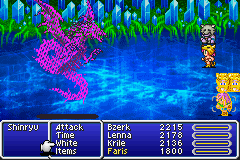
But on my next try, everything worked. Faris stayed alive, constantly resurrected Berserkers, and we won! Here is an emulator movie (actually of a second run at the battle). Enjoy!
There you go. Shinryuu beaten with three berserkers in the party, at a normal ungrinded level of 41, and no Mix.
Index