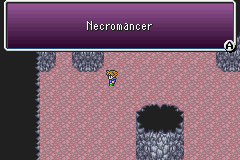
And now back to Enuo. I decided to give this a full effort to win as a true solo Necromancer rather than resort to the Bare job.
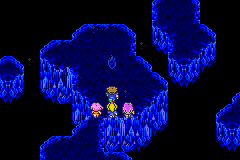
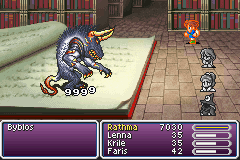
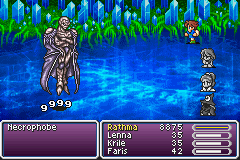
Looks an awful lot like Neo Exdeath, doesn't it? Plays the same music too. Except he appears from the bottom instead of the side, what clever design there. ![]()
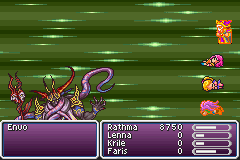
Like Neo Exdeath, Enuo has additional parts. There are two monsters named "Enuo L Hand" and "Enuo R Hand" in the GBA algorithms guide. They are always untargetable and invulnerable, but cast a variety of spells. Enuo L Hand casts Grand Cross and Giga Flare. Giga Flare could be withstood with Rathma's absurd HP total, and as usual nothing could be done about Grand Cross except hope it would roll something harmless. Enuo R Hand casts quite a variety of spells, simplified to this:
{Protect,Regen,Nothing}
{Poison,Osmose,Nothing}
{Haste,Shell,Nothing}
{Graviga,Slowga,Nothing}
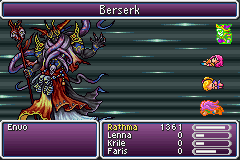
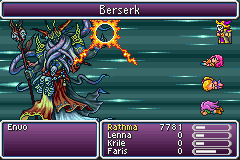
{Berserk,Pond's Chorus,Nothing}
{Evil Eye,White Hole,Nothing}
Those last two lines were killer. Berserk, Evil Eye (Demon's Eye), and White Hole would all end the fight immediately.
But Rathma couldn't overcome even just Enuo himself. Here's what he does:
{Firaga,Blizzaga,Thundaga}
{Aeroga,Aqua Breath,Bio}
{Flare,Holy,Meteor}
{Drain Touch,Deep Freeze,Meltdown}
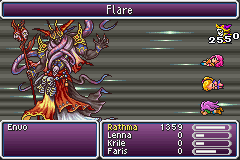
Nothing scary in the status department, just damage spells of different flavors. But they all dealt very large amounts of damage, many over 2500. The undead Necromancer could not outheal that. Drain Touch would barely keep up for a while, but not once Enuo got Haste and Shell status from his hands. (Shell halves the damage inflicted by Drain Touch and thus its healing.)
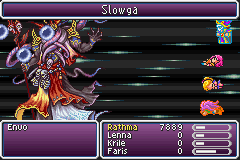
I tried a Reflect Ring which would bounce much of the nasty stuff including Berserk and Slow, but the critical failure there was blocking Shell from the Wonder Rod. And of course that lost the Running Shoes. The Reflect Ring would not bounce Meteor or the Dark Art spells from Enuo's last line, which again would outrace Rathma's Drain Touch and kill him.
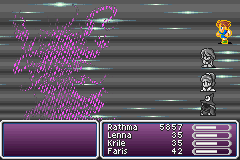
Here was the answer: wear the Running Shoes as usual, set up the Wonder Rod for Shell, and the Magic Lamp for CARBUNKLE. Then during the battle, spend as much time as possible in Reflect status, by using Carbunkle first then cycling the Wonder Rod up to Reflect. A couple tries later, Rathma got a lucky run where Enuo never cast Shell and Drain Touch was always able to keep up in healing:
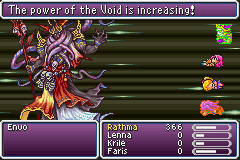
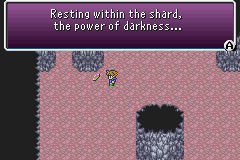
and that worked! "The power of the Void is increasing!" means that Enuo's first form has died.
First form? Yeah, first form. Here's what the second and truly final form does, condensed for readability:
No Interrupt{
     {Dimension Zero,Meteor,Almagest}
     {Dimension Zero,White Hole,Maelstrom}
     }
{Flare,Holy,Delta Attack}
{Almagest,Almagest,Grand Cross}
{Drain Touch,Deep Freeze,Meltdown}
{L3 Flare,L4 Graviga,L5 Death}
Dimension Zero

Counter(HP Damage){
     alternates between {White Hole,Dance Macabre,Nothing}
     or {Reaper's Sword,Hurricane,Nothing}
     }
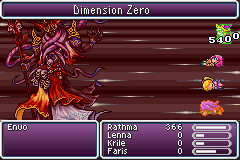
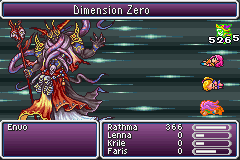
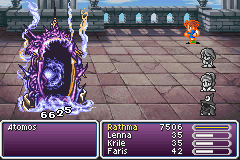
"Dimension Zero" is a specialty physical move, which dealt 5500 damage. (Would be 9999 in the front row!) ![]() No possible way Drain Touch could outheal that, or Meteor or Maelstrom or Hurricane. Man, this guy packs pretty much everything that a solo necromancer fears, and throw White Hole on top of that.
No possible way Drain Touch could outheal that, or Meteor or Maelstrom or Hurricane. Man, this guy packs pretty much everything that a solo necromancer fears, and throw White Hole on top of that.
So I went ahead and reverted Rathma to the Bare job for its access to defensive equipment and elixirs. I also had to raise him from level 90 to 91 to dodge those Level X blue spells, and get the other warriors Stoned instead of dead to avoid zombies from Dance Macabre.
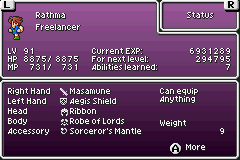
Here's his equipment setup. Masamune is for Haste, and he would also pick up Armor and Shell from the Defender sword and Wonder Rod as usual. Enuo never dispels that haste, so the Running Shoes aren't necessary and the accessory slot opens up. Sorceror's Mantle gives resistance to all elements, plus 10% physical evade and 20% magic evade, a fine choice. And that Robe of Lords provides a hefty 24% magic evade, also part of the package to stop some of the nasty stuff (mostly Hurricane and Maelstrom.) Finally, he could swap in a Judgment Staff item to cast Dispel on Enuo's own buffs.
With this setup, try one died to a Hurricane-Almagest combo.
Try two lost to Condemn from Grand Cross.
Try three lost to Confuse from Grand Cross, somehow missed any immunity to that in the equipment package.
Try four lost to Sleep from Grand Cross, again no immunity, and the Enuo first form never attacks physically to break out of it.
Try five lost to a Graviga - Meteor combo to slice Rathma's health then kill him.
But try six got all the way through. The second form of Enuo gets Shell status permanently, so it took 19 hits of Dark Art spells at just over 3000 damage to beat his 60,000 HP. Rathma dodged four Grand Crosses through the whole battle, three with no result and one dealing Weak. The final count was about twelve Elixirs. The scariest moment was one hit from the end when Enuo pulled out his Hurricane response to damage, but the Aegis Shield blocked it! One more hit and the final ultimate boss was history.
There is still a little bit more to do, an area called the Cloister of the Dead. This is a boss rush mode, where you fight 30 of the game's bosses over again, in groups of five. Rathma as a Necromancer couldn't do this, the problem being that you don't get any chance to use items or heal between fights, only between groups. He couldn't heal himself enough during the boss fights to keep up with incoming damage. Drain Touch wasn't so strong anymore, recovering only 1500 to 2000 health into Rathma's total of 8800.
But Rathma as a Bare did fine, with the same equipment setup as for Enuo and access to Elixirs. Masamune provided Haste every fight and the Defender gave Armor status, although there was no opportunity to cycle the Wonder Rod for Shell for each boss.

Most of the bosses weren't worth any remarks. They mostly just use their original moves and AI routines, sometimes upgraded to stronger versions like Fire 3 or something, but even that was small damage now. And they are goosed to several tens of thousands of hit points each, but that means nothing against 9999 elemental spells.
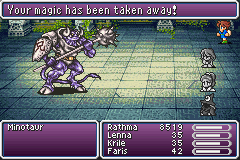
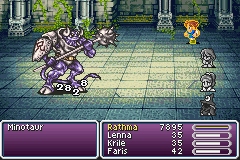
The Minotaur fight again blocks magic including Dark Arts, so Rathma killed him physically with swings from that Ultima Weapon sword (attack 180) won from Neo Shinryuu.
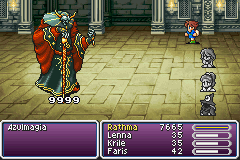
The first moment of any danger came about twenty fights in, against Apocalypse. He led with Condemn, and Rathma responded with a Wonder Rod item use to reset the battle. He did the same against Dark Shock a couple times until Apoc didn't do anything nasty. Evil Mist dealt 9999 into his poison weakness and Rathma won.
Rathma continued to carve through 29 bosses on the very first try. Halicarnassus and Twin Tania tried their usual Holy and Giga Flare spells, but Rathma simply survived the 3k to 4k damage from each. Archeodemon from the bonus dungeon showed up again, but I remembered how to work around his lethal ???? counterattack by waiting for the "Powering up for Gigaflare" openings.
But on the 30th and final boss:
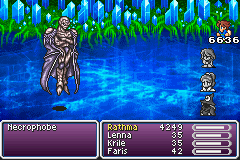
Necrofobia pulled 6000 damage out of nowhere to pancake our hero. What gives? According to the algorithms guide, it seems to be a "Strong Fight" move. I had saved Golem from the Magic Lamp for this fight, but somehow Golem didn't pick up that attack.
While(HP<30000){
     No Interrupt{
          {Vacuum Wave,Firaga,Thundaga}
          {Vacuum Wave,Blizzaga,(Strong)Attack}
          }
     }
Counter(HP<30000)
     Flare
     }
Well, it was still beatable with careful execution. As long as Rathma was at max HP every time it could come, he'd survive. Necrofobia can use that attack every round once he's under 30k HP. But fortunately hasted Rathma was faster and able to get a double turn. So on every turn, I waited until just after Necro acted. If he used Strong Attack, I used an Elixir and waited to try again. Until he used the weaker spells, in which case Rathma could slip in a spell for 9999 damage, eat the Flare counterattack, then get the turn again for an Elixir before Necro could act. It took only three cycles of that for the 9999 elemental spells to finish him off. (Full disclosure, I reloaded from a save state before the Necro fight rather than spend an hour fighting through the previous 29 bosses again.)
And at long last, that wraps up the adventure of Rathma the Necromancer, and our trip through the Final Fantasy V Advance bonus content. Rathma as a pure Necromancer reached the penultimate boss of the bonus dungeon, and then as a Bare-Necromancer went all the way including all the superbosses except Omega Mk.II. So I've proven that a solo character can indeed beat everything here, and even with the abilities of just one job.
The bonus content was decent on the whole. It actually felt a lot like an expansion pack, adding content into the base game's mechanics. The bonus dungeon is extremely long and largely uninteresting; it's obviously intended to force you to use the Oracle job for its Read Ahead ability. The fetch quests make no sense at all and just serve to force you to backtrack and spend more time fighting the same random encounters. Between that and the absurd experience rewards, this is obviously entirely targeted at the max-out grinder players. Rathma hit level 91, and that was after running/teleporting away from many fights. But the action definitely picked up at the end with some interesting bosses. I don't think I'll make it a standard part of any more playthroughs, though.
Thanks for reading, once again. I think I'm done with solo variants for now, but there is one four-character variant in mind that will cover certain ground Sullla missed in his solo class adventures. It may appear here sometime.
For comments and discussion, see the Realms Beyond thread here.