
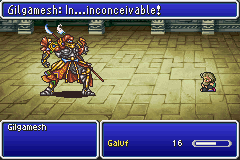
World Two begins with the rest of the party imprisoned while Galuf has to fight solo for a little while, including a fight against Gilgamesh. He was a Time Mage with the monk's Barehanded ability, which combined fairly well. He would Haste himself and then start beating monsters, resorting to Comet for big damage when needed. He's close to dead there, but I'd been roughly tracking Gilgy's HP and knew Galuf would win.
Party configuration for the Big Bridge was once again four Monks, but now I've spent enough time as some of the other jobs to have a little versatility. In the second ability slot, Butts has !Blue, Lenna has !White level 4, Galuf has !Time level 2 (enough for Haste), and Faris has Vigilance.
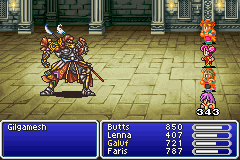
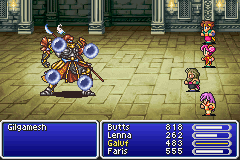
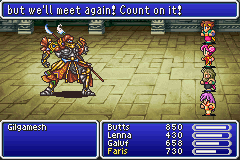
This handled Gilgamesh easily enough. Four Hasted monks versus a Slowed Gilgamesh (applied again after his AI script that Hastes himself) means I get 16 attacks to every one of Gilgy's. No suspense in who's going to win that one, even without any items. Sullla is right that speed is the killer stat of this game.
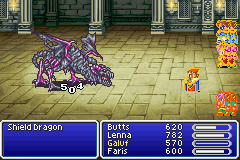
The next episode was comic but spectacular. I wandered into Sealed Castle, not really remembering what was there. A Shield Dragon appeared of course, and I managed to run, reaching the top floor for a glimpse of the weapons. On the way out, I encountered another. The game would just not let me run. Several times, the party took a few hits so I had my !Time character cast Return (Reset), but still no running. The Teleport spell to escape the battle didn't cross my mind.
So while trying to run, I had the characters start casting up some buffs just for the heck of it. As usual, get everybody Hasted, Protected, Shelled, and Regenned. Then add the White Magic spell Blink (Image), which forces the next two physical attacks against that target to miss, like the Mirage Vest. Slowly it dawned on me that I could lock out Shield Dragon from hitting me at all! With Haste, the White Mage could cast Blinks faster than Shield Dragon could knock them off.
That left the question of how to damage HIM. Shield Dragon is permanently in Wall status, which rules out most magic. And he responds to physical attacks with physical attacks, so I couldn't do that as he'd outrace my re-Blinking. I discovered that the Blue spell Aqua Breath (AquaRake) worked for about 200 damage, but 37 MP per use was way prohibitive to deal the 10,000 damage required. So enter everybody's favorite Wall-piercing spell, Comet!
Bam! Comet's damage output was wildly variable, dealing anywhere from 100 to 600 per cast. But all I had to do was hold out long enough and I could win! Butts and Faris could not chip in any damage or White buffs, but what they could do was feed potions and Ethers to the two spellcasters.
Shield Dragon does have one more attack, Zombie Breath. It damages the entire party for about 200 each with a chance to inflict Zombie status. Fortunately, I'd bought a supply of Holy Water at the previous town. Zombie Breath came four times during the fight, twice missing on inflicting any zombies, and hitting Lenna once and Faris once. But Butts fed them holy water to fix that. And about 30 Comets and 30 minutes later...
BAM!
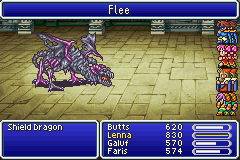
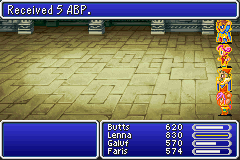
Those were the hardest 5 ABP I ever earned, but damn right I earned them! (Shield Dragon casts Flee when its HP gets low enough; I beat it, it didn't randomly run.) This fight wasn't even worth any XP though - what a ripoff! I think my characters learned plenty from this fight!
Actually, I think the biggest danger during this fight was to accidentally have the Time Mage cast Reset, which is just one space below Comet in the menu. ![]()
BTW, I love the "Rewind" function of the VisualBoyAdvance emulator. The emulator is basically constantly saving state as you play, and this function can be invoked anytime to back up about 5 seconds. I haven't used it for cheating, but it's perfect for grabbing screenshots that you otherwise just missed, like when Shield Dragon used Flee.
Tyrannosaurus in the Moogle river gave me a bit of trouble, because I'd spent the party's MP on healing in the dungeon, and I'd gone in without any way to deal fire damage. A couple times I Reset the fight after taking damage, before figuring out not to use physical attacks. Instead, the party parked in the back row with Protect and Haste buffs as usual. Butts landed a Blue Magic Flash which drastically cut the danger, and Comet did most of the damage.
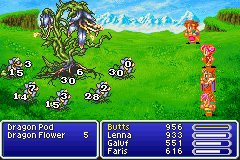
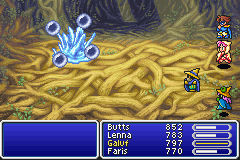
 Hiryuu Plant ("Dragon Pod" in this version) was a perfect fight. The Monks could always Kick out all the flowers at the same time. My party never got attacked.
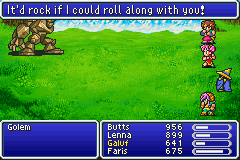
No Bone Mail here for this party, but they did get a useful pickup in the Golem summon.
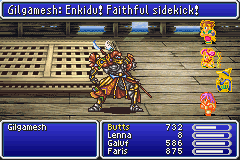
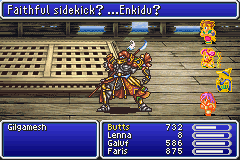
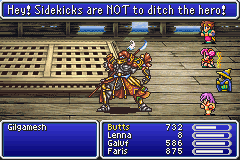
Next boss up was Gilgamesh on the ship, with Enkidu this time. All it took was the usual Hastes and Protects and my party had an overwhelming advantage. Three Monks and one mage casting Bio did the damage. (Frequently Faris was actually classed as a Thief for the miscellaneous abilities in a dungeon, with Barehanded/Brawl equipped to fight like a monk. I've been referring to her as a monk in such a situation for brevity. The only difference is max HP and lacking the innate Counter.)
The Barrier Tower was where relying on Monks for offense started to slip. They could still deal 250 x 2 damage to most enemies, but that was starting to seem small against enemies with the likes of 2400 HP. Also, the Red Dragons guarding the chests gave me some trouble. Eventually my strategy against them was to Shell and Protect the Time Mage first, then Reset if the dragon ever cast Atomic Ray (600+ damage to all characters), and eventually I'd have a fight where the dragon didn't and the monks could wear down the 7500 HP.
Atomos, though, was plenty easy. I came in with three monks and a Time/Black mage.
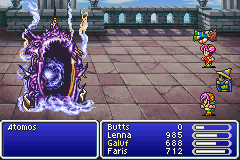
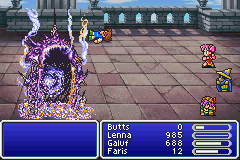
He knocked out Bartz with the hail of Comets. Galuf hasted up the remaining three, who went to town with fists and Bio (the heaviest spell he had), and they worked through the 20,000 HP even before Bartz's body reached the boss. (I knew of the Dark Shock + L5 Death answer, but wanted to try a legit fight.)

And after Barrier Tower comes a very important breakpoint where magely power shoots through the roof. With the submarine, the town of Mua is accessible to buy the level-5 spells, Fire/Ice/Bolt 3, Cure 3, and Haste 2. (Firaga, Blizzaga, Thundaga, Curaga, Hastega in this translation, and the town is Moore.) So it's the perfect time to go wizardly, with Black Mages at the peak of their powers now.
I now felt like I was in a bit of a rut on jobs, just using the same mage abilities over and over, but those really were the right answers. All the melee oriented jobs besides Monk are useless without items: Knight, Mystic Knight, Dragoon, Ninja, Archer/Ranger, even Dancer, and I've put Samurai with GilToss off limits. Black magic is now my best damage route until we get some of the high-level summons. White and Time supply the critical buffs, and Blue magic as always is a combo platter of options. Butts and Lenna still have Barehanded equipped so I can still do physical fighting too if desired.
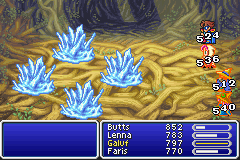
Against the Crystals in the Forest... Sullla knows what crystal is which and what they do. I don't. My first approach was to cast max Firagas from the two Black Mages, letting the fire crystal stay at max HP while trying to kill the others. This didn't work: the earth crystal cast Earth Shaker and the wind crystal cast Aeroga right at the same time, wiping the party.
Second try, I still hadn't really figured out the elements. It seems that all but the fire crystal take normal damage from fire, but no other element works on any other crystal? Anyway, I now planned by focusing Firaga on one crystal at a time, also tossing in some 1000 Needles (Blowfish). That worked to kill three crystals, which never did anything dangerous. Then I started on the fire crystal with melee attacks and Comet. Then the crystal cast Firaga and leveled my party.
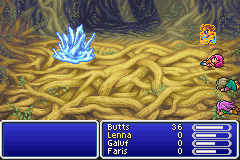
(Butts made a valiant attempt at one last attack with a sliver of life, but the crystal killed him next turn.)
Then I looked up what was going on. The crystals start with 7777 HP, and when any goes below 3000, casts a high-damage spell of its element at the party. So it was actually luck that I avoided that on the first three, but probability caught up to me on the fourth.
I experimented a bit more, using Reset a few times. I eventually figured out that I had to go with the full monty of buffs. Had to take the time to let the white mage cast Protect and Shell on everybody, the time mage cast Haste2 and Regen and Float on everybody, and the blue mage Flash a few times. (Flash is a bit annoying in that you never know if it has worked. There's no visible indication for Dark status on a monster.) This brought the crystals to a standstill: most of their regular attacks would miss thanks to Flash, and the few that hit were for about 80 damage that Regen healing wiped out in two rounds.
This approach reminds me very much of our Berserkers variant in FF1, to which it is remarkably similar. Tough battles consist of compensating for armorlessness by setting up the best available defensive buffs. Then you can go on the attack.
So I did. Now I used Firagas to bring the lower three crystals to just above 3000 HP. Then I killed each crystal one at a time, making the characters wait until their action bars all lined up and then launch Firaga, Firaga, 1000 Needles all together.
That worked, leaving just the Fire crystal again, and the party at full health with all buffs intact. The Fire crystal would be harder, since Firaga's 1500 damage in one turn couldn't be used. The best attacks I had were Comet, 1000 Needles, and a physical attack from Lenna (a white mage with Barehanded.) I also waited until the Time Mage landed a Slow on the fire crystal to help my chances.
Once again, bring it to just over 3000 HP, wait for the action bars to line up, wait for the crystal to take an action. I hoped I could get two attacks from each character before the Slowed crystal got a turn... and did.
(Full disclosure: This is minor cheating, but I didn't reload from the save point after the party wipes. I used the emulator's Rewind function to go back several seconds, just far enough to give the Time Mage a turn to cast Reset. I did this because this boss fight is a fair distance from the save point, and I'd won quite a number of random fights before. If I'd known/remembered that, I would have played it straight and just ran from the random battles. But the crystal boss battle itself was 100% legit, I didn't save-state or manipulate luck or anything. The whole sequence took me over an hour real time and I really didn't want to take even longer. The decision worked against me in game terms, since I didn't make a pass at optimizing jobs for the boss. Some Golem would have been really nice, among other possibilities.)
(Then once again, I figured out the easy solution afterwards. White magic Reflect (Wall) means that the scary elemental spells can't hit me.)
Exdeath's Castle gave me some problems with random encounters - they do hit hard when you're not wearing armor. I kept running out of MP, then realized I had to stop using magic for curing, needing the juice to deal damage in battle instead. I bailed out halfway through in order to go buy a stock of 50 Hi-Potions.
Exdeath's Castle, though, is the first place in the game where encounters start to pay out any decent amount of ABP. Each random battle here gives 4 to 8. Presently all the mages learned their professions up to level 5, when I cut back over to a more Monk-oriented party. I assigned three real Monks now, all with a different secondary ability in !Blue, !Time, and !Black. The fourth character (Lenna) was now a Summoner with !White. In this way I covered all five schools of magic while still bringing solid HP and physical capability to the battlefield. Also I finally picked up L2 Old and L3 Flare here.
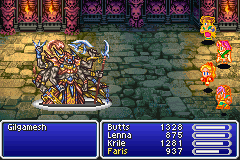
This setup handled the next Gilgamesh with astonishing ease. The only buffs needed were Haste 2 and Slow on the enemy, refreshed after Gilgamesh transformed. Golem locked out any physical damage, and the monks just beat and beat and beat and beat on him until he gave up. It does seem that playing without items is less difficult a handicap than we might have thought. There are plenty of answers to everything among the job skills, and just Haste is a massively strong buff.
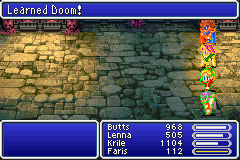
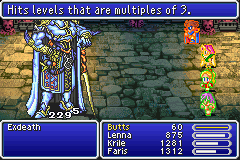
And now for Exdeath, of the Condemn (Doom) spell that Sullla's solos hate so much. Here I turned it to my advantage. I Reset the battle until it targeted Bartz the Blue Mage so I could learn the spell from the battle. ![]() Bartz was also the least important character for the buffing-up phase so he could take a brief dirt nap. And Exdeath made a tremendous waste of a physical attack against Bartz right before his time was up anyway.
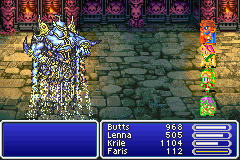
Bartz was also the least important character for the buffing-up phase so he could take a brief dirt nap. And Exdeath made a tremendous waste of a physical attack against Bartz right before his time was up anyway. ![]() I had started everybody in the back row but Reverse Polarity (Dynamo) pulled them up front. Without armor, one physical attack would kill the characters, so now I started getting worried.
I had started everybody in the back row but Reverse Polarity (Dynamo) pulled them up front. Without armor, one physical attack would kill the characters, so now I started getting worried.
Exdeath has no elemental weaknesses, but it seems he does have one massive spell weakness. At level 66, he is vulnerable to Level 3 Flare! This did over 2300 damage per shot and won the battle pretty quickly. Faris chipped in 1500-damage Firagas as well. It also turned out that the two Monks had just enough HP to survive a physical attack (1200 of 1300), which of course got wiped out by Curaga when the white mage's turn came around.
Index | Next