I'm breaking the final boss fight out onto a new page because it deserves to stand apart. I believe I actually spent more time on this than the entire rest of the game.
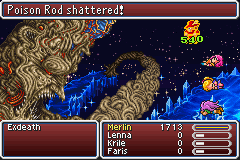
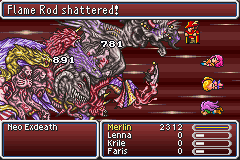
Merlin unveiled yet another new trick: the Bone Mail gives immunity to White Hole. It inflicts both Stone and Dead status, so immunity to EITHER means immunity from the whole attack. Sullla has not yet done this, using the Bone Mail for Neo Exdeath. A few classes can equip the Bone Mail but not an Aegis Shield, but most of them have no way to work around the Bone Mail's healing problem. But the Red Mage can heal by breaking a Venom Rod on himself!
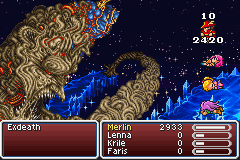
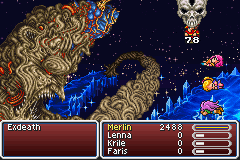
There is another significant problem with the Bone Mail: weakness to Holy element. Tree Exdeath would cast Holy for 4800 damage against it! But fortunately Merlin could get Shell status out of the Wonder Rod to halve that and survive it, that's the 2420 damage above. I did have to pull out and level Merlin up to 58 in order to get enough HP to withstand that. Back in the Void and time for that plan...
OH CRAP. Missed that interaction entirely. Shell halves my Venom Rod healing. The Holy and Flare spells were real problems. Halved Venom Rods could actually still almost keep pace, but left no time for attacking, and then eventually Condemn during this part of the AI routine would inevitably hit.
But I really wanted to do this battle with the Bone Mail rather than play White Hole Roulette forever. I thought and thought and came up with this answer. Take a page from Spoony the Bard. Run Exdeath out of magic points on White Hole before the dangerous part of his AI routine starts. That will entirely avoid Holy and Flare and Condemn and Meteor all!
Could 99 Venom Rods heal Merlin long enough? They didn't have to. Merlin sat in the back row attacking himself with the Assassin Dagger constantly. Every time its Death spell went off would give Merlin a free full heal! And Merlin would only slice himself for 80 damage, thanks to Armor status, the Bone Mail's high defense, and a quirky property of the back row mechanics. A warrior attacking himself incurs BOTH sides of the back row penalty (quarter damage) since both the attacker and target are in the back row.
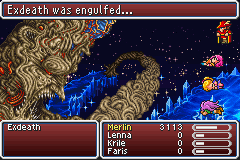
Beautiful! White Hole was not Merlin's greatest enemy, it and its enormous 99 MP cost were Merlin's best friend! Tree Exdeath was now completely neutered. Merlin made short work of the boss now. I created a save state here just like Spoony did; there was no randomness at all to get here, just a lengthy grind. Merlin had demonstrated 100% infallible superiority over this boss.
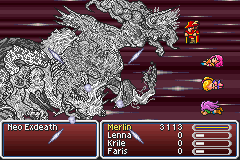
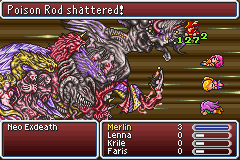
Neo Exdeath also demanded a new plan. What was the most dangerous attack? Not Grand Cross for once. The Bone Mail protects against many of the worst statuses (another reason I was going to great lengths to wear that armor), and most of the rest are survivable. In fact, there were only three lethal outcomes of the 18: Stone, Zombie, and Condemn.
The worst attack was Almagest. That's Holy element, which would deal 3400 damage against the Bone Mail's Holy weakness and pancake Merlin from any life total. I did not relish the thought of grinding Merlin up over 4000 HP to survive that plus a physical attack. He could survive Almagest once while Shell was still in place from the first half of the battle, but that would get Dispelled soon.
I briefly tried a strategy of killing the Almagest part by Stone by cycling the Wonder Rod around to Break during the tree form. Of course it worked with repetition, but it felt really save-scummy to use that save state 15 or 20 times per try. And that meant Merlin would have to dodge Grand Crosses twice as long, needing to work down both that and the physical parts instead of killing the Grand Crosser first. I also tried ditching the Bone Mail and doing the fight the standard way with Chicken hacking and Elixirs and a lot of retrying, but never got even halfway through the tree in thirty tries.
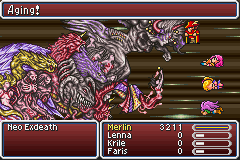
The next idea was to inflict Aging status on the Almagest part with the Ancient Sword, as Sofis and I both figured out from the algorithms guide. This did nerf Almagest, dropping it from 3400 damage to a survivable 1400 and slower, and wasn't too save-scummy since Merlin could try many Ancient Sword swings per fight. I made about ten attempts at the battle this way, about half failing on the aging and getting killed by Dispel - Almagest, and the rest hitting the aging but eventually dying to Grand Cross.
The fatal hole in Merlin's plan was that he couldn't deal damage fast enough. The front row was too risky: a Dispel - Fight combo (the Grand Cross part will occasionally do both and line up the timing with the physical part) could hit for over 2000 damage and put Merlin way in the hole on healing. But in the back row, Merlin would deal only 1200 damage after factoring out the Chicken Knife flees. Grand Cross would come around ten or more times before Merlin could kill it, and eventually even 3/18 probability would catch up to him. Actually 4/18 because the Weak outcome was also lethal, since Merlin would almost always be in HP Leak status from his Venom Rods.
Rod breaking was no help either, not remotely enough damage. Actually it turned out that Sol Cannon was the one and only time I ever resorted to rod breaking for damage in the entire game, and that wasn't necessary except to skip the Angel Ring cash grind.
As I was walking Merlin out of the Void to look around for anything else to do, the answer ran into me.
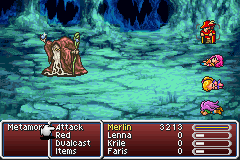
Metamorphas from Ghido's cave do reappear in the third world! They drop Light Staffs to break for Holy! 2800 damage from the back row! I farmed up 20, and yeah since the encounters were no threat, I save-scummed to get them (save state before killing the Metamorpha and reload until it drops the item.) I also took Merlin up to level 63 to gain a magic multiplier for both the Holys and Venom Rods.
So back to the Tree Exdeath battle. Merlin ran him out of magic again as before and created a new save state. And one last final trick: after Shell, I cycled the Wonder Rod around to the Death spell for Merlin to get one full Bone Mail heal later.
The first attempt at Neo Exdeath from here failed with the Aging status never firing and Merlin going down to a second Almagest after Dispel knocked off Shell. The second attempt started out more promising, landing the Aging status on about the fifth swing.
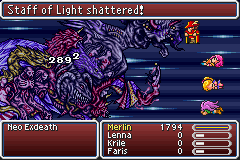
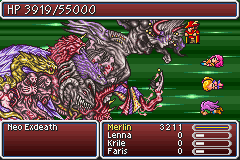
Merlin parked in the back row breaking Light Staffs at the Grand Crosser, healing with his Venom Rods when needed. Grand Cross launched, and did nothing. Almagest hit again and was now eraseable with a single rod heal. Dispel would hit occasionally, needing Merlin to refresh his Armor spell, but he could also slip in a little damage on those turns by Dualcasting that Armor and a Fire 2 spell. Grand Cross did nothing a second time, and a third time. Now it was almost dead.
The fourth Grand Cross inflicted Weak on Merlin... but by a stroke of divine luck his most recent HP Leak had stopped seconds before! Merlin was able to rebuild himself into health with more Venom Rod breaks, then the nineteenth Holy spell killed the Grand Crosser!
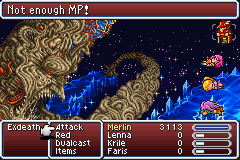
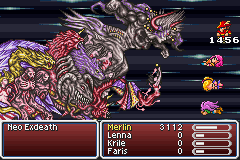
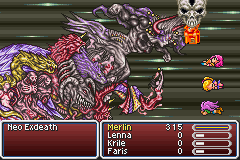
The only remaining question was whether the 99 Venom Rods would last the duration against Almagest and physicals. Merlin had burned 30 to this point but had more than enough left. And one really final trick of the Red Mage: he doesn't need to write down boss HP totals on paper because he can check directly with a spell. It didn't even cost a turn when Dualcasted along with an Armor spell refresh. Merlin patiently worked down the last two parts with the Chicken Knife from the back row and set himself up for a Dualcast Fire 2 finish.
There you go, Neo Exdeath beaten without a single Elixir used. ![]()
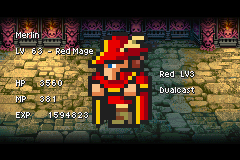
I did enjoy this variant a lot, again. The Red Mage might seem like a rehash of the jobs that it combines, but he does have many of his own solutions. I kept expecting the Red Mage to fall off a cliff in effectiveness by not getting the upper level spells but that never happened. The key was the job's ability to use both rods and staffs, letting Merlin cheat his way into lots of upper level magic anyway in Shell and Holy and Berserk and Bio. But even the low level magic includes tons of options in Sleep and Armor and Mini and Confuse and Toad. Merlin finished at level 63, higher than the median for Sullla's solos around 57, but that's a product of our play styles, I'd rather grind a bit more to shorten the final battle than make 50 or 200 attempts at it.
Index | Top