I'd actually already been thinking through the bosses of worlds two and three up to the Holy spell, and thought I had a plan for each. Let's see how it goes.
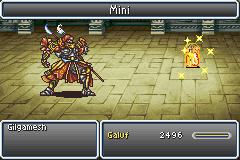

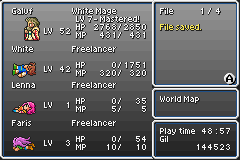
First up is Gilgamesh in the basement. The algorithms guide delivered up a hilarious solution. He's vulnerable to Mini. ![]()
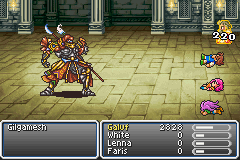
And White was able to beat Gilgamesh on the bridge the direct way, rather than waiting for him to run out of MP to block his Haste/Armor/Slow buffs. His Jump only dealt 220 damage to armored-up White and could be overcome with the Healing Staff. White worked his way through the rest of the encounters on the big bridge (you can't run) using mostly Confuse spells.

White happily collected the Image and Shell spells in Regole, giving him new options against both physical and magic attacks. Finally the power of the White Mage began to ramp up. Everything White had ever done to this point also could have been done by one of those dilettante Red mages.
White would run from most random encounters on the overworld, moogle river, and Drakenvale. They could be won in the usual ways, by endlessly healing or by Confuse spells. Just not worth the lengthy time for each; if White needs to add levels or gold I'll find an appropriate area. For Tyrannosaurus, White took the usual easy instant kill of a Phoenix Down against the undead enemy.
The Abductor boss on exiting Bal Castle posed a problem with his Vampire spell. It deals damage equal to the caster's "missing" HP (max minus current) and drains it into the caster. Confuse could hit it, but strangely the monster did nothing at all while Confused - didn't even attack itself, just stood there forever! I don't think Sullla has ever mentioned this fight in his solo reports. Does it not happen in the SNES version? Does no class just ever have a problem with it?
It could be won by running the boss out of magic, although it would take forever to run through 1000 MP at 2 per casting of Vampire which is its only MP-consuming spell. So the only answer was to retry until White managed to work through the 2500 HP before Vampire hit. At least Shell status halves its chance. Worked on about the fourth try.
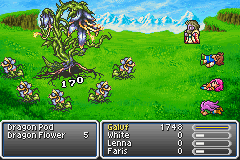
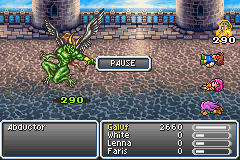
Now for the Hiryuu Plant in Drakenvale. The main flower does nothing by itself, but it continuously revives the five little flowers. They deal little damage, but their physical attacks inflict nasty status ailments of (in order left to right) Confuse, Paralyze, Blind, Poison, Aging. The last three can be ignored or cured or prevented (Angel Ring for aging.) But the first two are wicked dangerous in taking control away from the player. If they are ever both active at the same time, they quickly lock a solo character in an endless loop of confusion and paralyzation and you never get another turn.
So here's the general preference of plans for this fight.
1. Blow away the boss flower outright with damage or an instant kill. Obviously no option for White.
2. Repeatedly group-kill the little flowers. Great for Monks and Summoners, but not our hero here.
3. Get immunity to the Confuse flower (usually Bone Mail) and keep killing the Paralyze one manually. White couldn't do either. He couldn't wear the Bone Mail and his 30% inaccurate wildly variable flail couldn't keep any flower off the board.
4. Disable the little flowers with some status ailments of your own. Every status works; they have no immunities. They can be Stopped, Slowed, put to Sleep, turned into Toads, and all manner of other stuff.
So I thought I had this battle nailed down. The flowers can be inflicted with Mini status. Mini locks its victim's attack value at 3. White had more than 3 defense, so the flowers should deal zero damage and be prevented from inflicting their nasty status effects. Except that didn't work. It seems their specialty attack ignores defense so they still dealt a few points of damage and the debuffs.
My next try was Confuse on the two dangerous flowers. Once confused, each flower would stay so for several rounds on average, until it hit itself. With both dangerous flowers confused, White could heal himself and slip in some hits on the main boss. This worked but not for long enough. The problem was the 30% Magic Evade possessed by the flowers, so Confuse was not fully reliable. Eventually one and then both flowers would break free of confusion, ending the attempt. I tried adding White's newfound Blink/Image spell which causes the next two physical attacks to miss him, but that couldn't keep up with five flowers attacking or even three.
I needed those flowers to stay confused for longer... got it! White cast his Blink spell ON THE CONFUSED FLOWERS! Now they could not hit themselves! I carefully focused and watched for any miss on the two nasty flowers, refreshing Blink on it immediately after. Now I could really lock those two flowers in confusion permanently! And White had enough turns left over to heal himself and hit the boss. It also worked out more turn-economical to also keep the Blind flower in Confuse-Blink lock rather than spending turns on eye drops.
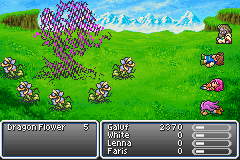
The usual hundred Flail swings later... it worked! White bonked out the remaining flowers and claimed his dragon grass. I was really proud of this fight: I needed almost every trick in White's arsenal, and a really unconventional solution of casting a buff spell on the enemy. Now I see why Sullla loves these solo challenges. They really make you think and always find new answers.
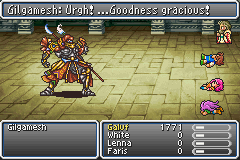
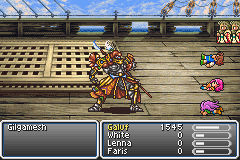
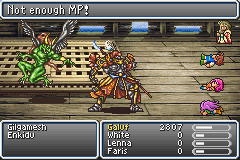
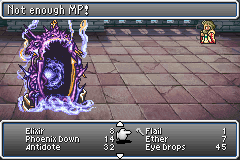
And that brings up the Gilgamesh/Enkidu fight on the ship. Some characters can blow them away immediately with damage or luck. Some have enormous trouble. Care to take a guess which category White falls in? ![]()
White had virtually no chance to kill either boss before White Wind or Vampire hit to replenish them. He would have to run Enkidu out of his 1000 MP (at least White Wind is expensive), but he couldn't survive that long either without Gilgamesh's cheese near-instant-kill Death Claw move hitting. Enkidu also packs a Byblos-like variety of nasty moves, Sonic Wave to halve level and a slowing move.
However, Death Claw was the only dangerous move in this fight. If Death Claw never hits, I would never lose. It did seem that it hit very rarely. As near as I can figure, its chance was 66% base + 28% for Gilgamesh's level - 52% for White's level = 42%, halved by Shell to 21%, and also 10% magic evade. Death Claw could actually appear many times without succeeding. The actual danger was after Enkidu arrived and cast his Sonic Wave, to reduce White's level to where Death Claw could hit him.
So... what if we make sure Death Claw can't be cast after Enkidu arrives? Now the plan was to run Gilgamesh out of magic FIRST before Enkidu arrived. This seemed fairly unlikely; to deplete Gilgamesh's 888 MP would take over 40 castings of Death Claw at 21 MP, and surely one would hit, right? Well, White might have an answer there too. Death Claw isn't truly an instant kill. It drops HP to critical and paralyzes, leaving the target easy meat for a killing blow... but what if White constantly applies Blink status to force that follow-up to miss!

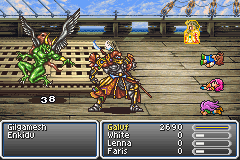
Beautiful! Death Claw actually never even hit once so those Blinks didn't matter. I don't know if I missed something in the magic hit formula or if White was just really lucky. Anyway, now Gilgamesh was zero threat, all he had left was physical attacks that dealt 40 damage versus armor status in the back row. White bonked him with the trusty flail until he summoned Enkidu.
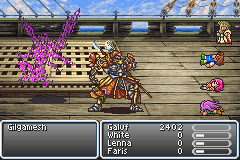
Step two was to run Enkidu out of magic too. Can't risk trying to outrace him and then getting killed by a Vampire for 4000 damage. White would simply have to sit there and eat the Sonic Wave and Web (Slow) moves, just like in the Byblos fight, letting his level drop to 1. White actually very slowly lost the healing race to Enkidu's Aero 2 and Wind Slash moves so needed an occasional Elixir. But the bigger danger was Enkidu's Missile spell, dealing 75% of current HP. That required an Elixir right away and happened six times through this phase of the battle.
Another hour later...
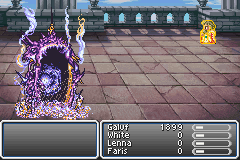
there we go! IT'S CLOBBERING TIME!
Well OK, that is also going to take a little while.
Six and a half hours to be precise.

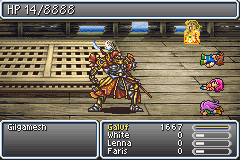
That battle also proved something else that I'd wondered. It IS possible to get tired of hearing the Big Bridge music theme. After about two hours, I turned off the emulator sound and played my own music instead. ![]()
I wasn't sure whether to go for a Reflect Ring in the tower. White would learn the regular Wall spell soon enough in Moore, but the spell effect wears off while the accessory is permanent. I tested the Wall Knight encounter groups, and White had no fast way to win them. Wall Knights are vulnerable to Mini and Confuse, but White had no way to sneak a spell past their walls. There wasn't anything else in the same encounters that was worth confusing, so the only way was the long slow way of Flail bashing. I tried that on one encounter just to see how long it would take, which turned out to be about ten minutes. This could be painful.

But then that very first Wall Knight fight yielded up the prize. ![]()
At least White could smash Red Dragons in the tower like a breeze. Shell protected against the nasty attacks and the Healing Staff quickly dispatched the undead beasts.
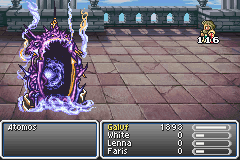
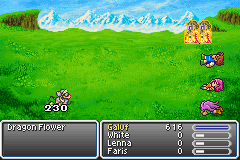
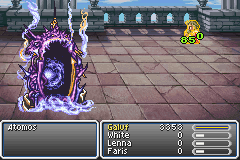
And now it is time for the mountaintop pinnacle of road block bosses in Atomos. It's all downhill from here: the remaining bosses are all answerable until the Holy spell is acquired and the white mage achieves near godhood.
White couldn't possibly kill the monster before it sucked up his dead comrades and started spewing Comets. Sullla's solo exception of killing off the other three characters singly does nothing for us here, it would buy White time for maybe 1000 damage worth of attacking. White would have to win by plowing through the Comets as Jesse the Thief did. At least White gets Shell status to halve the damage.
I made a quick test run to see how White would fare against the Comets. They would average 400 damage per Comet, so 533 damage per turn of Atomos's (two separate 2/3 chances of casting Comet), 1600 when Atomos with his innate Haste status got three turns in a row. Obviously way too much to outrace with the Healing Staff, so Elixirs it would have to be. Sigh. Hours of Cure Beast farming it was.
(Yes, this was a supreme insult by the game. The White Mage, the grandmaster of healing magic, has to resort to Elixir farming. Thanks to that IDIOT Xezat. DAMMIT XEZAT why can't we use your submarine for TWO MINUTES to go visit Moore to buy Cure 3!)
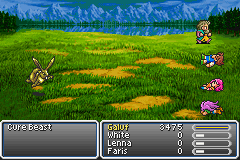
White could easily win the Cure Beast random encounters, but it took forever. He would Confuse-Blink three to lock them down (and stop them healing each other, and heal White instead for free!) and start in on the fourth with the flail. The first three would run out of MP right around when the fourth died, and I could just hold down the attack button from there. Still took about ten attacks per Cure Beast. This worked with zero danger, but took forever and ever and ever. Ten minutes for every single encounter. Forty minutes per Elixir. 66 hours for 99 Elixirs.
I cried uncle. I turned Galuf back into a Bare job for the grinding.
I hope this doesn't disqualify the variant in the eyes of my readers. Sorry, but at the end of the day, we all have Aging status and a Doom clock overhead. I really can't justify wasting sixty hours on this. I should have done this level and Elixir grinding in Ronka and the ship graveyard instead. I hadn't because at first I misread Jesse the Thief's report: I thought he did Atmos at level 58 with 30-some elixirs. Now I see he had to go all the way to 64 and 99 elixirs.
Anyway, for Cure Beast farming, Galuf equipped the Bone Mail and Elf Cape for minimal damage taken, and an Osafune/Bizen katana bought in Surgate. Any available weapon would take two hits at ±600 damage to kill a Cure Beast, except this katana would sometimes crit to do it in one. Now the Cure Beast encounters could be won in a minute each. Hi-Potions between battles were the fast simple way to heal up. While grinding, I worked out the math for Atmos.
Comet deals 50..200 damage, minus White's maximum magic defense of 24 (Gaia Gear, Coronet, Angel Ring), times 8, halved for Shell, so 104..704 damage. 404 average.
White has 25 agility and 11 equipment weight. After taking an action, White needs 120 - 25 + 11/8 = 96 ticks of the action bar to act again. Atmos has 36 speed and Haste. Atmos needs (120 - 36) / 2 = 42 ticks of the action bar. Atmos gets 96/42 = 2 & 2/7 turns for every one of White's, call it 2.333 or 7/3 for simplicity and to account for any lag in clicking.
Atmos casts 4/3 Comets per turn on average. Multiplying everything together gives that White must heal 404 × 7/3 × 4/3 = 1257 damage per turn to survive.
|
PLAN A: Run Atmos out of MP. Atmos does nothing but cast Comet, he has no other moves or physical attacks. 10,000 MP / 7 per comet = 1,428. If White can heal long enough to endure 1,428 Comets, he clinches the victory. The Healing Staff averages 48 × M healing. At level 64, White's magic multiplier was 16. So he could heal 768 per round with the staff. So the Comets outrace the staff by 500 per turn on average. White has 4000 HP. So we need an Elixir after every 7 turns of healing. 7 turns × 7/3 Atmos turns × 4/3 Comets = 21.777 Comets per Elixir. 99 Elixirs will last 2156 Comets, which is more than enough! |
PLAN B: Kill Atmos directly. Attacking instead of healing, White needs an Elixir once every three turns. White gets 200 attacks before running out of 99 Elixirs. Atmos's defense is 14 quartered to 3 by the Flail. White's damage is 8..24 reduced to 5..21, average 13. At level 64, White's physical multiplier was 12, for average damage of 13 × 12 × 70% flail accuracy = 109. We would need 183 attacks to make the kill. This is also within the range of White's Elixir supply but by a narrower margin. |
Plan A had a significantly greater margin for error, so that was the choice. It also had a better breakpoint if more juice was ultimately needed, adding a magic healing multiplier at level 66 as opposed to a physical multiplier at 71.
White Shelled himself up as he watched his companions disappear, and Atmos started shelling White with Comets. White stuck to the plan, healing constantly, carefully anticipating intervals (one out of three cycles) where Atmos would get three turns in a row. I would use the Healing Staff when above 1800 HP and an Elixir below 1400 which was the max Atmos could deal in one turn. Between those was an awkward zone - too risky to use the staff, a bit wasteful to use an Elixir. The best move then was to pause and let Atmos get just one turn to burn some more Comets, then use the Elixir.
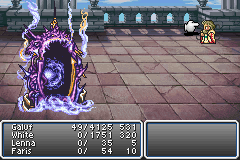
Close call there! I was intentionally playing it a bit risky with Elixirs early in the fight. If White died, I could just try again. If not, he would get ahead in the healing race and be able to be more conservative later. Like in some earlier fights, I used the emulator to spy on Atmos's MP total rather than manually tracking 1,428 Comets.
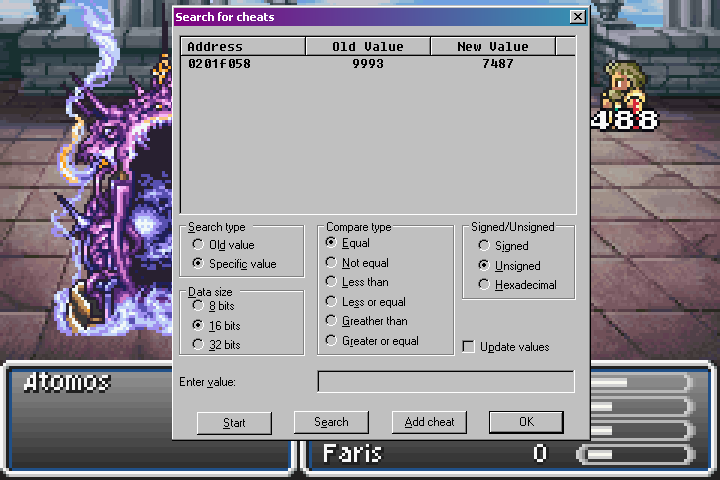
There's proof that things are going my way. White has used 20 Elixirs, 20% of his total, but the boss has burned 25% of his magic. I did not spy on Atmos's MP again; I was actually enjoying the suspense.

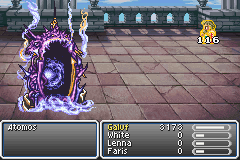
White and Atmos danced this dance for an hour. And the RNG even fell into a rut. There were some very discernible patterns to the Comet damage. In particular, there was one sequence where Atmos would roll 450 to 650 damage for three straight Comets, getting me ready for a heart attack, then roll exactly 116 on the last. I captured that 116 damage Comet three times above just to prove it. (notice that White's action bar is nearly full each time, indicating that Atmos just had several turns.)
Then just like that, it was all over.
Thunk. Out of MP and the boss could never do anything ever again. White yanked out his venerable Flail for the last time and made short work of the monster. Atmos defeated on the very first attempt once I had the right supplies and plan.
Whew. Enormously glad White was over the Atmos mountain, and it was the last mountain indeed. It's all downhill from here.

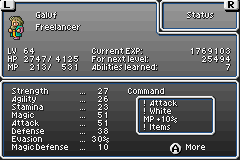
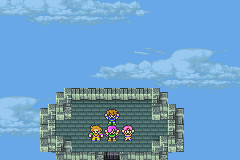
Heh, Galuf actually leaves the party briefly during the undersea scene where he's sulking about Xezat, which meant the entire party was dead. ![]()