World two. Galuf won his solo fight against Gilgamesh without incident, thanks to a shield blocking several attacks. For the Big Bridge fight, I misjudged the timing and failed to Mute him before the buffs, but Slow after the fact can still cancel out the Haste and we still won easily.
Regole held another solid weapon upgrade, Orihalcon Daggers at 41 attack and 100% hit, strictly superior (and cheaper!) to the also available War Hammer at 38% attack and 80% hit. Regole also sold a fresh set of armor for the berserkers, Golden armor and shields and helms across the board. My armor acquisition had been pretty haphazard up to this point - there was still a Leather Cap and Bronze Shield among the berserkers!
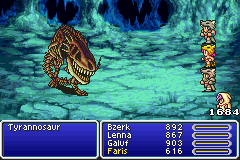
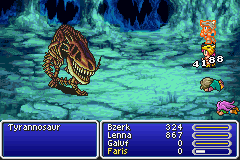
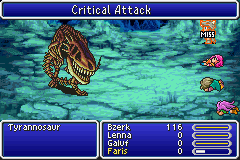
Tyrannosaurus: WHOA THAT WAS CLOSE! He dealt over a thousand physical damage, killing Faris then Galuf then Lenna in one hit each! Tyrannosaurus goes down instantly to a Phoenix Down, or quickly to fire damage, but this party could not do either (remember Faris is prohibited from inflicting death status on enemies.) But Bartz survived, with several attacks missing thanks to his shield and Elf Cape, and barely took down the boss!
The Dancing Dagger came from the Moogle village, and went to Lenna just to see how it would behave. Berserk status does not override its dancing effects, unlike fighting commands like Aim and X-Fight. It is also stronger than the Orihalcon dagger on the 50% of attacks that it doesn't dance. So Lenna kept it just for variety. (Berserkers don't have a lot of variety.)
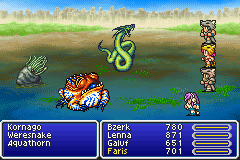
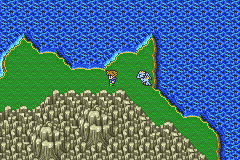
The mini-quest to get the Kornago Gourd in Kelb/Quelb was also interesting. There is an old man in a well who requests that you bring him a frog, which means to Catch a certain enemy (with the Beastmaster's command) that can be found right outside the town. Catching an enemy requires reducing it below 25% of its initial health. Once again, the problem was Berserkers killing the target before Faris could do her thing. Solution: cast the white magic Armor spell on the frog. ![]()
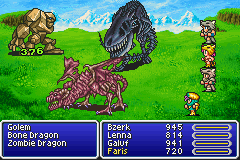
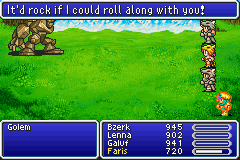
I also picked up the Golem summon in Drakenvale, by having Faris continually heal Golem with the Healing Staff and occasionally a Hi-Potion (doubled in effectiveness for her as a Chemist.) Faris could also deal damage to the undead dragons with the Healing Staff. (That's within the rules! This is a random encounter and it's the plain Fight command.) Also amusingly in this fight, Tempting Tango from the Dancing Dirk would un-flip the dragons, making them target the party again instead of Golem.
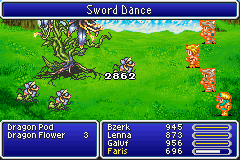
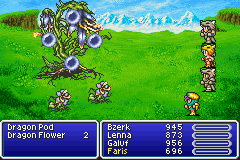
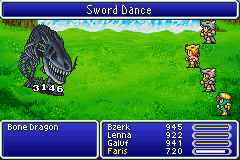
Hiryuu Plant was easy. It's vulnerable to Stop, and Faris had Time Magic assigned, so she just kept it in stasis never reviving the little flowers while the berserkers chopped it apart. (Nice Sword Dance there, Lenna, but wrong target!)
You can also see Faris as a Chemist in these shots. Believe it or not, I've never used the Mix command. My original playthroughs were on a portable GBA where I didn't tote around a mixing guide reference with me, and I left it off the table for the Nudists. But I want to play with it some here. The Chemist can also very conveniently equip the Healing Staff to simulate white magic, while keeping Time magic also available in the second ability slot. Most random encounters would be won with Haste on one or two of the berserkers, then hitting with the Healing Staff to repair any damage. Also, the Chemist can equip the Bone Mail for massive defense. (Just have to remember not to Heal Staff herself!)
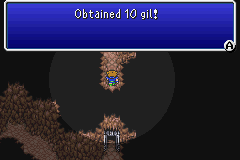
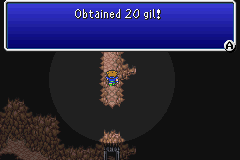
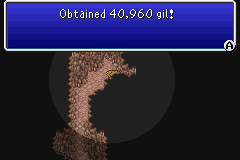
There is another side-quest at this point in the game. In a cave east of Castle Bal, there is a passageway that gives you Gil with every step, doubling every step to a maximum of 40k for a total of 80,000. The trick is that every step has a chance to fight a very tough monster called Gil Turtle. I'd skipped this with the Nudists (they didn't need cash), but this party ran quite low on funds sometimes, so it might be worthwhile. It is also a challenge that Sullla has never relayed to us in his reports, so allow me to do the honors.
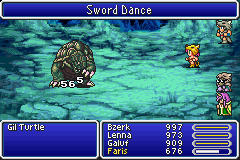
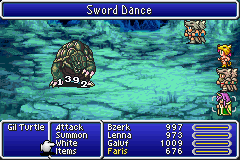
The standard strategy to beat Gil Turtle is X-Fight with Spellblade Ice-3 into his elemental weakness, but this party has no source of ice damage. He is a purely physical boss at 32768 HP with no magic attacks, but every time he is struck, he responds with two physical attacks of his own that deal 1200+ damage and can inflict some status ailments in darkness and poison and confusion. That kind of pain is nearly impossible to overcome; the answer is to proactively prevent Gil Turtle from hitting you, by way of Golem and shields.
So Faris must employ the Summoner job for this fight; Golem is required but she has not trained the ability to access level 4 summon magic. I guess the second ability should be Time magic for Haste. She equipped the Main Gauche (Guardian Dagger)/Elf Cape combo for some dodging. Two other Elf Capes and three Golden Shields were on the berserkers for some good dodging too.
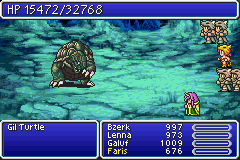
I lost, but there was light in the tunnel. Golem could almost fight Gil Turtle to a standstill. He protected against 2200 damage (the formula is (level+20)*50) which would be four hits in the back row. The problem came when Golem had already absorbed three hits, then Gil Turtle hit me with two in a row. As long as the excess strike hit anybody besides Faris, she could repair it with potions and such. But eventually she did get one-two-killed and that was that.
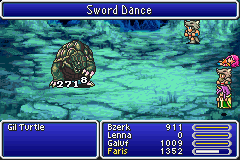
Hmm... As always, I need to cut down on the counterattacks. The best answer was to strip two berserkers down to fists so they couldn't damage the boss, and the third (Bartz, the strongest) gets the Dancing Dagger. I will do damage entirely by way of Sword Dance. Also, Time magic might be expendable. White magic might be better, to get both the Armor and Blink spells. Fortunately, the Elf Cape and shield checks come first, so if either succeeds, the attack does not poof a Blink image.
So this started working! I carefully kept track of Golem's damage absorption on my calculator. (Golem cannot be refreshed before the protection is depleted.) Whenever we were one hit away from Golem expiring, I waited on Faris's turn until it did so Golem could be re-cast. Again I'm taking advantage of Berserkers' capability to "jump the queue" of turn order: the picture shows Bartz attacking while Faris is waiting for a command. As with the Nudists vs the Shield Dragon, I could re-Blink my party faster than the enemy could knock them off. From here, it was just a matter of time until enough Sword Dances came in my favor.
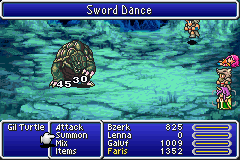
There's proof that I knocked off more than half the boss's HP, and could easily finish the job. But it wasn't worth it. The problem was MP consumption: Faris already had to use one Elixir. And Gil Turtle appears usually three or four times in order to reach the end of the gil pathway for all the money. Not worth burning a dozen elixirs for 80k cash. The small chance of a Sword Dance just didn't deal damage fast enough, taking typically 40 or so MP worth of Blinks and Golems for each single 1500 damage hit. So I hit reset from here.
Still, I wanted to try again. Remember that Chemist job I was talking about? Mix can do a million things. Here's the important ones for this fight:
Turtle Shell + Turtle Shell = Protect status
Turtle Shell + Eyedrop = Haste
Holy Water + Antidote = Level+10 (Samson Power)
Turtle Shell + Antidote = Halve Defense of target (Split Shell / "Turtle Soup" in this translation)
That last one would be the most important. By knocking down Gil Turtle's 40 defense, I could get Bartz doing much more damage on normal hits and not so reliant on Sword Dances. The rest of the combo platter covered just about everything else we could want. Mixing fills the roles of White magic with Protect status, Time magic with the Haste mix, Blue magic by simulating Off-Guard, and provides a uniquely great offensive boost with Samson Power.
Faris still had to be a Summoner for Golem, this time with !Mix as the second ability. Let's see how this goes. Lenna got killed early before the defensive buffs were up, but that made no matter.
In a word, brilliant! Soon I had Bartz and Faris hasted, armored, and floated, and Gil Turtle's defense halved twice. As before I kept careful track of Golem, refreshing when necessary.
And after pumping some Samson Powers into Bartz, look what's happening to his damage. Up from a piddly hundred or so to over a thousand on a normal attack, and 4000 on Sword Dance! This then didn't take long:

Victory! Even better, it was done with a minimum of consumable items. The only ingredient needing farming was Turtle Shells, needing about 8 per battle to cover Haste and Protect status and two Split Shells. No Elixirs needed. (Some Shells can be substituted with Dragon Fang + Phoenix Down which also casts Protect status, and Dragon Fangs are also farmable from Zombie Dragons in Drakenvale.)

It turns out that Turtle Shells are readily available in world 2 with the wind drake, so I went and farmed a bunch of them, then carved through a total of four Gil Turtles for the big prize.
And now back to our quest.
Index | Next