But I'm not going for Enuo just yet. With the precedent set for Rathma going back to a Bare, I set about some more challenges. Rathma had to exit the dungeon anyway for more elixirs and potions.
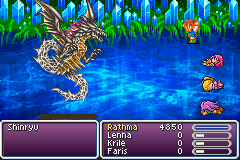
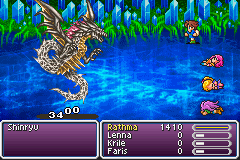
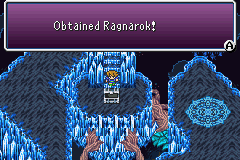
Rathma as a Bare had all the defensive equipment, but was missing one piece of offense that a Bare job should have in the Brave Blade. But there does exist another sword of attack 140 and almost as good. The only problem is that you have to beat a little monster called Shinryuu to pick up the Ragnarok. But I had worked out that the Bare-Necromancer combo could do it! Let's go over the attacks:
Tidal Wave: Only used at the start of the battle. Over 8000 damage, but retry until the Aegis Shield blocks it.
Fight: 1300 damage with Armor status from the Defender sword, survivable.
Roulette: A death spell, protected by Ribbon.
Snowstorm: Ice damage, nulled by a Flame Ring.
Atomic Ray: Fire damage, absorbed by a Flame Ring.
Thunder: Low lightning damage, counterable by healing.
Mighty Guard: Just a defensive spell; it would prolong the battle but pose no danger to Rathma.
Level 2 Old and Level 3 Flare: Obviously avoidable.
Poison Breath: Low poison-element damage, counterable by healing.
Demon's Eye: Stone status, blocked by Aegis Shield.
Maelstrom: Weak HP status. This was the one weak link. Rathma would have no answer to it except healing.
{Maelstrom,Fight,Roulette}
{Snowstorm,Atomic Ray,Thunder}
No Interrupt{
  {Maelstrom,Fight,Roulette}
  {MghtyGrd,L2 Old,L3 Flare}
  }
No Interrupt{
  {Fight,Fight,Demon's Eye}
  {Fight,Fight,Poison Breath}
  }
Fortunately, the AI routine lines up such that Maelstrom is never uninterruptibly followed by a fatal attack. As long as I made sure Rathma got a turn after that first line with Maelstrom, he was safe. And even if not, the kill was low odds; Rathma was immune to Snowstorm and Atomic Ray, so Shinryuu would have to roll a Maelstrom - Thunder sequence at 1/9 odds, plus have them both hit past the Aegis Shield and Shell status. Then that second Maelstrom is also immediately followed by three spells that could not kill Rathma. So I had the battle plan nailed down: just make sure to always get a turn after any time Maelstrom could appear.
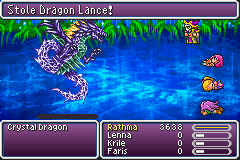
And how shall we deal damage? I tried the usual power route, a Dragon Spear stolen via Thief Knife from a Crystal Dragon, but even with its 8x modifier against dragons, that dealt only 1000 damage from the back row after Shinryuu's Mighty Guard. (This approach really needs higher strength and the multiplier from Jump.) Better was to use Dark Flare from the Necromancer's menu, which cut through Shinryuu's 60 magic defense. A boosted elemental Dark Art would deal slightly more, but Dark Flare allowed Rathma to keep the Guardian Dagger in hand like against Neo Exdeath to deflect some physical attacks.
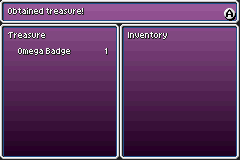
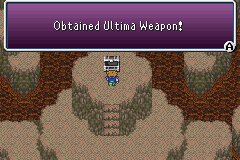
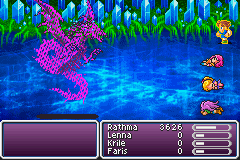
Long story short (actually not all that long), this worked. Rathma started the battle by getting Haste, Armor, and Shell from the Masamune, Defender, and Wonder Rod. I carefully watched Shinryuu's turn sequence and used Elixirs at all the right times, needing twelve throughout the whole battle. Dark Flare consistently hit for its 1600 damage (that 3400 above is before the Mighty Guard Shell) and its magic cost was not a concern when Rathma was sucking Elixirs anyway. Down went the mighty dragon and Rathma claimed his Ragnarok sword on the first try that he got past Tidal Wave.
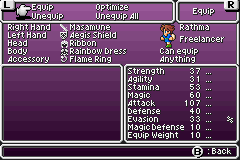
Incidentally, the Necromancer job wasn't essential for this fight. The Bare job can actually beat Shinryuu all by himself thanks to the defensive equipment, with enough levels and enough elixirs. What the Necro contributed was improved stats over the Bare job; chiefly the doubled vitality, but also some strength and agility. A pure Bare would probably have to go to the mid-seventies for enough health to survive a few attacks.
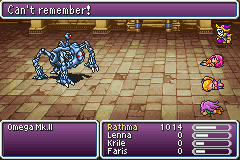
And of course one superboss demands another. Like with Shinryuu, there was no way a pure solo Necromancer could dodge the death attacks or outheal the incoming damage from Omega. But again I thought the combined Bare/Necromancer setup could pull it off. The equipment setup would be Aegis Shield, Ribbon, Rainbow Dress, Flame Ring, and in the weapon slot Masamune then Wonder Rod then Magus Rod for Haste, Shell, and the elemental-up boost. As I keep doing, let's go over the list of superboss attacks and answers.
Atomic Ray: Absorbed with a Flame Ring.
Emission/Flamethrower: Absorbed with a Flame Ring.
Rainbow Wind: Mute and Darkness status, both protected with a Ribbon.
Blaster: Instant-death attack, protected with a Ribbon.
Maelstrom: Drops HP to weak; unavoidable but an Elixir will undo it.
Earthquake: 6000 damage, but reducible to 3000 with Shell and survivable with Rathma's vast HP total.
Rocket Punch: Confuse status, protected with a Rainbow Dress armor. (Really. A Rainbow Dress will beat the uberrobot.)
Mustard Bomb: 1500 non-elemental damage with Wonder Rod Shell (oh how I love that trick), survivable.
Delta Attack: Stone status, protected with an Aegis Shield.
Surge Beam/Wave Cannon: Damage always equal to 50% of Max HP. Use an Elixir.
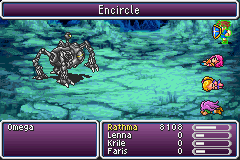
Circle/Encircle: Here's the big danger. This is why almost no solo character goes anywhere near Omega. If it hits, it removes the soloist from the battle entirely and the party loses. The only counter in the entire game is the Chemist's mix Dragon Kiss to set the Heavy flag on the character.
Rathma was just going to have to get through the battle without Encircle ever landing. The probabilities actually weren't too bad. First, Omega only has a 1/3 chance to use it each time he takes damage. Second, the Aegis Shield blocks it 1/3 of the time. Third, the attack is inherently inaccurate and worked out to about 50% hit chance with Shell on. That multiplies out to just a 1/9 chance to get Encircled into oblivion for each hit on Omega.
How about the offensive side of things? Chaos Drive and its lightning element were just the ticket. It should have topped the 9999 cap easy (190 * 1.5 * 22 * 2) except that Omega gets Shell status built in which kept it in the 6000-7000 range. But that would still take down Omega in eight or nine hits.
Encircle wasn't the only danger. The combo of a Rocket Punch (50% of current HP, cast only in response to damage) plus Surge Beam was always fatal too. So I had to carefully watch Omega's AI routine and only hit him just after a Surge Beam when I could be sure to get a turn for an Elixir before it would hit again.
Short story short again, this worked too. It went pretty fast; each try took just a couple minutes; one way or the other, each fight would not be long. It took me about twenty tries to nail down the timing to work around the Rocket Punch + Surge Beam combo, and for all the Encircle attempts to miss. But eventually Omega blew up!
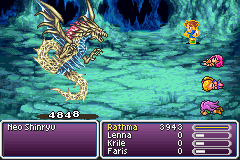
Oh, but Rathma was not done going after superbosses. Down in the bonus dungeon is an even scarier dragon named Neo Shinryuu. Check out the list of attacks new to this boss from his progenitor.
Almagest: Moderate Holy element damage, survivable with Rathma's vast HP.
Zombie Breath: Low damage and survivable. It inflicts zombie status only if it kills its target.
Curse: Inflicts random status effects (same as the Dark Art), most protected by the Ribbon.
Breath Wing: 1/4 of max HP damage, survivable.
White Hole: Dead and Stone status, blocked by both the Aegis Shield and Ribbon.
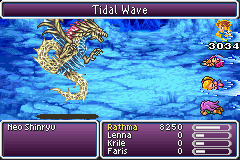
Tidal Wave: Large but survivable water element damage. This time it's used in Shinryuu's regular attack rotation and not just at the start of the battle.
So it turned out that Rathma could handle each of these attacks too, as a Bare with access to the defensive equipment and elixirs. Neo Shinryuu is also juiced up in the physical fighting department, often attacking twice in a row for 3000 damage each. But Rathma could handle that too with the usual tricks of Armor from the Wonder Rod and blocking some with his shield and a venerable Guardian Dagger.
Rathma began the battle with his usual tricks: Haste from the Masamune and Armor from the Wonder Rod. As for damage, the choice was Dark Flare as before to pierce his magic defense. Now it was dealing 4800 damage per cast with Rathma's immensely high level and magic multiplier.
AI SCRIPT:
Set Self Status:False Image(Reverse effect if already inflicted)
Nothing
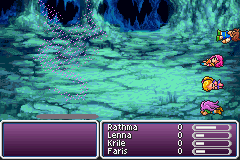
The gimmick of Neo Shinryuu took a bit of figuring out from the algorithms guide. There are actually two monsters within the same battle. The first one, which does all the attacks, is always active and always has the Invulnerable status (same as Necrofobia with his Barriers.) The second monster is vulnerable to damage normally and does not attack, but it rapidly flips the "False Image" status off and on. So half of your attacks seem to miss entirely, with no damage printout, whenever the second form is hidden. I liked this creative gimmick, but on the whole it would not really make much difference, just prolong the battle.
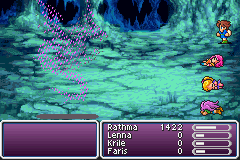
Gradually I even became able to beat those 50-50 odds! Every time the vulnerable form flipped, there was a small pause on the action bar, one of the "invisible" moves that many bosses make. By watching the bar closely, I could see whether the vulnerable form had flipped once or twice since my last attack, so I would know ahead of time whether Dark Flare would hit. If not, I'd wait a second or two before attacking. So I eventually learned how to guess right roughly four out of five times.
Rathma used Elixirs whenever his health ran below about half full. I was careful to work the timing around Maelstrom, making sure not to allow Neo Shinryuu a double turn for a Maelstrom - followup combo for the kill. And after enough Dark Flares successfully hit:
Ha, nuts. I killed him but he killed me too! I wasn't sure I'd read that right from the algorithms guide, but it's true that Neo Shinryuu casts Flare and Meteor when he dies. I had tried to get to that point at full health, but that was difficult thanks to this (cleaned up and reordered for clarity):
While(HP<15000 & Var01=00){
     Set Variable:Var01=02
     Mute
     }
While(Var01=02){
     No Interrupt{
          {Attack,Attack,Critical Attack}
          {Attack,Attack,Critical Attack}
          }
     No Interrupt{
          {Attack,Critical Attack,Nothing}
          {Attack,Critical Attack,Nothing}
          {Attack,Critical Attack,Nothing}
          }
     }
Once under 15,000 HP, Neo Shinryuu casts Mute. That's not the single-target white spell, that's the Time Magic spell (Void on the SNES) which locks out all magic for both sides. Then that branch of the AI routine kicks in, Shinryuu getting two and three uninterruptible attacks, up to FIVE in a row when getting a double turn by way of his speed. Fortunately, the programmers missed making Dark Arts subject to Void/Mute, so they still worked.
I had to suck Elixirs almost every turn, waiting for an opening when the Aegis Shield and Guardian Dagger would pick up several attacks in one flurry. But it took only three such openings for three more Dark Flares to make the kill. Here came the Meteors again, but this time Rathma had patiently cycled the Wonder Rod to Shell in addition to Armor...
and Rathma had won!
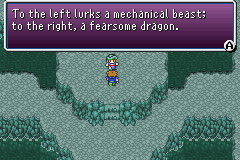
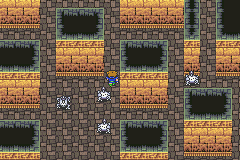
There was one more superboss to go, Omega Mk.II. He lies beyond the famous room full of regular Omegas. Rathma as a Bare had beaten the original Omega and I didn't feel any need to prove him over again here. I accidentally discovered a couple tricks, though. One, the Omegas only begin the fight if they bump into your character's front side -- in that spot where Bartz is facing in the picture, the Omegas would just mill around behind him.
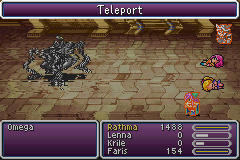
Second, I wasn't quite paying attention to what I was doing and cast Teleport with Faris thinking it was a random fight, but actually an Omega... and it WORKED! And removed that Omega from the map! I continued to do that against the rest of them, allowing me to walk around the room freely. (Note to designers - throwing out the same superboss eight times is not fun or challenging design. I bear zero shame in working around that nonsense here.)
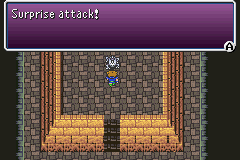
Those antics aside, here's the boss. "Surprise attack"? Yeah, real surprised over here.
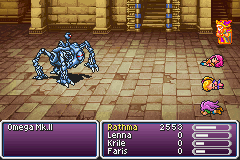
This Omega has three different forms and changes between them randomly. Each form is weak to one of lightning, ice, or fire but absorbs the other two along with all other elements. Not only would Rathma hit on only one-third of his attacks picking elements at random, any wrong guess would heal Omega and wipe out a successful guess.
Other than the elemental three card monte, he's the same as the standard Omega, with all the same attacks including Encircle. Just a bit more buffed in the stat department on HP and speed and defense. He even seems to have the same weakness to the Bard's Stop song according to the algorithms guide.
I thought of trying to hit him with weak elemental damage, say a Flame Rod or Icebrand attack, to check the elemental weakness before using a big spell. This did not pan out: this Omega has a full 100% physical and magic evade! You literally cannot hit him with a weapon except for an auto-hit skill like Aim. Other ways to check the elemental weakness would be the Scan/Libra spell or a true black spell, but Rathma could do neither. No, I wasn't going to try to cycle the Wonder Rod through the black magic spells ten times.
I just couldn't think of any way to make the elemental damage work. Rathma could still deal some damage with the defense piercing Dark Flare, which would reach about 2400. But that would take on the order of thirty hits to kill Omega Mk.II, and with a 1/3 chance every time for Encircle, inevitably it would hit.
Reluctantly I conceded that a solo Necromancer even as a Bare could not win this. You need either more characters to survive the Encircles, or some way of checking the elemental weakness. Sorry, folks, I can't win 'em all.
 And how shall we deal damage? I tried the usual power route, a Dragon Spear stolen via Thief Knife from a Crystal Dragon, but even with its 8x modifier against dragons, that dealt only 1000 damage from the back row after Shinryuu's Mighty Guard. (This approach really needs higher strength and the multiplier from Jump.) Better was to use Dark Flare from the Necromancer's menu, which cut through Shinryuu's 60 magic defense. A boosted elemental Dark Art would deal slightly more, but Dark Flare allowed Rathma to keep the Guardian Dagger in hand like against Neo Exdeath to deflect some physical attacks.
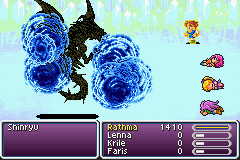
 And of course one superboss demands another. Like with Shinryuu, there was no way a pure solo Necromancer could dodge the death attacks or outheal the incoming damage from Omega. But again I thought the combined Bare/Necromancer setup could pull it off. The equipment setup would be Aegis Shield, Ribbon, Rainbow Dress, Flame Ring, and in the weapon slot Masamune then Wonder Rod then Magus Rod for Haste, Shell, and the elemental-up boost. As I keep doing, let's go over the list of superboss attacks and answers.