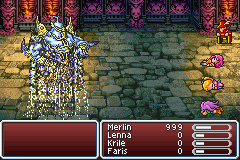

Galuf disposed of basement Gilgamesh with GilToss. Merlin beat Gilgamesh on the bridge with an Ancient Sword hit for aging status then simply outracing him with the Healing Staff even after the Haste/Armor AI changeover. (I tried the Mute spell to block that but it didn't hit in about 20 attempts. Lots of other characters reported Mute failure here too. Maybe Gilgamesh really is immune to it even if the algorithms guide doesn't say so? Maybe that's changed on the GBA?)
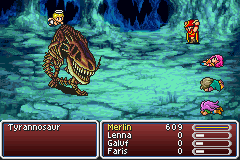
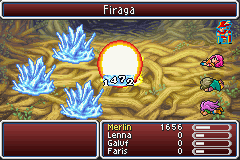
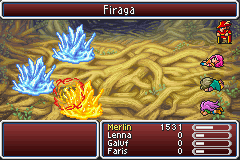
Merlin predictably blew up everything in the Moogle river with elemental spells. As usual for the Tyrannosaurus boss, I took the easy kill with a Phoenix Down. I don't fight this boss legitimately because there's no save point at hand and no defense against ????, and it would just be tedious to run the entire river dungeon over again for each attempt.

I was still finding new techniques with the Red Mage from time to time. Between spells and weapons, Merlin could inflict a pretty long list of status effects (Toad, Mini, Poison, Aging, Sleep, Confuse, Berserk, Mute, Armor on himself.) In random fights I even found the Toad spell useful. Toad isn't often worthwhile for a real Black mage who could just kill with a damage spell instead, but Merlin's raw magic power was starting to fall behind where a Black mage would be and need several casts to down many enemies. Toad was a great way to disable enemies and hack them down with a sword at an efficient MP cost.
Another technique unique to the Red Mage alone (besides Bare): it's the only class that can equip both the Bone Mail and rods, allowing the trick of breaking a Venom Rod to self heal. (Blue Mage could too but he can simply cast White Wind instead.) Another way to heal with the Bone Mail was to get Jitterbugs out of the Dancing Dagger, with Mystery Waltz actually also very useful to steal back some MP.
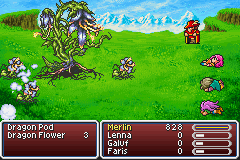
Merlin had a fine answer to the Castle Bal Abductor boss, locked down by one Confuse spell then killed with elemental magic. And Merlin answered the Hiryuu Plant easily, by wearing the Bone Mail to get immunity to four of the flowers' effects, then casting Sleep spells. With first the paralyzing flower then all the flowers asleep, Merlin achieved a lock and sworded the boss flower until it died.
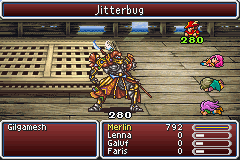
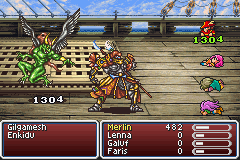
Gilgamesh on the ship:
1. Hit him with the Ancient Sword. Gilgamesh ages to the point of dealing 0 damage, so even Death Claw isn't fatal!
2. Armor spell on self and move to the front row
3. Use the Dancing Dagger to Jitterbug back lost HP (no potions due to Bone Mail)
4. Hit Enkidu with Bolt 2 spells
5. Watch as Enkidu self-immolates with a Vampire spell on the Bone Mail (rendering his White Wind ineffective at low HP)
6. Finish off Gilgamesh easily - he can never kill when his physicals deal 0 damage.
Step 4 I tried to do a few times with the Ancient Sword but the aging never hit, and the Dancing Dagger but it never landed a Sword Dance. Merlin got killed by accumulated damage a few times since he couldn't heal. Finally I just hit Enkidu with plain damage spells which worked on the first try.
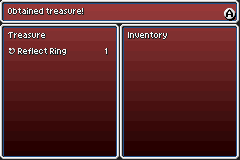
Merlin took a little longer than average, about 25 Wall Knight kills, to score his Reflect Ring. The best weapon to use was actually the Dancing Dagger, since both the Ancient and Sleep swords reflecting back at Merlin would be bad news! Also because Jitterbug operates as a magic attack ignoring their high physical defense. Even after this, Merlin was still underleveled at 34; most solos reach their low 40s in the tower before Atmos.
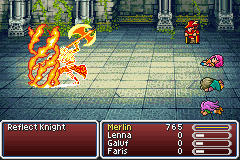
Oh and here's a puzzle: How is that Reflect Knight getting hit with a fire spell above? Merlin did not yet have his Reflect Ring to bounce one off himself past the enemy wall. It's not a Confuse spell on the monster - their innate Reflect status bounces that too. Answer below.
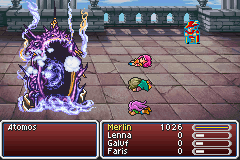
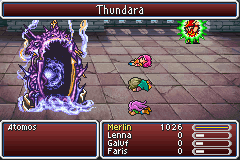
Didn't need any levels to shred Atmos though. One Sleep spell and he was helpless as Merlin emptied a full tank of 40 Bolt 2 spells into him. No need for an Elixir magic recharge thanks to the Gold Hairpin.
On to Moore Village, where just about every class leaps up in power... except the Red Mage. He filled up his spellbook way back at Karnak and never gets to learn anything new after that.
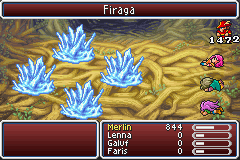
The forest crystal seal guardians are usually an easy fight... except that Merlin in his arrogance neglected to invest in a Flame Ring back in world one. Fire 3 from the fire crystal would hit for more than Merlin's entire HP total. And there was no way to get Shell or fire resistance. Gaining HP wouldn't work either, because the fire crystal was faster than Merlin so would sometimes get two turns in a row. The only possible answer was the Reflect Ring.
The Reflect Ring in turn prevented use of all of the following: Armor spell buff, Elf Cape accessory, the Healing Staff, and Bone Mail + Venom Rod healing. Ouch! Merlin could only heal by way of potions and Elixirs. You know what that means... Cure Beast grinding. At least Merlin could kill them quickly with two Air Dagger hits. I raised Merlin from level 38 to 43 gaining a physical multiplier, HP total from 1200 to 1600, and Elixirs up to 23, then tried the Crystals fight for real.
The first step was to damage the fire crystal to the critical range, to force it to start bouncing Fire 3s off Merlin's reflect ring and onto the other crystals. Merlin next worked down the Air crystal too, since its Aero 3 attack would also bounce and damage the other crystals. It might be worth noting the exact elemental mechanics of the crystals. Each crystal absorbs one of the "classical" four elements: fire, water, earth, air. All four are immune to the "other" elements of ice, lightning, holy, and poison. But the three classical elements that are not absorbed do work normally on each crystal.
This was a fun and crazy fight! Spells bouncing all over the place totally out of control! Merlin basically sat there and did nothing but heal with Hi-Potions and occasional Elixirs, all the while hoping that the bounced spells would line up the right way to kill one of the crystals. Aqua Rake and Earth Shaker do not bounce and could imperil Merlin very close to death. I got lucky when two straight Fire 3s reflected onto the water crystal and killed it before the earth crystal was ever lowered to the critical range. That was a great break and big turning point, then the earth crystal also dropped to bounced spells and the fight was well in hand.
To knock off one more crystal needed some luck, since each of the remaining two now had a 50-50 shot to heal itself with its reflected spell. Merlin had to keep knocking each crystal into the critical range while also sucking Hi-Potions constantly, waiting for the bouncing to line up in his favor. He needed about five straight coin flips to go his way, the Fire crystal hitting the Air crystal three times in a row with the Air crystal not healing itself twice in a row. A dozen Hi-Potions later, that happened.

Great, one crystal left. Except... how in the world could Merlin overcome 1500 points of fire self healing every turn? And whenever it healed itself out of the critical range, it would get a couple physical attacks before Merlin could reduce its health again. Running it out of magic would clinch of course, but could Merlin heal himself through 10000 / 27 = 380 castings of Fire 2? Remember the Healing Staff and actual Cure spells are out due to the Reflect Ring, and I had no idea if the Hi-Potions and Elixirs could last long enough. Or was there a way to pull enough damage?
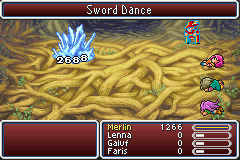
Both answers were found together: Merlin pulled out the Dancing Dagger! Jitterbugs would make up some ground in the healing race, or two consecutive Sword Dances would nail it for 5000 and the kill. That latter is a 1/64 chance on each pair of attacks, but fortune smiled on Merlin and that came after about twenty rounds of combat.
Incidentally, Merlin never cast a spell that whole battle -- so any class that can equip the Dancing Dagger could do the fight this way, if for some reason you had no Flame Ring but a Reflect Ring.
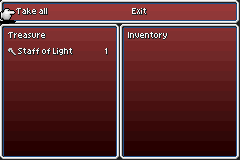
Merlin next had to farm up some Light Staffs from Metamorphas to break on Exdeath. White dealt 9000 with each of two, but I calculated that Merlin at his lower level and magic power would only hit a bit over 4000, so needed four. I didn't mind the grinding because it also accomplished not one but two secondary tasks: each Metamorpha fight was worth 3 ABP to keep adding up towards Dualcast, and running from all the non-Metamorpha fights was powering up the Chicken Knife ahead of time.
Merlin made his way through Exdeath's castle with only a few deaths. He fought most of the random encounters by way of Confuse spells, using the Dancing Dagger as his main weapon. I was happy with any of the outcomes - HP drain, MP drain, confusion, or the almighty Sword Dance were all useful. Merlin could beat a Yellow Dragon but it wasn't worth the resources (had to break several Venom Rods for healing on the Bone Mail), and had to run from Red Dragons or get one-hit-killed from Atomic Ray against the Bone Mail's fire weakness.
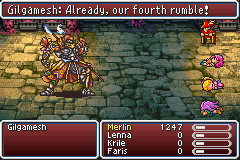
Gilgamesh gave me some pause. Yeah, the fight is optional, but I always feel it should be fought. Somehow I didn't have anything to refer to from White's game. White must have done the fight since he had Excalipoor in inventory, but I don't remember it and didn't write down anything. It was probably the usual long slow clobber with Cure 3 for healing. The only answer I came up with was retrying about ten times until the Dancing Dagger rolled a few Sword Dances and Gilgamesh didn't use Sonic Wave. Took about six Elixirs that were probably ill-spent, but a win is a win.
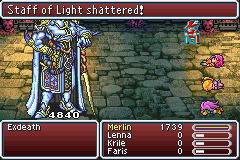
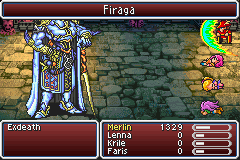
On the other hand, Exdeath was a well-rehearsed drill with Reflect Ring in hand. Retry until he doesn't cast Doom, of course. The four broken Light Staffs would carry our hero through to the second part of the battle... but neither part was easy. I kept getting wasted by his simple Vacuum Wave physical attack. This wasn't a problem for overleveled 4000-HP White or Lucius the heavily armored Gladiator, but 770 damage out of just 1700 health could kill Merlin very quickly. I had to be VERY prompt on drinking Hi-Potions and Elixirs, and had to get back in the back row immediately when Dynamo pulled Merlin up front. It took about fifteen tries at the first half of the battle, and three tries at the second half when Exdeath rolled long strings of physical attacks to kill Merlin rather than reflected self-immolating spells. The final cost was 20 Hi-Potions and 7 Elixirs.
Answer to the Reflect Knight puzzle: It wasn't a Confuse spell, but the monster can be confused with Tempting Tango from the Dancing Dagger. When confused, the monster will cast Reflect on one of your party members, and then you can bounce a spell off yourself onto the monster.