For Antlion, I futzed around a few times with Berserks (inflicted with a Power Staff random drop) and trying to get Sword Dances, then looked up the easy solution, he's vulnerable to Sleep, so it took just that one spell and a pile of Bolt 2s.
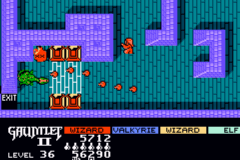
"I've not seen such bravery!" ![]() That's what the announcer in Gauntlet calls out when you beat a boss dragon. But Merlin was going to spend a lot more time heading directly out the Exit instead.
That's what the announcer in Gauntlet calls out when you beat a boss dragon. But Merlin was going to spend a lot more time heading directly out the Exit instead. ![]()
Despite the Chicken Knife and its 3000 damage or instant fleeing, the Pyramid took a while to complete. I kept getting Merlin killed in stupid situations, like being unable to heal with the Bone Mail against large groups of Cursed One/Damned enemies, or the Machine Heads' fire attack into the Bone Mail's fire weakness, or getting paralyzed by an Aspis until the Cursed Ring doom clock ran out. Finally I had to concede that Merlin wasn't powerful enough to bullrush through these battles, and took off the problematic gear in favor of more ordinary stuff. (It actually takes the Running Shoes to unlock the full power of the Bone Mail, as unrelated as that combo might seem. With Haste, you win battles much faster and don't need to worry about the lack of healing.)
Merugene actually killed Merlin, possibly the first time in the history of solos that she's managed that. ![]() Confusion was the culprit. I had to go in with the Bone Mail to prevent that, and then also the Reflect Ring (remember no Flame Ring) to prevent her Fire 3 from being a one hit kill against the Bone Mail. Merlin had to do the battle the laborious but correct way, patiently checking her weakness with the Scan/Libra spell each time then hitting with the right elemental spell. Afterwards, I realized my two errors. One, I never got a Lamia's Tiara helm drop in the Pyramid which prevents confusion without all the Bone Mail drawbacks. Two, the algorithms guide says this boss is vulnerable to Sleep which would indeed make it a cakewalk.
Confusion was the culprit. I had to go in with the Bone Mail to prevent that, and then also the Reflect Ring (remember no Flame Ring) to prevent her Fire 3 from being a one hit kill against the Bone Mail. Merlin had to do the battle the laborious but correct way, patiently checking her weakness with the Scan/Libra spell each time then hitting with the right elemental spell. Afterwards, I realized my two errors. One, I never got a Lamia's Tiara helm drop in the Pyramid which prevents confusion without all the Bone Mail drawbacks. Two, the algorithms guide says this boss is vulnerable to Sleep which would indeed make it a cakewalk.

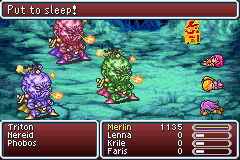
Merlin actually found some new aspects to the Stalker boss fight! He's vulnerable to Sleep. While asleep, he could be hit by a damage spell and would not switch places! But the false images could still act and attack, which was interesting - in the code they really are monsters in their own right. But they could also be put to Sleep separately. Merlin emptied his stock of Bolt 2 spells into the sleeping boss, refreshing magic with a few Ethers, until he died.
Merlin also invented a new solution to Omniscient. He is vulnerable to Berserk (via Power Staff) which shuts off his ability to Reset the fight when struck. His physical attack deals gargantuan damage though, nearly 2000 even in the back row -- but Merlin could handle that! Bone Mail defense and an Armor spell made sure Merlin could survive at least a couple rounds, long enough to inflict Aging status with the good old Ancient Sword, then break Venom Rods on the Bone Mail for healing.
As for Minotaur, Merlin simply clobbered him with the Chicken Knife, once again using the Venom Rod - Bone Mail combo to heal.
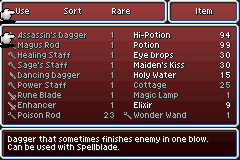
Take a look at this long list of weapon tools that Merlin kept handy. Unlike many solos, Merlin actually had three useful Legendary weapons to claim. The Sage Staff would one-hit-kill most any undead monster. The Magus Rod (Wizard Rod) granted the elemental-up boost to all spells. And most importantly the Assassin Dagger as the strongest weapon that didn't flee from battle. (This weapon is significantly stronger in the GBA version with the bug fixed regarding Agility and the knife damage multiplier - close to double the damage as on the SNES.) Merlin's usual procedure for random encounters was to start with the Chicken Knife and attack one or two enemies. If the flee kicked in, nothing lost nothing gained. If not, then swap to the Assassin Dagger to make sure to win properly and get the experience.
On that list is another great toy Merlin found in Istory Falls. The Rune Blade would become Merlin's primary choice when the Chicken Knife was undesirable. It gets twin multipliers from Strength and Magic Power, like the Chicken Knife does from Str and Agility. It also pierces enemy defense like an axe. So it would average around 2000 damage, pretty competitive with the Chicken Knife. Red Mage is just about the best class to use the Rune Blade, able to use swords but not knight swords and with a high enough magic power to matter. (Blue Mage might too, but he can instead Goblin Punch with fake Excalipoor.) It costs 8 MP per boosted hit, but Merlin could afford that, not really spending magic on his midlevel damage spells much now.
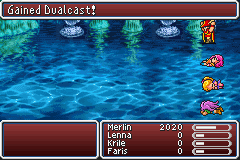
And Merlin finally finally finally finished his job here in Istory. Definitely the latest mastering among any of the solo classes! I was starting to wonder if that would ever come or if Merlin would have to go feed Magic Pots in Phoenix Tower for their 100 ABP. Dualcast was useful in Istory, as Bolt 2 could do enough damage to kill enemies weak to it.
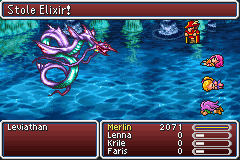
Leviathan went down easily to an equipped Coral Ring, especially considering that Dualcasted Bolt 2s meant twice the Tidal Wave counterattacks to heal Merlin! I even went for style points with the Thief Knife to snag an Elixir.
For the Great Trench, it turned out that the dangerous Unknown blob enemies can be Toaded! That turns off their Possess response and makes them easy meat for the Sage Staff. The piggy trio were also vulnerable to a status ailment in Sleep spells. They do have 60% magic evade, but with Merlin getting four Sleep attempts per round via Dualcast and Haste, it hit quickly. Best of all, sleeping pigs can't cast Delta Attack so it wasn't even necessary to coincide the kills.
By the way, there's a great way to powerlevel here that never occurred to me before. Fight in the room adjacent to the Magic Lamp recharge room and simply use the Lamp every round of combat. Bahamut and Leviathan would win one fight, then Odin the next, then just step down into the water room to recharge it. I could add levels in about five minutes each this way.
That's the four main dungeons and tablets, but we're not done. Merlin wouldn't be a very good twinker if he didn't do all the Side Quests, would he? First up was Odin, which Merlin won pretty easily in time with the Rune Blade.

Then Bahamut, who Merlin actually had trouble with. The canonical solution is to bounce Mega Flare with a Reflect Ring, but most of Bahamut's other attacks like Blaze and Snowstorm and Earth Shaker don't bounce and would rack up enough damage to kill Merlin. Jesse the Thief found Bahamut "pretty easy"? Must be the HP totals. Jesse could withstand those big attacks with over 4500 health, but the Red Mage forgot to put stat points in Vitality (plus he's still underleveled at 48) and is barely cresting 2000.
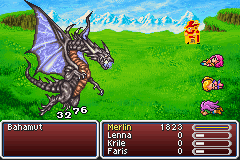
The answer was to get Shell status out of the Wonder Rod, which meant giving up the Reflect Ring (else the Shell bounces), but the Running Shoes are better anyway plus we can cast Armor too. I worried that the fight would become an Elixir fest, but it turned out that Merlin (with the Chicken Knife's +5 Agility) was fast enough to do most of his healing with Hi-Potions, only needing two Elixirs in the last throes of the fight when Bahamut went Mega Flare crazy.
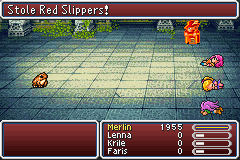
And Phoenix Tower, where the enemies can actually do a fair amount of nasty stuff in death (Roulette) and stone and zombie spells. The Bone Mail protects against some of that, but Merlin had an even better solution. All the enemies in here are vulnerable to Toad! Merlin would open every battle by Dualcasting Toad until everybody was a frog. Then he could do whatever he wanted -- like pull out the Thief Knife to steal some swag and the Dancing Dagger to steal back the MP spent on Toad. What does a Red Mage want with a rainbow dress and red slippers? Don't judge me!
The first boss of any note in the Cleft was Apocalypse. Somehow Sullla has this fight figured out better than I do. Even Jesse the Thief simply said "got him on the second go" without mentioning how. But I always have to try many times. He's got tons of dangerous stuff - Roulette is 50/50 death if you aren't wearing Bone Mail, Condemn, ???? is instant death for up to 9999, White Wind wipes out several turns of attacking, Mighty Guard virtually doubles his HP, Dark Shock virtually ends the fight if it hits early, and the infamous Death Claw.
I did catch on to prepare the Wonder Rod for a shot of Holy damage then Dispel to cancel Mighty Guard once. But what else is there to do? All I could do was hack with the Chicken Knife for 3000 and retry until it rolled enough hits and Apocalypse rolled enough misses. Breaking Venom Rods into his poison weakness or summoning with the Magic Lamp both didn't do any better, less damage than the Chicken. This took twenty attempts and over an hour until the AI script and random factors went Merlin's way, even a ???? and Dark Shock both had to MISS at low odds. I was really dissatisfied with this battle. What am I missing here?
Even Catastrophe then took twenty attempts too. He kept killing Merlin with the Demon's Eye stoning attack, ten times in a row. I eventually got it done by getting Aging status out of the Ancient Sword on the first round, so that Merlin would both get a speed advantage and not have to spend turns healing from his weakened Earth Shakers.
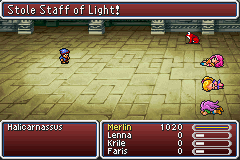
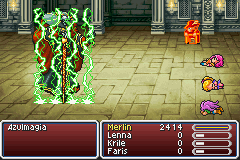
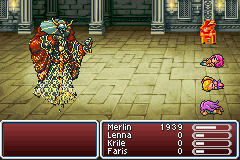
Now it's time for some comic relief! A Reflect Ring stopped Halicarnassus' Holy which is his/her only dangerous attack. And the Algorithms Guide revealed a vulnerability to Mini. Then I wanted to steal a Light Staff just in case it was needed, so I left Merlin as a toad to attack with the Thief Knife but deal little damage. A little doll fighting a toad - hilarious stuff! Eventually Halicarnassus suicided with reflected Holys -- except that there's no graphic for the little Mini sprite to dissolve away so it just stayed there. ![]()
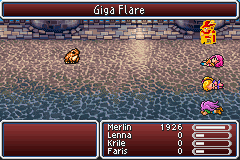
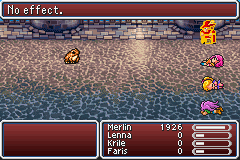
More comic relief: Twin Tania is vulnerable to Toad in the "Charging up for Giga Flare" form! (Oh, there's tons of ways to abuse that form: Death, Break, Stop, Odin, Shoat, Death Claw, Condemn, Doom Axe/Assassin Dagger.)
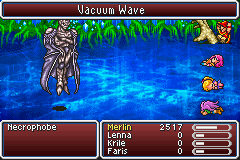
Necrofobia took a ton of planning, but I got it right.
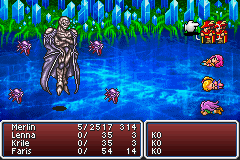
1. Equip Running Shoes, and the Black Robe as the best armor that isn't the Bone Mail.
2. Prep the Magic Lamp for Golem and the Wonder Rod for Image.
3. Image status from the Wonder Rod for later (just enough time to do both this and Shell before the first barrage.)
4. Shell status from the Wonder Rod, absolutely required to survive the first round of spells from the barriers. (Survived it with 5 HP there!)
5. Alternate Elixir and attack until one barrier is dead.
6. Outrace the other three barriers with Dualcast Cure 2 until they run out of magic.
7. Get in the back row and cast Armor to make Golem last longer.
8. Cycle through the Wonder Rod until Holy is ready for Necro's weak form.
9. Kill the last barrier.
10. Hit Necro with Dualcast elemental spells; 3600 per round is more than the Chicken Knife and works from the back row.
11. Pray that his Death spell doesn't come up. It did at 1/3 odds on my first four attempts! Then it did again on the successful attempt, but actually missed!
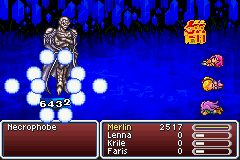
I was REALLY proud of that fight. Merlin outplayed and outmatched the boss through sheer versatility, and didn't even need to break rods. Dualcast Fire 2s were just enough to kill him in one pass through his AI routine needing to dodge his Death spell only once. Hurricane never hit, although would not have mattered if it had, since Golem with Armor on lasted the whole time.
So Merlin claimed the final save point as the lowest level among any of our solos, just level 52. (Newton says he was 50 but he was actually level 255 when he beat Necrofobia. ![]() ) I hadn't intentionally tried to keep Merlin low, but he was able to solve everything without powerleveling, plus he Chicken-fled away from most of the third world. He did pick up a couple more levels on his Void hikes out and in for a Magic Lamp recharge and buying 99 Venom Rods.
) I hadn't intentionally tried to keep Merlin low, but he was able to solve everything without powerleveling, plus he Chicken-fled away from most of the third world. He did pick up a couple more levels on his Void hikes out and in for a Magic Lamp recharge and buying 99 Venom Rods.