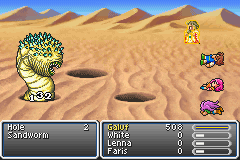

Sandworm was a non-problem. After five hours on Byblos, fifteen minutes on this boss was positively sprightly. So much easier when you actually have your levels.
For CrayClaw, I looked up the adventures of Jesse the Thief again. Like Karlabos, this monster can dish out an instant near-kill with Tail Screw, except that CrayClaw can also inflict HP Leak status to make the kill truly instant. Tail Screw and the move called Slimer/Mucus in either order spells unavoidable death. Jesse was eventually able to win through random repetition, needing to survive 18 rounds with his knife. But White would have to go much farther, needing 37 hits with his inaccurate flail, plus he didn't have the Guardian Dagger. Argh. Random repetition would not work within my lifetime, so how could White do this?
Well, check the algorithms guide. Maybe he's not immune to the Mini spell which White had just gotten... nope no luck. But take a page from Byblos's book: Confuse!

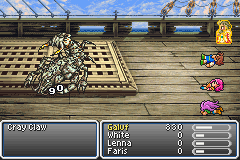
There we go! And CrayClaw's AI routine when confused played enormously to White's favor. He would only use Fight, and only at 1/3 chance on each turn, so more often than not the turn would cycle back to White to have another Confuse ready to go right away. The other great part of Confuse is that when the target eventually escapes, its action bar still gets reset, meaning more time for White to get a turn. So CrayClaw was never able to put together a lethal combo. In fact Tail Screw never once hit, with about eight attempts total all missing White. CrayClaw worked through his own 2000 HP and White won this battle on his first try with the right approach.
Adamantimi was a non-event with White armored up in the back row taking quarter damage and easily out-curing the boss's strikes. The Diablo 2 Monster Regen Problem works the other way too: if the monster can't out-damage a player character's regeneration, the monster can't ever win.
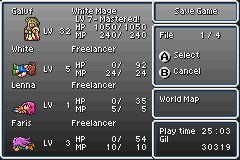
After a brief try at Sol Cannon, I decided to level up White for at least one more attack multiplier at 32. He was only level 28 so far, actually lower than some of Sullla's solos. Arthur the Knight had to go to 31 to beat Byblos, Spoony the Bard to 32, Barnum the Beastmaster to 31.
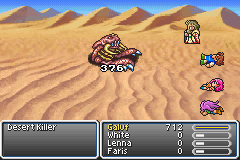
The easiest enemies to kill for leveling were Sand Killers in the desert, of all places. Undead but not Heavy, they would die quickly to the Healing Staff or instantly to a Raise spell. White had used these to level for Byblos. But this wasn't really the best place to work; they only appear as one out of four encounter types, and often run away of their own volition.
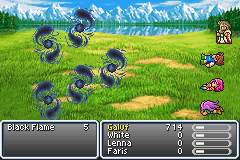
While trying different random encounter groups, White amused himself by creating some real havoc with Confuse spells on a large group of enemies. Which turned up a real oddity in the mechanics. The back row penalty applies TWICE if a monster is in the back row and attacking itself in the back row! A monster would deal QUARTER DAMAGE to itself just based on where it is standing! Bizarre logic, but entirely understandable from a computer code point of view.
Finally White settled down outside Jacole. Here was the hilariousest method I've ever found of powerleveling. Fast too.
White had exactly enough gold (50,028!) for either a Flame Ring or Angel Ring but not both. I took a shot at the Ronka Ruins' Flame Throwers without a Flame Ring to see if the purchase could be avoided. And yes, the Healing Staff could once again just barely overcome the monster damage rate, 450 per round versus 180 x 2 from the flame guns, with enough excess to cover the times they (faster than White) would act twice. White could slip in an attack on about one out of ten rounds, making his win inevitable although extremely slow.
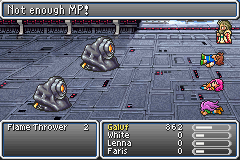
Then just as I was about to go reset and buy a Flame Ring to speed things up, they ran out of MP. ![]()
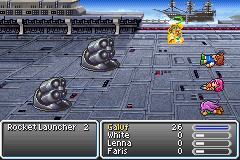
I tried to beat Rocket Launchers the same way: keep the Healing Staff in hand so White would self-heal when confused, then bash when they ran dry of magic. Unfortunately their Rocket Punch confusion move does not use MP and White eventually died. White couldn't use Arylon's solution of equipping a really weak weapon unable to punch through the character's own armor when confused. He still had the plain Staff weapon which is weaker than the Flail at 13 attack maximum, but he couldn't assemble 13 defense. So I rerolled each encounter until getting Flame Throwers instead, which seems to be standard procedure for most weak solos.
White did need the Angel Ring for Sol Cannon. The Heal/Esuna spell can repair Aging status, but it consumed too many turns that needed to go to other actions. It's also good simply for general use until the Running Shoes turn up later.
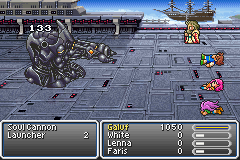
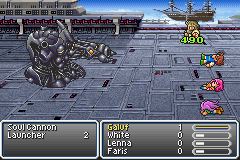
I knew Sol Cannon itself wouldn't be a problem: plenty of time to Heal Staff to max. The big attack Surge Beam comes only once every eight turns. But White couldn't get past the Launchers! Their missile attack deals half of current HP in damage, and Surge Beam from the main cannon deals half of max HP. No matter your current life total, the one-two punch is a kill shot. A solo character MUST heal between the last missile hit before the main cannon's Surge Beam. Except that the missile attack is only 75% accurate - and (at least on the GBA version) the screen doesn't even display any attack message when it misses. If no missile fires, you have to guess on the timing.
Also, the Healing Staff wasn't enough. It could not heal more than half of White's max HP. If White was at a sliver of life after the missile attacks (frequent), the staff would bring him up to just 450 out of 900 leaving him to die to the Surge Beam. Ironically, this didn't work because White was TOO HIGH a level. At a lower level, max HP would scale down faster than the Healing Staff's power, leaving the Staff able to replenish more than half or almost all of the character's HP. And Galuf was the wrong character here; anybody else would have fewer HP and greater magic power. I had to resort to Elixirs instead.
And the Algorithms Guide revealed no weakness this time. The Launchers and Sol Cannon are immune to Confuse and Mini, the only two status ailments White could inflict. The only way out was in.
I had to get very good at sensing the time interval between Sol Cannon's last message ("Energy Cells 128%") and the Surge Beam, and at seeing the very brief pauses when the Launchers would seemingly skip a turn (in reality trying a missile attack that missed, which shows nothing on screen.) It felt like playing pinball of all things. Desperately batting White's life total back and forth over oblivion with split second timing. Most of Sullla's solos could take out the 800 HP Launchers in a couple attacks and eventually luck their way through. White averaged 100 damage with his flail, and had to keep up the perfect Elixir timing for twelve or more cycles of the main beam to get through both launchers.
It took about thirty tries. A great swell of relief rose up when that second Launcher finally exploded! Needed 9 Elixirs total; after one Launcher was gone I could sometimes substitute the Healing Staff.

White wasn't done yet, he still had to chew through 12,500 HP of the main cannon. But now the fight was purely deterministic and the Healing Staff could overcome Surge Beam for eternity. I worked out and settled into a routine where White could get two attacks and three heals to every two cycles of Surge Beam, kept it up making no mistakes for a hundred Surge Beam cycles, and claimed my victory.
An hour forty for this battle. I've had worse.
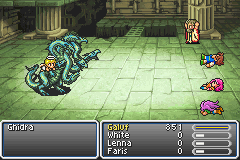
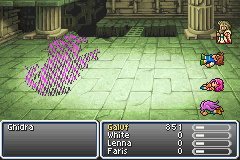
In the Ronka Ruins came an opportunity that I had figured out some time ago and eagerly anticipated. It involves these Ghidra enemies (Hydra in the SNES translation). These foes offer White his best chance for powerleveling in the entire game by a huge margin. They are undead but lack the Heavy flag. That means the Raise spell could kill them instantly, but they have Reflect Wall status to foil that. But a Phoenix Down bypasses that (you can see the little angel sprite there) and does land the instant kill! And they pay out a humongous 3108 experience, more than you get from any other random fights until mid third world.
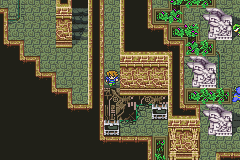
Also, they're not always rare encounters. The central section of the bottom floor by the boss and these chests has a different encounter set where the Ghidra is common.
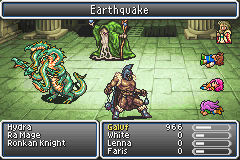
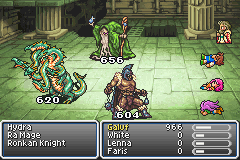
This other encounter was also very easy and worth doing for 2250 exp. White could Confuse that Hydra enemy (Hyudora on the SNES) which would cast Earthquake and wreck its own team. White could also play tricks with the Ra Mage which would cast some nasty spells too. He felt like Barnum the Beastmaster, getting monsters to do his dirty work for him!
And importantly, this chance comes right before the one time I need to powerlevel Bartz as my second solo white mage for the three fights where Galuf will be absent. Yes, I already have my strategy for the Purobolos nailed down: level Bartz over 1500 HP so he can take an explosion. Sorry, there's just no other way to do that. (Confuse won't work. I'd be dancing over the stars tonight if it did.)
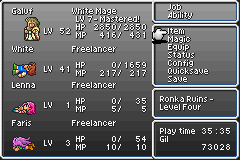
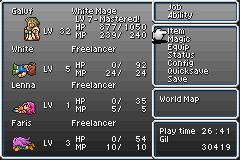
So I took Bartz up to level 41 and 1650 HP as a white mage, then switched back over to level Galuf too. How high should I go? This is far and away my best chance for a long long while, and I kind of don't think there is any such thing as overleveled for a solo white mage. I took White all the way up to level 52 here, adding a magic multiplier at level 51 (with Healing Staff, 51*51/256+4 = 14.1) and attack multiplier at 52 (20*52/128+2 = 10.1). And M = 10 also means that all the damage numbers are multiples of 10 and easy to track in my head. ![]()
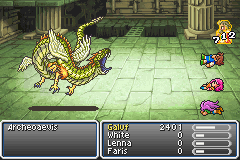
So after five hours of messing around in the Ronka Ruins, White finally moved to take on ArchaeoAevis. The first three forms were no problem, the Healing Staff easily outpacing everything they could do. It took a good fifteen minutes real time to get through these forms, but White was never in any danger of losing. For what would be the only time in this variant, I resorted to a save state. It added nothing to my experience to repeat this busywork every try.
The fourth form could kill White, by using its Claw paralyzation attack and wiping away his life with its Lightning spell which deals 1/4 of max HP. The only answer was Sullla's usual solo solution in the Elf Cape to attempt to dodge Claw. (Too bad White couldn't use the Guardian Dagger on top of that.) And the only way to win was to keep clobbering with that sad little Flail for 100 damage per hit. This form would kill White rarely, on maybe one out of four attempts.
So White got to the final form, which despite being named "The Undead Form" in most guides, is not in fact undead. Cure spells don't damage it. It brings lots of nasty stuff: attacks that confuse, paralyze, and Maelstrom. I had to give up the Healing Staff and just keep attacking, hoping to shorten the battle and luck into winning with enough high damage hits to get through its 2500 HP. I had to rely on the better turn economy of Elixirs for healing rather than the staff. Still, that Flail did just enough damage that there was hope. White's average score before dying was about 1000 damage, so just gotta keep it up a bit longer. Comically lost one try somewhere over 1500 damage when White got confused and CAST CURE 2 on the boss twice!
Then one try passed 2000 damage, then 2400, then 2490.
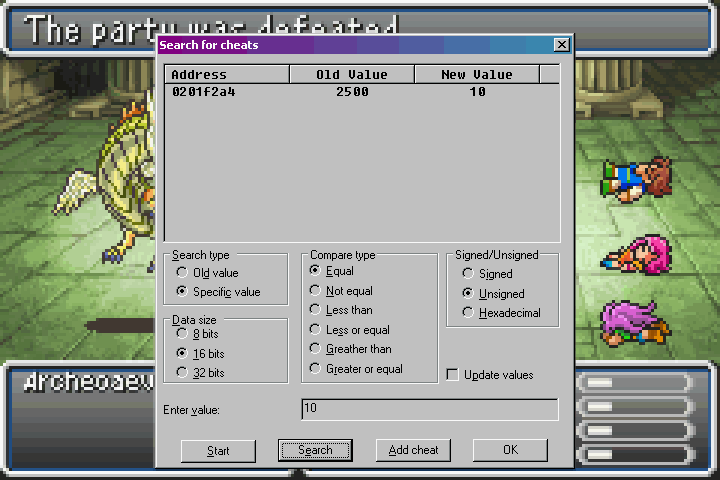
ARE YOU SHITTING ME. TEN HIT POINTS. ONE HIT AWAY and ArchaeoAevis goes Paralyze - Confuse - Maelstrom - dead to a self hit. I was PISSED and almost gave up the variant entirely here.
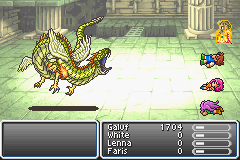
But two tries later, about twenty total, everything went White's way. Twenty Flail hits, six missed Maelstroms, only four Elixirs, and one dead boss.
I alertly returned to the save point in the Ronka Ruins and kept a separate save in another slot, in case Bartz as my temporary soloist needed any more leveling for the three meteor minibosses. Also unequipped everything from Galuf before he disappeared so Bartz could use it.
Manticore/Chim.Brain was a joke as always, easily out-healed. So was Titan, which had worried me a bit, but Healing Staff did beat Earth Shaker which he really doesn't use very often anyway.
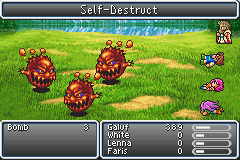
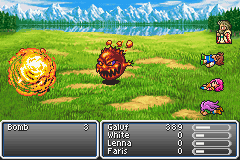
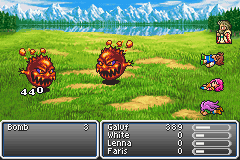
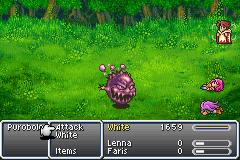
Last up were the Purobolos, the sextet of little bombs that can blow themselves up for a damage count equal to their current HP that can't be dodged or modified. And if you kill any, it revives all its friends with full HP. White's only plan was simply to survive one 1500 HP explosion at a time and then heal up. It worked to perfection. White could even survive two explosions in the same round if he waited for the turn to use an Elixir instantly between them. It only took about five tries to get the needed results. (Any character willing and able to level up over 1500 HP can do this fight this way.) The last bomb went forever without blowing itself up, so White worked it down with the flail and killed it after a Mute.
Whew! Well, there you have it, a solo White Mage has gone all the way through the first world. Not Karlabos nor Byblos nor Sol Cannon nor ArchaeoAevis could stop White's quest. White ran one last errand to the Ship Graveyard to restock 20 Elixirs (grinding them from Cure Beasts would be so slow, and we only need Elixirs as far as the Atmos fight then White gets Cure 3), and on to the second world.
Index | Next(A footnote to explain fully what's going on in that "cheat" screenshot of ArchaeoAvis. I had used the emulator cheat-search function to find the memory locations for boss HP. I made a test run, setting each form to 1 HP, in order to skip ahead to the final form and test whether it was truly undead or not. If Cures could have killed it, I wouldn't have done so much leveling up. I never used any cheats for real, but the memory location was still there to show how close White had come to that boss kill.)