Sid Meier's Alpha Centauri - Morgan Industries
This is a writeup of a playthrough of Sid Meier's Alpha Centauri, with the Morgan Industries faction.
This comes after my game with the Hive, as chronicled on the Realms Beyond forum. I had intended to rework that thread into a page on this site, but the narrative really needed and was intertwined with the interaction and banter with the other forum participants. So I'll let that thread stand as it is, and start a new game with a new writeup here. That Hive game was intended to be a normal and typically representative tour through SMAC, but I had in mind all along a followup that would show a drastically skewed one.
The purpose of this run is Morgan Industries. I want to show the right way to play him. There's more questionable information about Morgan out there than any other faction, so here's my contribution to that.
One of those inaccuracies is that Morgan is a good faction in the first place. He's not. Morgan's economy rating does not make him productive or rich. Free Market does that, but it does so for every faction who can usefully run it. To review the Economy SE function (correctly; the datalinks in-game incorrectly describes +3 and +4):
- +0 Economy: Normal energy production
- +1 Economy: +1 energy every base
- +2 Economy: +1 energy per square (most factions with Free Market)
- +3 Economy: +2 energy every base (Morgan with Free Market, most factions with FM + Wealth)
- +4 Economy: +2 energy every base (Morgan with FM + Wealth)
Morgan takes no particular advantage of Free Market. There is no SE combination where Morgan gets more out of Free Market than does anyone else. The important threshold of Economy rating is +2, which Free Market alone reaches for any faction besides the Hive. Morgan's faction rating on top of FM, either with or without Wealth, yields 2 energy per base.
That 2 energy buys 1 mineral... which is exactly what Morgan loses to his support penalty. Except for his starting cash, Morgan really has no advantage over a blank faction. That support penalty looks minor but virtually erases his advantage entirely. Morgan should indeed still run Free Market, but that is because FM itself is so good and Morgan is barred from the alternative of Planned, not because Morgan is any particularly good at running Free Market.
And all that is before we even get to Morgan's hab limitation and trouble population-booming (barred from Planned economics.) Those additional handicaps clearly set the faction as below average in power. Morgan does get additional commerce from a treaty/pact both directly as a faction power and from the higher economy rating, but that's still a small margin and also depends on cooperative AIs.
Between the extra energy per base, the support penalty, hab limitation, and pop-boom difficulty, Morgan skews drastically towards ICS. That really is the right way to play Morgan. ICS is not unethical or immoral or cheating or dirty; it is naturally the result of the confluence of all those mechanics. Any self-inflicted restrictions away from ICS are exactly that, a self-imposed variant handicap, not some more noble or pure approach. I intend to take advantage of this to the max, to demonstrate what really is the strongest game plan for Morgan.
This is Morgan's real power: he is the only faction that can reach +2 Economy without Free Market, by way of his faction rating plus Wealth. Morgan's power ultimately isn't to leverage Free Market, it's to avoid its drawbacks. In light of this, we see that Morgan among all factions loses the most from his forbidden SE choice by far. Morgan is the only faction that could have +2 Economy while running Planned economics. That would be a spectacular state of affairs: easy population-booming to work the energy-boosted squares and an industry bonus multiplicative with spending it. But that's sadly forbidden.
But there's one other option available: Morgan is the only faction that can run +2 Economy along with GREEN economics. This is, counterintuitively but truly, the best SE setup for Morgan later on. The growth penalty is tolerable, since Morgan has no headroom to pop-boom anyway. The efficiency directly provides better income and a higher labs slider... or can be used to offset Police State's inefficiency to in turn offset Morgan's support penalty.
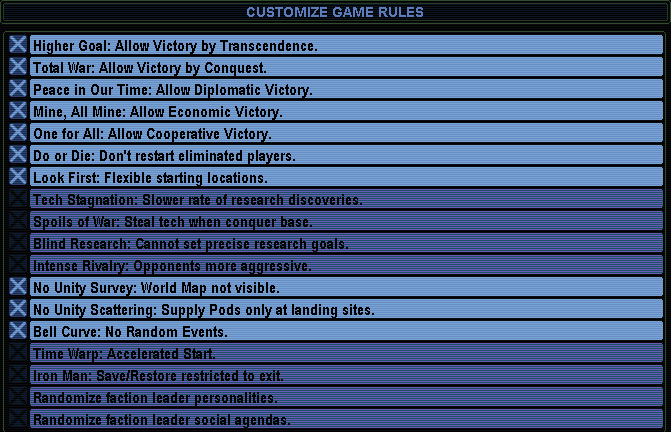
This uses the same settings as the Hive game. Base SMAC, not the expansion or any mods. Transcend (highest) difficulty, standard map size, low ocean for more room, standard erosion and rainfall and native life. Game settings: all victory conditions, no pod scattering, no random events, directed research. Also Do or Die (no respawning), which is enabled thanks to a loophole that arises without it: Morgan can delete all his starting units to intentionally respawn, which makes the program add his starting 100 credits a second time! I'd prefer not to do that, although a dedicated speedrunner would.
I had actually rolled this map and start before the Hive game. I had practiced for that with a few partial starts with different factions. I really liked the look of this one Morgan start, so saved it for the followup game.
It is similar to the Hive start, with a good amount of land and a river, but no big nutrient or mineral or jungle bonuses. The similarity is intentional; knowing that I had this Morgan start factored in to what I was looking for with the Hive start. Both starts are solid but not spectacular and should be typically representative of what you can encounter in most playthroughs.
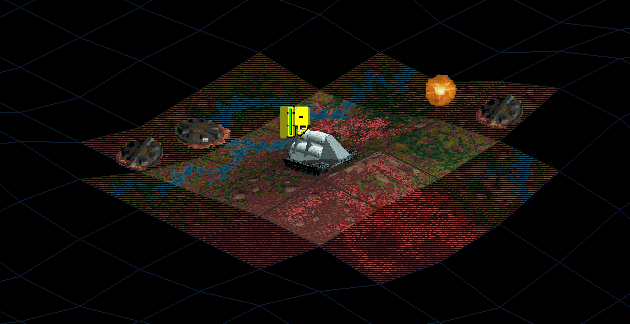
One difference from the Hive game is a few Unity Pods. Let's see what they yield.
On turn 1, I moved both colony pods onto the river, and the scout east towards that unity pod, revealing one more on that next river. On turn 2, one colony pod moved along the river to pop Lal's comm frequency from the pod; will be helpful later, but I don't really want to talk to him right now. Meanwhile, the scout popped a Unity Rover from his pod, that's a very nice result to speed up exploration. The rover comes with its movement points available, but failed its attempt to enter the fungus tile for that next pod.
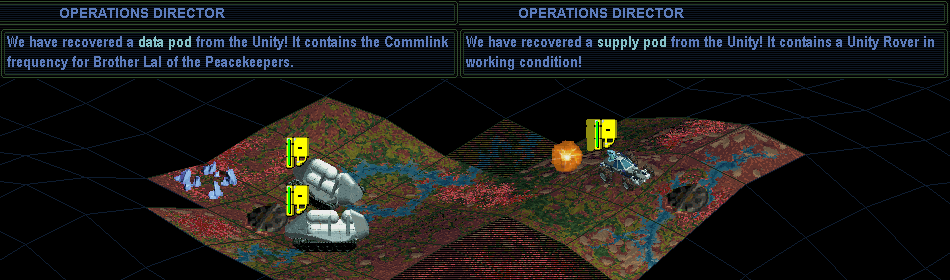
Then still on turn 2, I planted bases with both colony pods, on the river. Each has a rolling-rainy-river tile to work (circled), that's the best starting tile you can get without a special bonus.
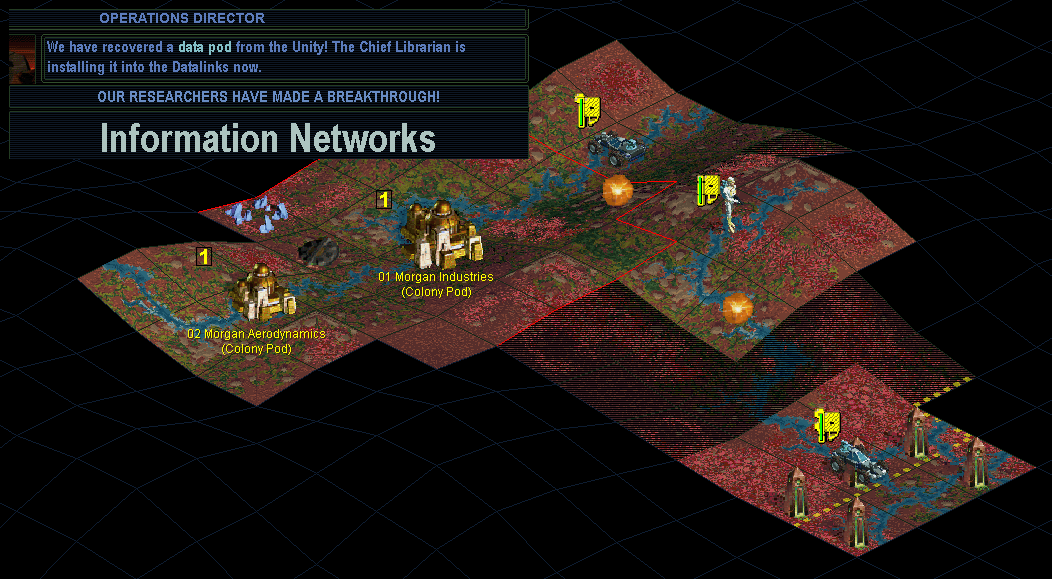
Next turn, my scout popped the other pod to the east, which yielded a second Unity Rover, which then slid all the way down that river to find The Ruins. Meanwhile the first rover came onto the river in order to go back west, and next turn would pop that last pod which yielded a nice tech of Information Networks.
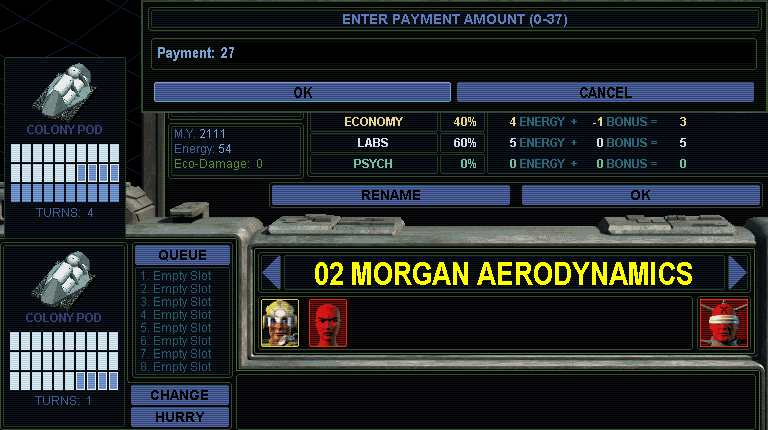
The Colony Pod build orders shown in those two pictures are not real. Those are placeholders that would be changed to terraformers. As usual, I set my first research to Centauri Ecology.
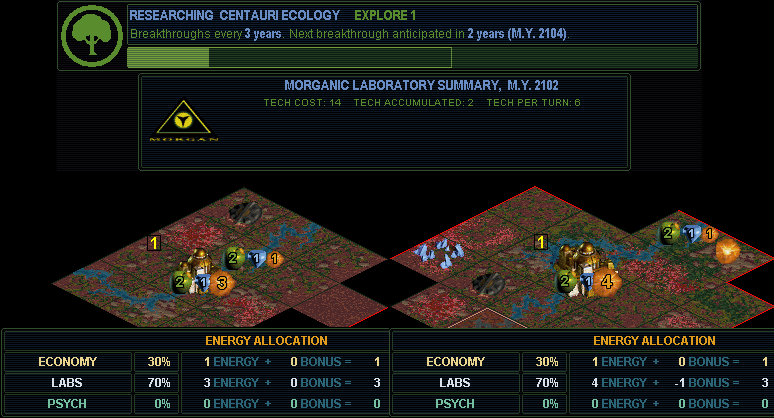
Which I could get in exactly two turns from 2102. I had two lab points from popping Unity Pods. I could produce 6 labs/turn from the two bases, reaching the total needed of 14 exactly in two turns. That's at least a turn faster than most other factions could do this, with Morgan's economy yielding an extra 1 energy per base. Fiddling with the slider showed that 70% labs would get me the most, with each base yielding 3 labs, even though the HQ (on the right) loses one to the unbalancing penalty.
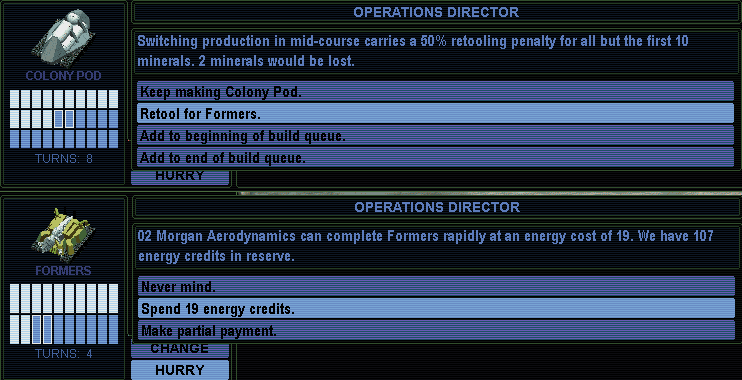
Two turns later, as planned, Centauri Ecology finished, and I changed both build orders to formers and rushed them. That's how to put Morgan's starting energy credits to use the fastest. There wasn't anything to rush before the terraformers - a colony pod requires population, scout units weren't necessary with the two unity rovers, police units won't help because we're headed for Free Market. To rush these formers, I paid the full amount, instead of partial-rushing so the base's normal mineral production would complete the item; I wanted those two minerals of overflow so the bases could get back up to 10 in the box to enable the next rush sooner.
This put out those two terraformers at the start of turn 2105, five turns faster than did the Hive game. Morgan's economy rating is illusory, as I described, but the 100 starting EC is real and is the faction's biggest strength. Morgan can deploy formers faster than anyone else (even Gaia who starts with the tech), and also has no problem paying for his first SE switches into Free Market and Wealth.
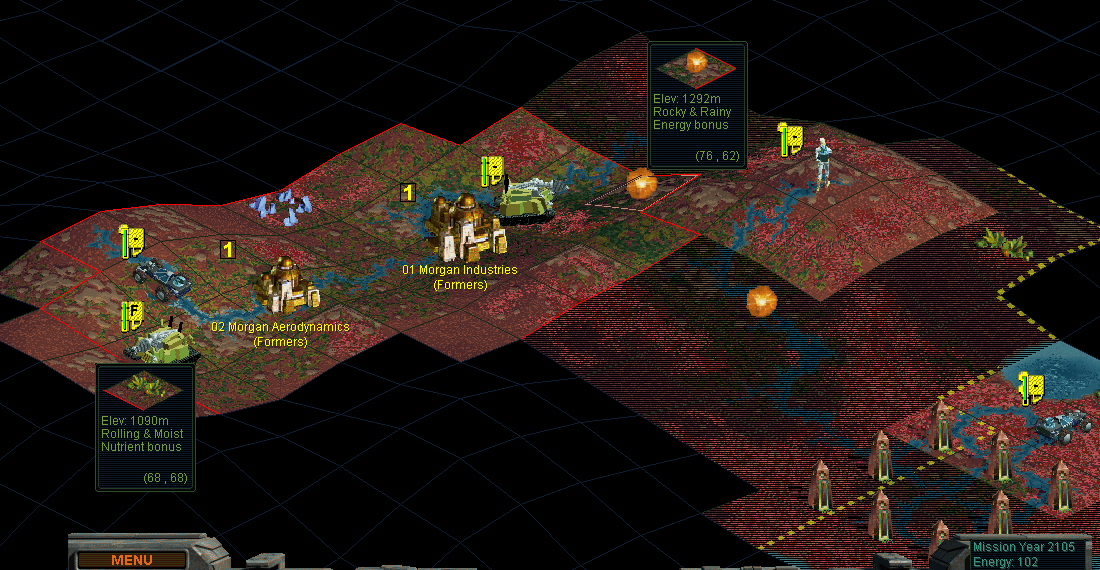
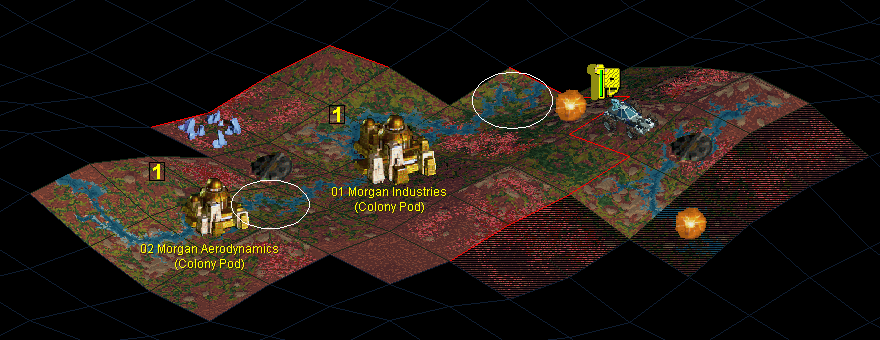
The west rover had found a nice rolling-moist-nutrient tile in range of Morgan Aerodynamics. That former went to forest it.
Morgan Industries' former took an interest in the highlighted tile over there: rainy, rocky, energy bonus, 1000m altitude. Importantly, the bonus uncaps the energy yield of that tile, and the altitude means a solar collector will add 2 more. To level the rockiness into rolling is a significant investment of former labor, 8 turns for that plus 6 more to build the solar, but then the end result with Free Market comes to a 2-1-5 tile. I'm not entirely sure this was the best choice this early, but it was interesting enough to want to do.
After Centauri Ecology, of course Morgan like every faction wants to beeline directly to Industrial Automation, for the Wealth civic and supply crawlers. So the next research towards that would be Industrial Economics, to enable Free Market. (One subtle advantage of Morgan is a good starting tech, Industrial Base as the prerequisite to Free Market.) The tech costs 14 labs and I can't get more than 6 per turn, so it's going to take three turns, finishing at the start of 2107.
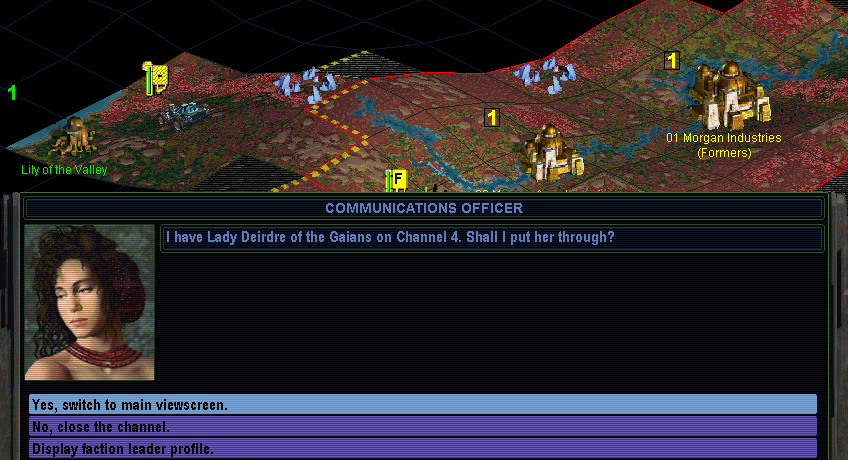
2106: My rover finds Lady Deirdre of the Gaians faction! Just like the Hive game starting next to the Peacekeepers, this game also sets my faction right up against their ideological archenemy. Gaia asks for a treaty and I may as well say yes, though it doesn't result in any commerce income just yet. She also knows Applied Physics and would sell it to me for 100 credits, but heck no to that price.
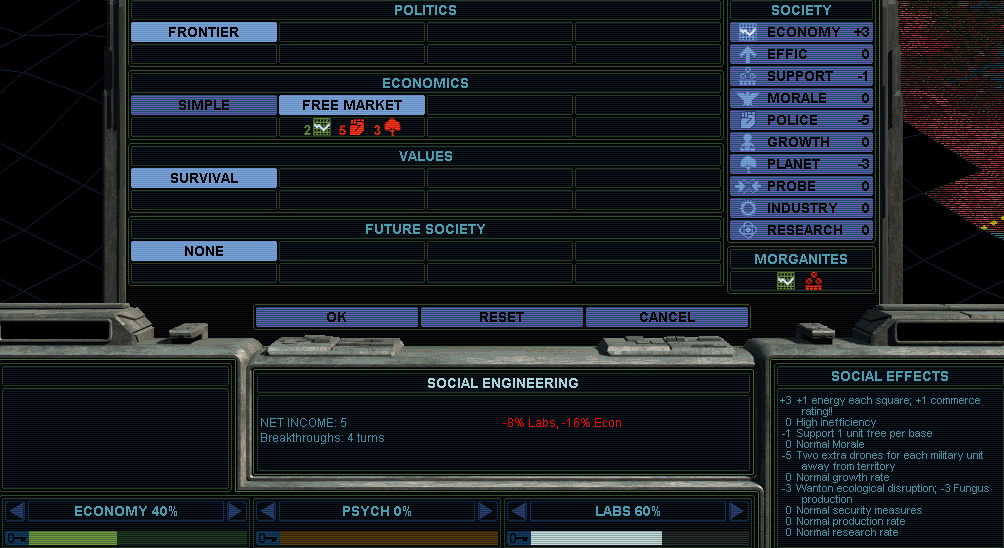
2107: Industrial Economics completed, and we adopt Free Market. I had tweaked the slider such that Morgan Industries HQ would produce enough labs to get the tech, so the pop-up asking to switch to Free Market came in the middle of upkeep processing, so that Aerodynamics could immediately make use of the civic on the same turn. It turned out that peak labs was now at 60% slider, with nothing lost to unbalancing.
Next I ordered research on Planetary Networks. I knew well from prior experience that Industrial Automation would not appear as the next choice to research beyond that, thanks to the missing-tech mechanic. I needed to acquire one more tech somehow before Ind Auto could be researched. This would be a great time to trade for a tech, just to perturb the modulus...
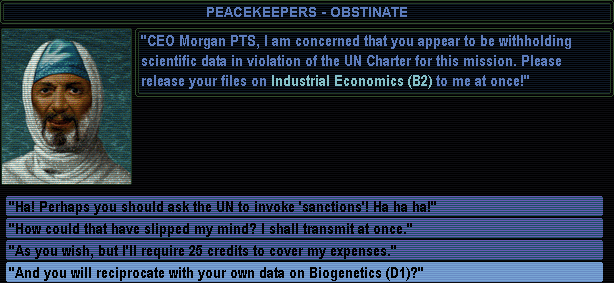
and Lal was nicely agreeable to what I needed. Planetary Networks would finish and Industrial Automation would start in 2111.
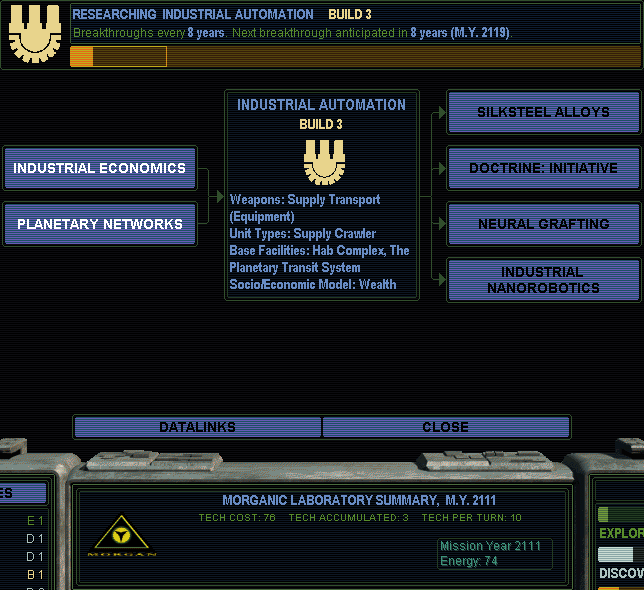
Ind Auto costed 76 labs, a drastic increase from the 14 of the first couple techs. Planning out these early beelines precisely can be quite important in terms of speed; acquiring any unnecessary techs can be a minor pain in bumping the costs, and a major pain if the missing-tech mechanic forces you to temporarily skip a key target. It says 8 turns here but that would come down to 6 total by founding my third base.
2109: Both bases have 10 minerals in the box again. Morgan Industries rushes its terraformer for 25 credits. Aerodynamics changes to a colony pod, since this base will grow sooner by two turns, thanks to the nutrient bonus tile.
2110: Aerodynamics is due to grow this turn. I have to go to 20% psych to keep the second citizen happy after growth, a minor loss but better than a doctor specialist. It will only spend one turn at this size before rushing the colony pod.
As usual, I do the rush by partially spending only enough so that the base's natural production will complete it this turn. Note how the psych slider can go to 0% now; we can ignore the riot apparently to be caused by that second citizen being a drone, because he will be gone into the colony pod by the time the base checks its happiness.

That pod then settled here. I had that former build a road on the tile where you see it, so that this pod could reach that spot to settle all in one turn. (It's worthwhile to spend 3 former-turns to gain one base-turn, plus I get the road too.) It's on the river for the income, and also claims more land towards Gaia. The new base then worked the food-forest tile, since Aerodynamics could switch back to the rolling-rainy-river tile which is also good. I immediately used the new base's 10 free minerals to rush a former.
2113: Morgan Industries now grew to size 2, also necessitating 20% psych again to keep the second citizen working. But notice the mistake I made here. The base grew to size 2... before it had 10 minerals in the box to be able to rush that colony pod! (Rushing costs double when the base has less than 10 minerals.) The second former from here had been a mistake, thanks to that support penalty. I didn't need that former yet - I didn't need more improved workable tiles yet, all it was doing was building roads, which could have waited, and its support cost me turns on this colony pod. Anyway, I decided the best way I could handle this was wait one more turn (bleeding the 20% psych once more), pay the doubled cost for 1 mineral so the base would reach 10 one turn later at the end of 2114, then rush the colony pod and drop psych in 2115.
2115: My one forest tile grew onto another, always nice to have that happen soon, doubles the chances of getting more to follow. (If I were inclined to do a speed-run game with luck abuse, a major component would be to reload every turn roll repeatedly until getting spreads from almost every forest.)
2117: Industrial Automation research finished, after some fancy slider juggling (80% science) to eke out exactly enough lab points. But I had only 24 credits on hand, not enough to afford the 40 to adopt Wealth. I chatted with Gaia to ask for money; she paid me 25 credits for one tech, but also stunned me with this:
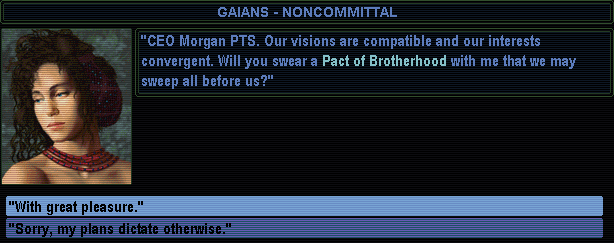
A pact offer, even though I already adopted her abhorrent Free Market! Well, I happily took it. Could this last long enough until I can get into her favored Green agenda?
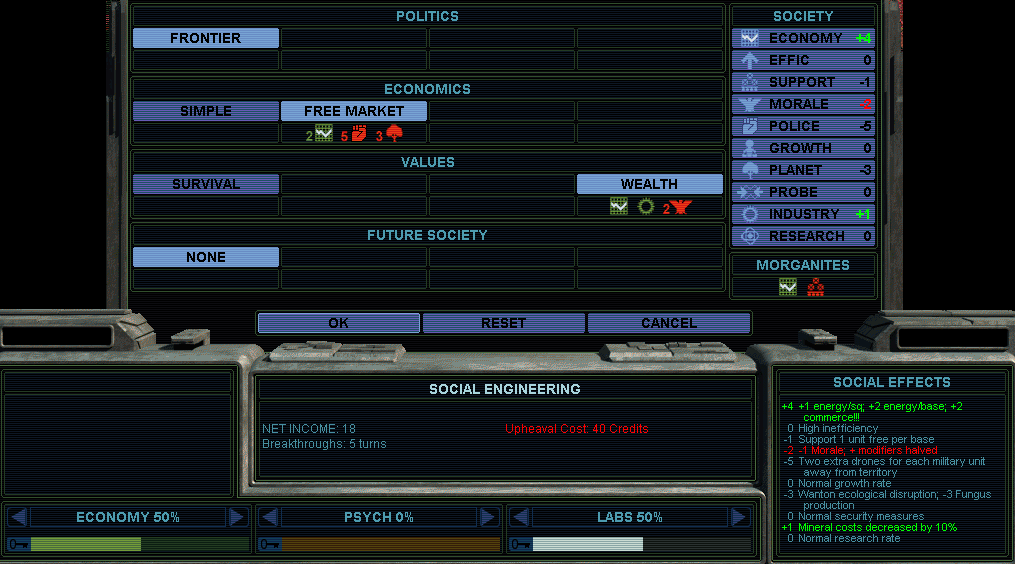
And so we happily adopted Wealth. Also on this turn my colony pod from the HQ went upriver to plant my fourth base, and my scout also met Sparta to the north.
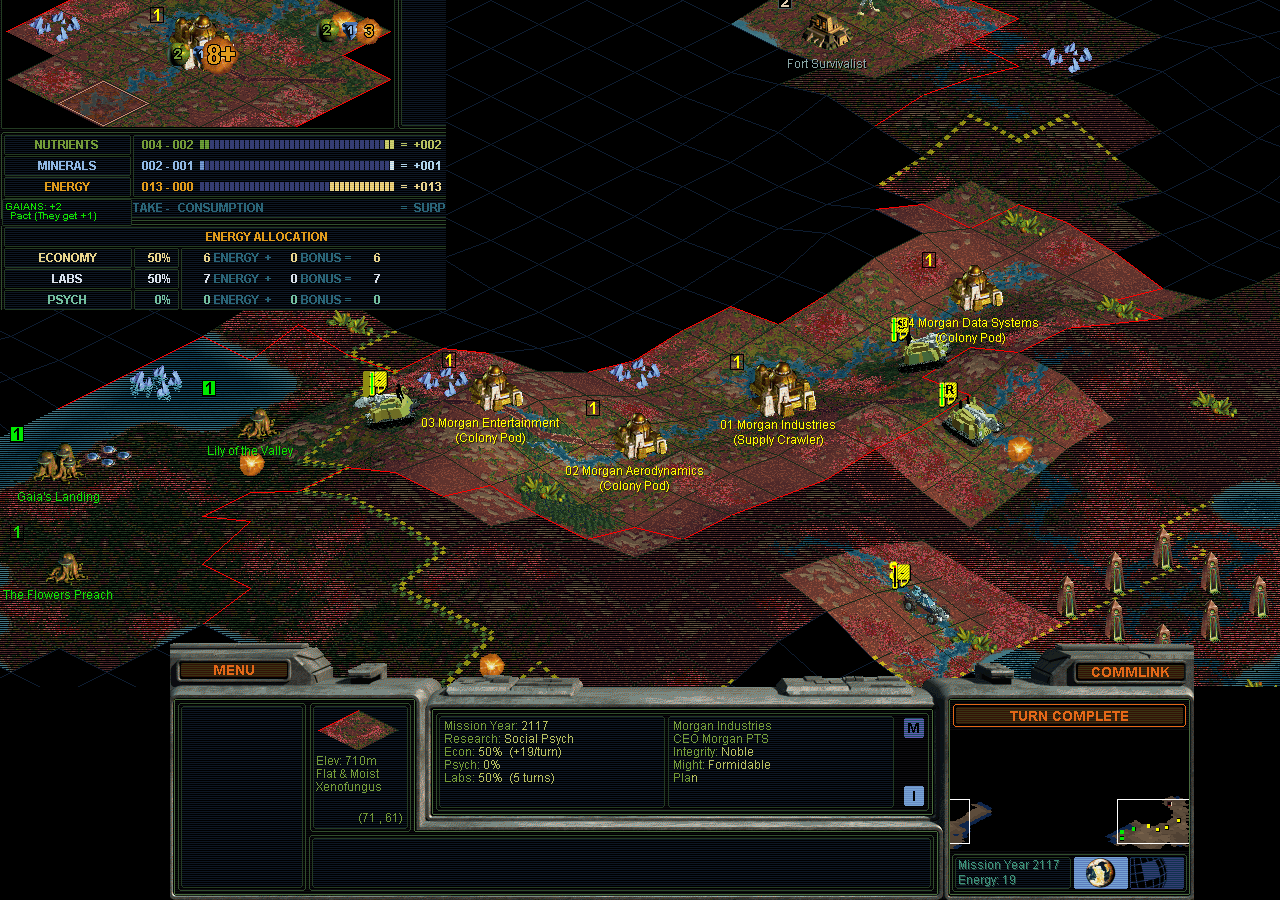
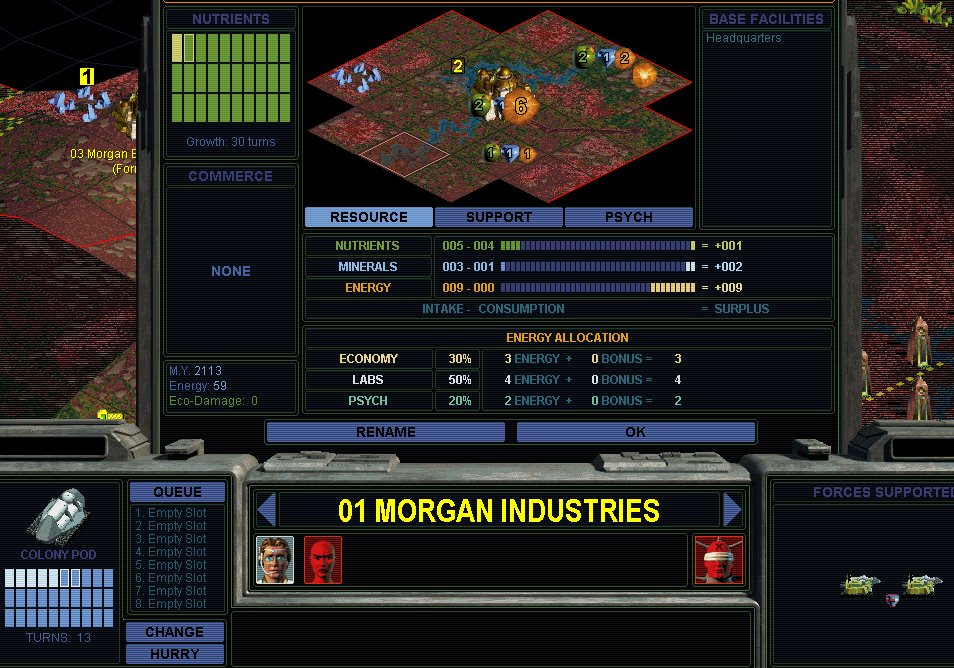
Here's an overview at the conclusion of that important set of opening moves. Four bases by turn 2117, producing a total of 21 labs and 19 energy per turn -- those numbers are compared to 4 labs and 3 energy for the Hive at the same date! The sliders now have to stick at 50-50, as there would be a lot lost to the unbalancing penalty in either direction. The inset shows my HQ's configuration, including 2 commerce from the pact with Gaia, which is occurring at each of my first three bases.
This is the absolute peak of Morgan's power curve. This is the moment where his economy rating makes the most difference, when the +2 energy per base and the pact commerce account for the biggest proportion of the factionwide total, and those inputs have researched and adopted the early SE models faster than anyone else. Morgan is not about building up riches; Morgan is about a fast start. Morgan's comparative position peaks here and then can only go downhill. The starting cash has been spent, and the handicaps of support and habitation and booming will start to catch up. We will see how long this lead can last, compared to the support and industry and police advantages enjoyed by the Hive.