So in all my science games so far, Poland came out the fastest in 185 turns. I also made that in the Babylon game, but with a substantial assist from El Dorado, so Poland was really the better game.
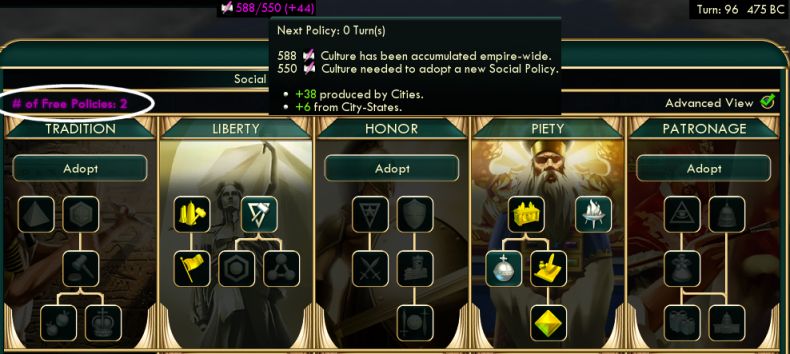
Poland's civ ability could be read as "all of Tradition". (If you consider Liberty as the standard play, which I've come to favor since working out that wider is better for science). I can't believe I never realized until chumchu told me on Realms Beyond that Poland's freebies should be used to complete both Liberty and Tradition. I'd been trying to stuff them into Patronage or Commerce with unsatisfying payoff.
You know Egypt's civ UA of +20% on wonders? Poland gets 15% from Aristocracy. Aztec's culture? Poland gets more from just the Tradition opener. Morocco's trade route gold, Netherlands' happy? Poland gets more from Monarchy. Korea's science? That's one social policy worth (same as Secularism); Poland gets seven. Solidarity probably really is the strongest civ ability of all.
But that got me thinking in alternate directions to go. What else could Poland do besides Tradition? Patronage? Eh, Greece does that better. Commerce? You can't do that the right way (immediately after Liberty) since you can't reach the medieval era to open it that fast. But... how about Piety?
The linchpin is Jesuit Education for the Reformation belief slot. This allows purchases of universities, public schools, and research labs with faith. The cost is the same as a pagoda/missionary, escalating with era, and incorporating the Mandate of Heaven 20% discount. Figuring from the era that each building comes in, this is 160 faith for a university, 320 for a school, 480 for a research lab -- or just about the same (and exactly the same total) as their hammer costs. The science buildings are of course the most important breakpoints for a science game. Jesuit Education means I can move all those out of the critical path of hammers or gold and pay for them with another currency entirely. Gotta try it.
Piety also enables shrines and temples as worthwhile builds, particularly when 1 faith really is equal to 1 hammer. 40 hammers:1 faith as the standard payback ratio is terrible, but 20:2 is four times better and excellent, and 50:3 for the temple is also reasonably effective. You also get the exploitable effect involving +100% overflow, which I'll detail more later. If deliberately exploited, this functionally reduces the hammer cost of each shrine and temple even more.
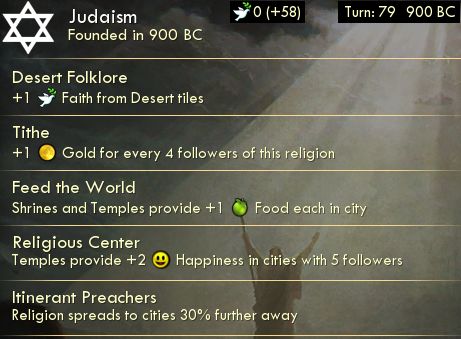
Jesuit Education does mean we'll have to skip the Pagodas belief. We can't have those and the science buildings competing for the same stream of faith; there still won't be enough to satisfy the demand for two different types of buildings. I want to plug in Feed the World here, +1 food each from shrines and temples, and here's the reasoning for that.
I compiled and looked over a pile of numbers from my science game reports, and also from a handful of partial uncompleted and unreported games. Here are two important conclusions.
Over a time horizon of 50 turns, settlers beat the National College at any city count for beakers per hammer invested. For the 70 base hammers of a Collective Rule settler, you get 9 beakers per turn once that city has grown to size 6 and built a library. The NC costs minimum 125 and usually 155 hammers for up to 12 beakers per turn (+3 and +50% multiplying with palace, size 6, library, GL, itself), a worse payback ratio! And of course cities grow and produce many more factors than just beakers. So it really is correct to expand as fast as possible and worry about the NC later. I had tried several partial game starts experimenting with the NC at different widths with different civs, and what kept happening is they might reach Education a smidge faster but universities much slower in cities that got founded and developed later. Any city whose settler waited until after the NC just never really caught up on size and strength.
There is one way to compress the time before Education and between Education and schools. But it isn't the National College. It's just sheer population. My Greece game had turned out to be the fastest to go from Education to Sci Theory, and also had the highest population during that time. A few other early milestones like Civil Service also consistently seemed to depend on population count. What this means is frontloading productivity really is critical. Growing population as fast and early as possible is how to get to Education faster. Libraries matter too, not just to enable the NC but for their own production as well.
That brings me back to Feed the World. A 20 hammer shrine for 1 food is actually better payback than a granary! Not just the better ratio, but also that it completes sooner by 40 hammers and about eight turns, which means eight more food as well. Plus the faith production. That's what we mean by frontloading productivity, and why Feed the World is better than the +15% of Swords into Plowshares.
Another thing I'd been doing wrong was neglecting Engineering and aqueducts. See, here's what keeps happening with all my Liberty attempts, including several unreported starts. I want the 6th policy to go into Commerce in order to save a "hole" in Liberty to claim the finisher Great Scientist late after all the others are done. But unlocking Commerce requires a race to the medieval era which actually screws up my tech order. I have to postpone Construction and Engineering to get to the medieval era quickly (always Civil Service.) Then Education is only two techs away, we should go there next. Then we have to get to the Renaissance to open Rationalism. And then I've had cities operating without aqueducts for 50 turns longer than they should have and somehow struggling at size 6 instead of 10. But Poland gets around the medieval timing problem by investing heavily into a second early policy tree, so has no rush to reach Commerce or even Rationalism.
Another tweak: I must demand a capital suitable for Petra. I had fun in a few games doing Petra in side cities that could be tailored to a perfect spot for the wonder. But that's being overly clever and not actually optimal. I had been thinking that the capital holds no privileged position when you're not going Tradition, but actually it does: maritime city-states, whose +3 food in the capital does matter and goes to best use when it's growing onto Petra hill tiles. Perfect is the enemy of the good, and a capital building Petra and quickly growing to 10 hills beats another city that gets to 20 hills but takes until the modern era to do so.
What shouldn't go in the capital is the Pyramids. I skipped this in the previous Poland game but that was shortsighted, it really is worth building. A second city can usually get it ahead of an AI on Emperor difficulty and that's the best way to do it. It's all about the settler build queue in the capital. The Pyramids can't delay settlers, can't wait long enough for all the settlers to finish (or you'll miss it), and you want to be doing Petra right after settlers anyway.
Finally, there's one more major adjustment for the Jesuit Education game plan: Freedom over Order. Of course the big advantage of Freedom is buying the spaceship parts. But the constraint is finding the 11,000 gold for them on top of also buying research labs. But if the labs are coming by faith, we should have no problem saving up that cash. Poland's Ducal Stable UB also plays towards Freedom. The +1 gold per pasture actually becomes +2 throughout the second half of the game in a continuous succession of Golden Ages. And we'll even have the Theocracy policy in Piety for an extra 25% gold.
ENOUGH WALL OF TEXT! Get on with the game already.
Well, I had a hell of a time getting this game started. Like three weeks. I had something like ten different starts that lost Desert Folklore before I got it. And not because I gambled on getting a faith ruin for it, but it kept dropping on like turn 18 before I even could have possibly gotten there with a shrine.
But I also kept failing to get Jesuit Education, getting beaten to it in three different games that played up into the medieval era, games that each took several evenings to get that far before failing. I never really noticed what beliefs the AIs take for the Reformation, never had to worry about it. But they can and do go there quite early, even though Piety is a terrible choice compared to the growth of Tradition or Liberty, they will happily go all-in on Piety anyway. And Jesuit Education does seem to be a favorite AI belief. I had to reconfigure some of the early game plan to get there fast enough - specifically, skip Citizenship, and realize that you can't get the Oracle fast enough to help either.
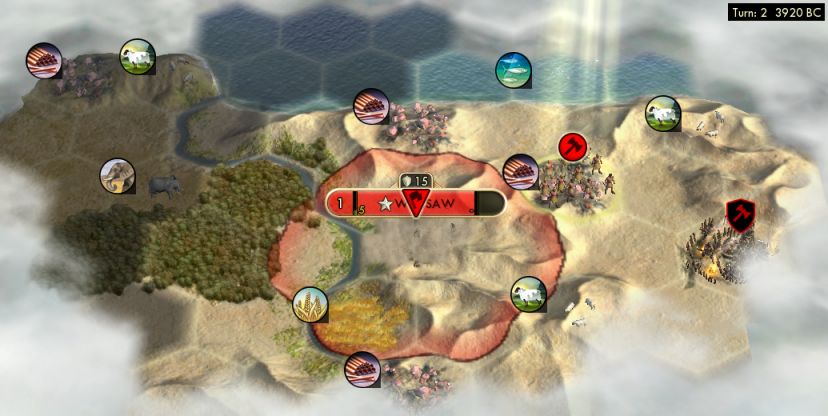
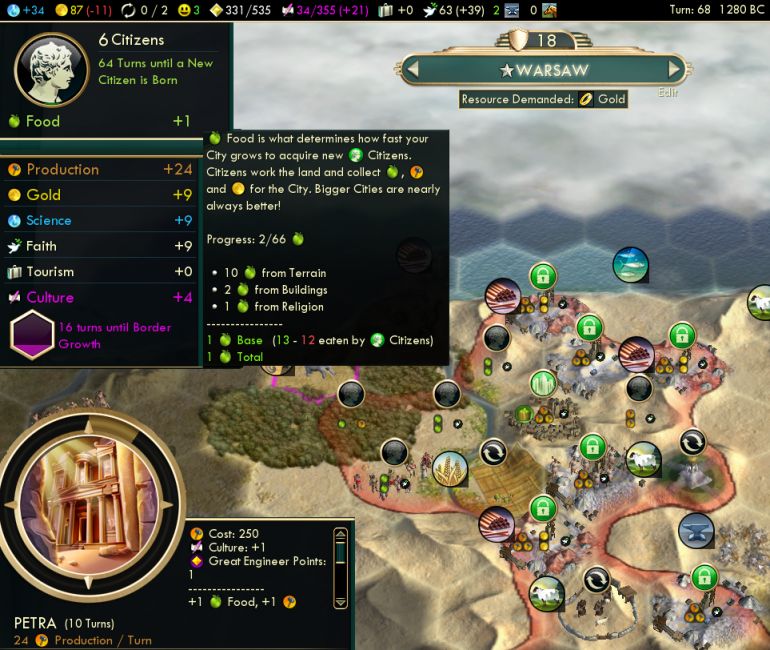
I had to move two turns to get here, but there's a great start. 3-food tile, lots of luxuries, tons of hills for starvation settlers and Petra. Note that luxury hills in the second ring are actually better than in the first, because the tile picker will pick them but not bare hills.
That 3-food tile has proven increasingly important across my many attempts and I want to talk a bit more about it. The ability to grow in 5 turns before we start popping population ruins is important, but there's more to it than that.
The core principle is to think of growth in terms of hammers, rather than food. What the 3-food tile does is make the growth essentially cost 10 hammers instead of 15. Because the opportunity cost isn't 1:1 between choosing to work food or hammers, it's 3:2 when we can choose to work a 3-food tile or a 2-hammer tile. (There exists no 3-hammer tile before you research Iron Working; the other hammer resources of stone and horses don't occur on hills.) That difference between 10 and 15 hammers is significant, that's a turn on the scouts and transitively on everything the capital ever does throughout the game.
This is also why growth beyond the first isn't worth it. It's rare to have more than one 3-food tile in the capital's first ring, even with the amount of map rerolling I do. The first growth costs 15 food which with a 3f tile means only 10 hammers of opportunity. The second growth costs 24 food which comes to 21.33 hammers of opportunity. (Details: this could be 8 turns working the 3f and a 2f tile for growth, or this could be 8 turns of net zero food, as 5.33 turns working 3f wheat + 2h hill, and 2.66 turns working two 2h hills.) And in practice that chance at a 24-food growth doesn't occur because population from ruins then pushes the growth cost to 33 or 44 food.
Note that even that first growth doesn't really increase productivity. If there is no second 3-yield tile, that second citizen only supports himself on food until a worker can build a farm or mine. But then what breaks that principle is the starvation settlers. Every citizen working even a bare hill costs no food to support and adds a full 3 hammers towards the settlers with Collective Rule, and 4.5 after a worker does mine that hill. That payback 30 turns later is worth 10 hammers for that very first growth, but not 30 or 40. (You also run into a limiting factor of the number of hills available to work.)
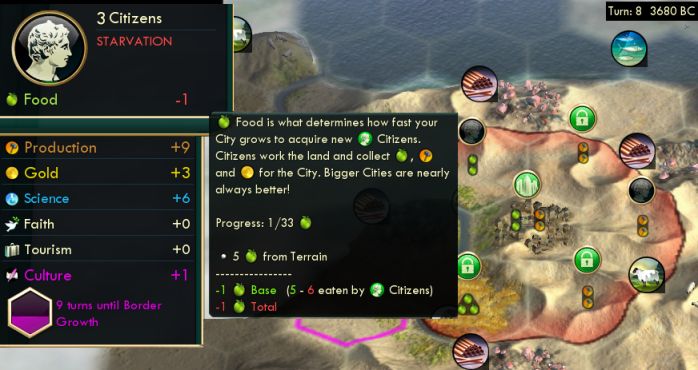
 Anyway, I got the opening I always want. Grew to size 2 on the 3-food tile, then popped survivors from a ruin to size 3. From here I keep food at 0 and work max hammers, relying on more ruins to grow another size or two.
 Another standard trick, micromanage between a 2-food flood plain and a 2-hammer hill, to alternate between +1 and -1 food surplus in order to keep the net surplus at 0 over time and produce the most hammers.
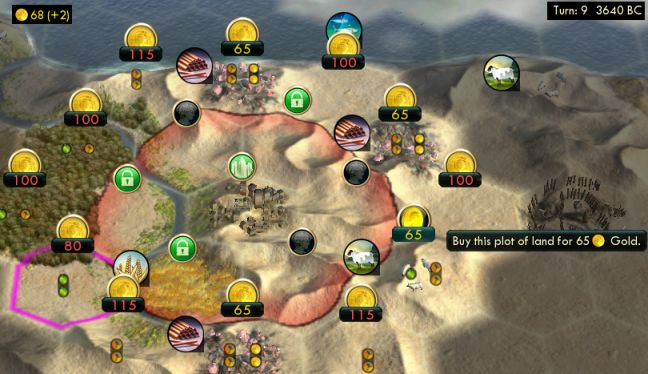 But here's a better idea, after popping a ruin for gold: buy the sheep tile. Then I can get the max hammers every turn rather than every other. Spending this money means delaying the worker that is always my first purchase -- but it's really taking a credit against the future labor of that worker. The sheep purchase gives +1 production, which is the same thing a worker accomplishes after 7 turns of labor to build a mine... so if this delays the worker by less than 7 turns, I come out ahead.
Build order: 3 scouts - monument - warrior - worker - scout (to go steal a worker) - settlers.
Research: Mining - Bronze Working - Masonry. I've found that Pottery isn't necessary. You don't use anything that it gives! You don't build a shrine or early granary, going straight to starvation settlers is more important. The better tech choices are Bronze to find iron and Masonry to start on the Pyramids as soon as the second city is founded. Next were Animal Husbandry, Archery, then finally Pottery - Calendar.
The ruins delivered a huge haul and quickly, almost as perfect as they can come. Spearman upgrade, t8 survivors to size 3 is perfect, t9 50 gold (to buy the sheep tile), t11 culture is also perfect, barbs, 75 gold, t15 culture again is perfect again, t20 popped a half-researched Bronze Working but still helpful, barbs, t21 survivors to size 4 beautiful,
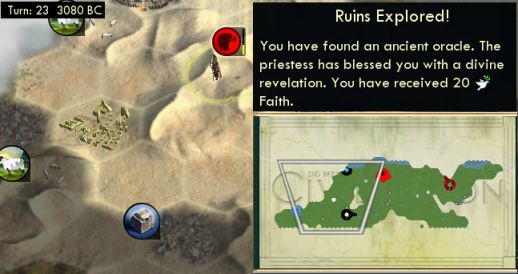
t23 got the faith ruin and Desert Folklore, archer upgrade, barbs, t27 survivors to size 5!, map, t29 big faith, t32 survivors again to size SIX kick ass!, t34 60g, archer upgrade, map, and finally on turn 68 a wildly late Sailing.
Policies: t11 the Liberty opener via ruin, t15 Republic via the second ruin, t30 Collective Rule.

And here come the starvation settlers. -9 food vanishing into unaccountability as the city can work 27 hammers/turn at size 6 even before we have any mines.
Workers were the only thing that came slowly. I'd built one who was now mining the copper (the wheat isn't farmed, I just put one turn into that while the worker had to move out of the way of the Collective Rule settler.) I didn't get a worker buy until turn 34, thanks to being very slow to meet city-states, they were all on the other side of the inland sea from me. But that's fine, being at size 6 for starvation settlers will more than make up for that. I usually figure size 4 as par for this step (and you often can't get more than 4 hills easily), so size 6 is all gravy (particularly working all six hills thanks to so many hill resources in second ring.)
")
And here's the second city, from the Collective Rule settler. This is also my standard move, plant this city in a location where it can build the Pyramids right from its founding. It looks badly cramped against the capital, but this is completely on purpose. So it can share lots of tiles, like the wheat which the capital can't use at all during starvation settlers. Also Krakow claims two desert hills (north of it) that are within the capital's reach for Petra later without having to buy them.
Turn 37 got copper improved, but already had to keep its happy instead of selling it! And a bit later, at about four cities settled, I found myself short on happy and couldn't figure out why... oh, I had settled on cotton but neglected Calendar! Fortunately I caught that and switched to it in time to pick it up just before settling on citrus too.
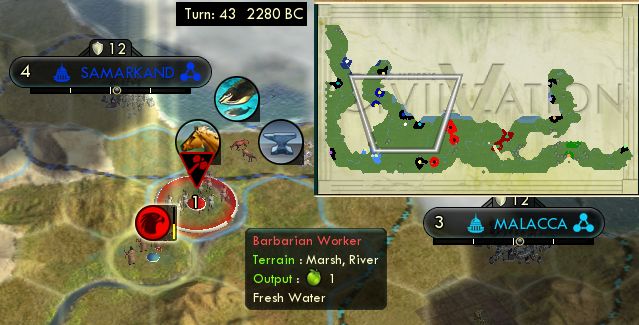
I had built one extra scout to send out for a worker steal. I targeted Samarkand because Malacca had a good quest of some sort. I got there, and chortled as the worker got handed to me instead via barbarians. No way, filthy mercantiles do not get their workers back!
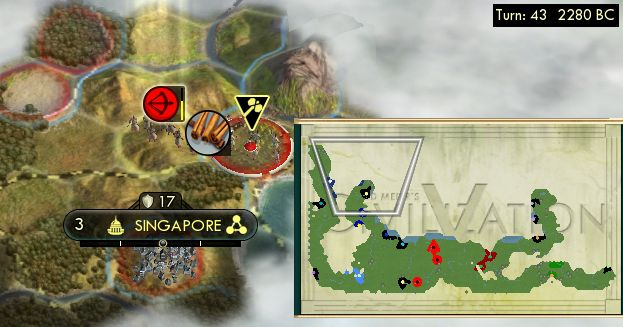
A different scout then found this opportunity, so grabbed it, even though it was farther away. It took 20 turns for this worker to wend his way home, but he made it at a good time to meet up just as my westernmost cities were getting planted.
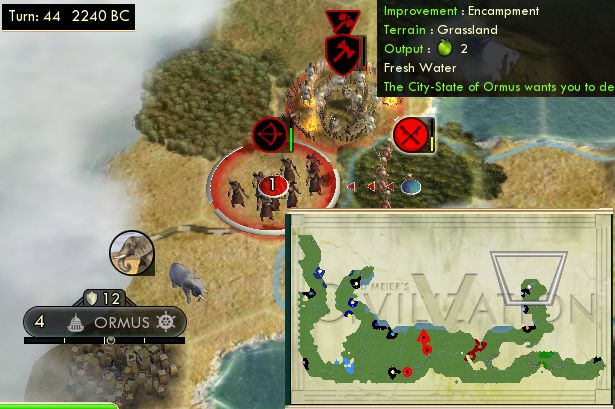
And then this episode of both luck and skill. My exploring (ruins-upgraded) spearman found maritime Ormus here, with a camp quest and a kidnapped worker. On top of that, I alertly let Ormus shoot the archer once before I attacked it, so I could kill it in one shot and get the influence credit. Then I cleared the camp and returned the worker, all adding up to a beefy 110 influence for a nice long super early maritime alliance. No better way to bootstrap baby cities than that.
We got the Great Prophet quickly, as happens for Liberty starts with the Collective Rule settler. I also had one big-faith ruin, plus the capital up to size 6. That all spawned the prophet early on turn 44. Too early, in fact. The problem is that if I found the religion now, all newly settled cities don't automatically get the Desert Folklore pantheon; they will take dozens of turns to convert from pressure. There is nothing urgent we need in the religion itself. Tithe is small potatoes at first, Feed the World doesn't operate without shrines yet, and we're nowhere near Jesuit Education. It can actually wait.
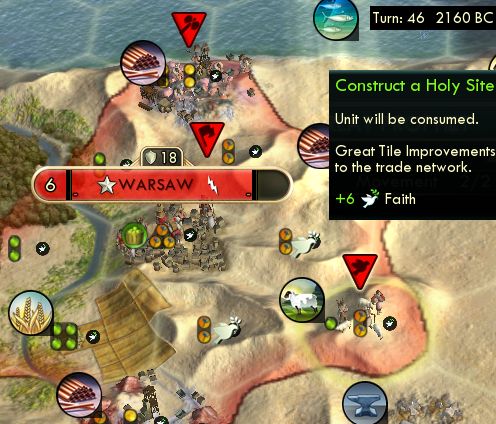
So the best move here was actually to plant a Holy Site. With the faith from this, I'd still get the next two prophets when I needed them, and come out with more total faith in the end. We'll return to this thread in a bit, but for now, it's Moses overlooking the valley of Canaan from the mountain but not yet entering the promised land.
")
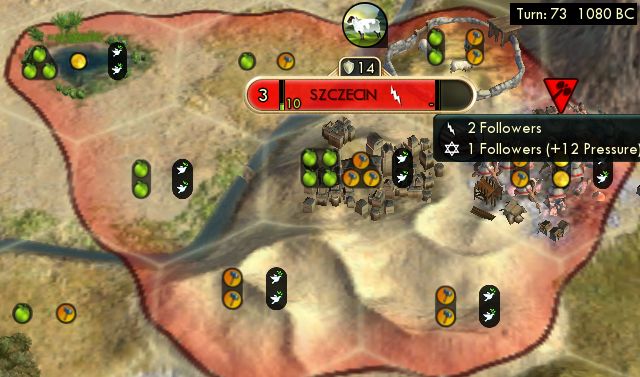
So I settled and expanded as usual, with the capital on that continuous stream of starvation settlers. Krakow in this picture already finished the Pyramids. But the major saga going on is just barely claiming this territory against the barbarians. The capital had built only one warrior and scout for escorts, and the second city went straight for the Pyramids. The cities of Lodz, Szczecin, and Gdansk all had to go for an archer as their first build. This feels like a terrible waste of early potential compared to climbing the growth curve with a granary or worker, but it really is necessary. The units lead to workers anyway; I'm about to snag two from barbs right here.
I got this camp clear for a big boost in the snowball. That's two maritime city-states that want it, plus I had already retrieved that other worker for Panama City. This is part of why Inland Sea is so great: city-states tend to bunch up on the shores of the sea, with one camp within range of several CS, but where the AI civilizations won't see it and come to clear it.
So check this out: I can't even starve! Two maritime allies and one friend mean 10 food from the city tile, which plus the granary is enough to sustain a size 6 city even while it works zero food and nothing but hammer tiles.
Warsaw completed the starvation settlers (out to 11 cities total) noticeably faster (~10 turns) thanks to being at size 6 rather than the more usual size 4. The timing worked out exactly right to go for its granary and shrine just before reaching Currency to start on Petra.
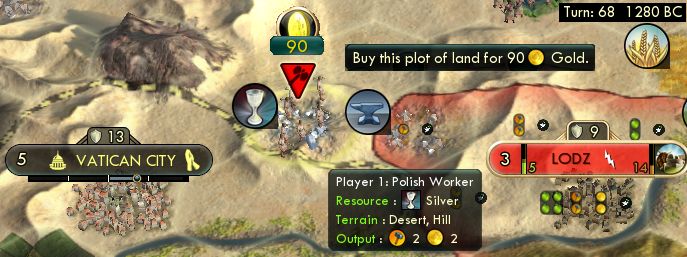
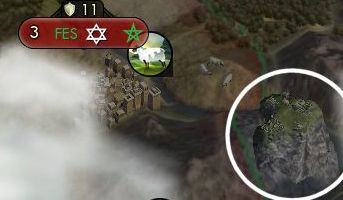
And check out this cheeky move. I stole Vatican City's luxury before the city ever expanded to it. Hey, if the tile picker loves to screw up the player by never picking hills, I can take advantage of it treating a city-state the same way.
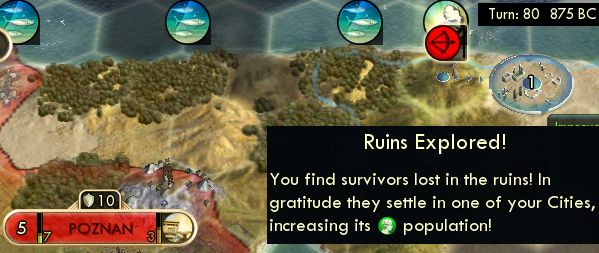
I'm always far too amused by finding ridiculously late ruins hanging around on a huge Inland Sea, but here's a particularly great one. We'll take 55 food in Poznan yes please.
")
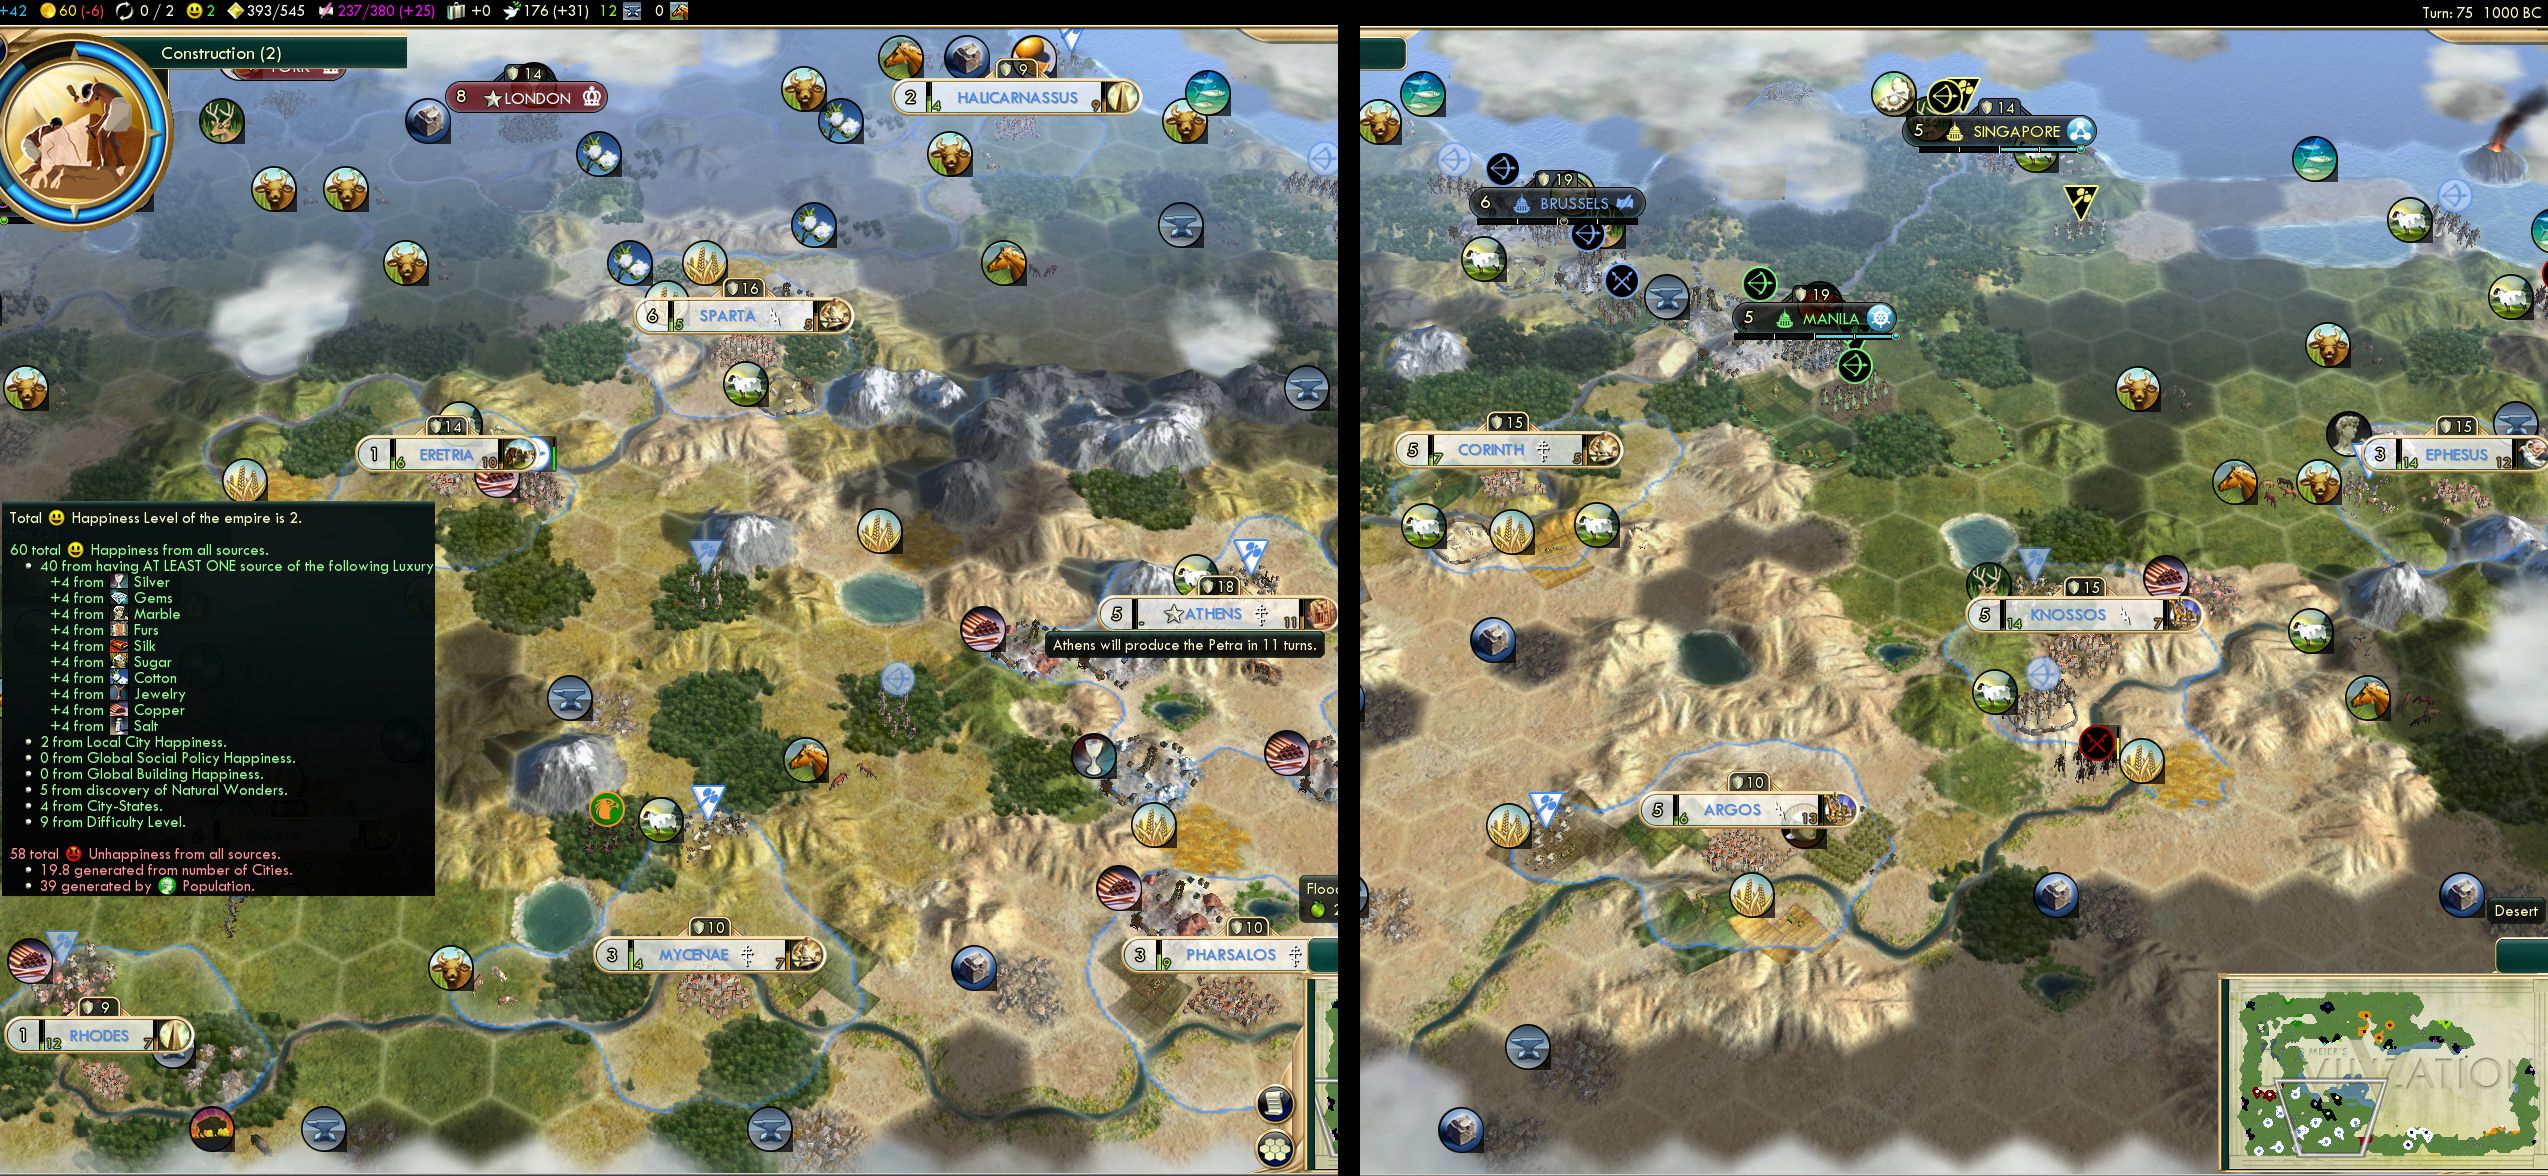
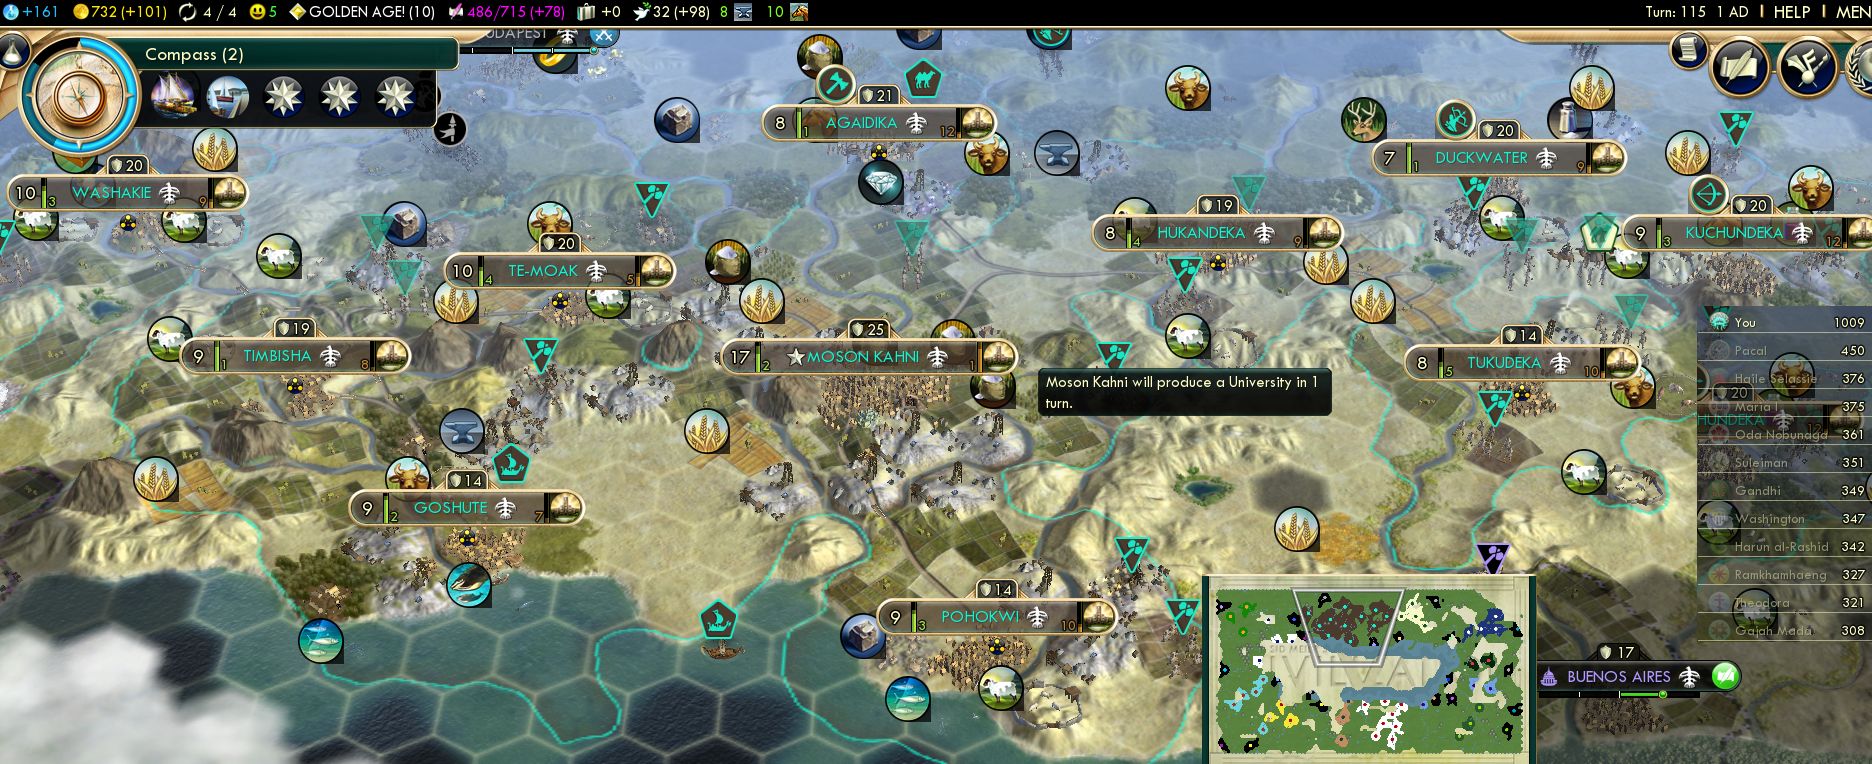
Here's the usual 1000 BC overview. 38 population, just one short of my record 39 with Greece, and actually better with two coming at the turn roll and more of the food boxes fuller. Frontload frontload frontload, expansion and growth is the one way to shorten the timeline to victory. And maritime city-states are the most critical way to do that early on, and both this and the Greece game got those.
Luxuries are also going great, and that's where the happy is coming from to keep up this growth. I have seven of my own after reaching out for marble at Gdansk, cotton under Lodz plus its swiped silver, citrus under Poznan, and incense (and a whopping pile of other resources) at Wroclaw. Plus a bunch more from city-states and an AI trade or two. And I would also put one more city at the northeast pearls. I abandon more games than you ever know (typically one or two per report) for having too few luxuries in the vicinity, but this map delivered here.
Presently it is time to relate the entire religious game plan as it developed, a surprisingly long tale.
The first decisions in the chain were Desert Folklore as usual and settling the first Great Prophet as described above.
The next was the fourth social policy, on turn 52, after Collective Rule as usual. I learned from three unreported failures that you can't take Citizenship here. After Collective Rule, Poland must drive to the Reformation as fast as possible before an AI takes Jesuit Education. I did hate to postpone Citizenship as such a frontloaded snowball component, but had to, and could get by on enough workers scavenged from barbarians for now. So this fourth policy became the Piety opener.
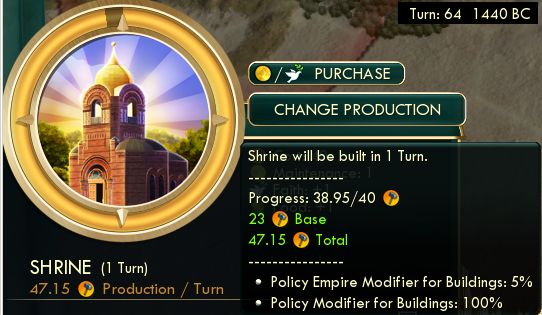
The Piety opener enables the double-production shrines. I started building them, timed as the religion spread to enable Feed the World too. And I took deliberate advantage of the Piety overflow loophole. Civ 5 doesn't divide hammer overflow by the production modifier as Civ 4 does, so you can overflow all +100% hammers from the shrine and temple into something else. For each of those items in every city, I would micromanage it as close to completing as possible, then set the city to maximum hammers for that next turn. This essentially gained a full turn of hammers twice in every city, overflowing from shrine to granary and from temple to aqueduct.
So the build order for most cities went shrine - granary - temple - aqueduct - library. This also reflects my tech order. I'd experimented with some different paths in the unreported games (that missed Jesuit Education) and found what I'm pretty sure is the optimal one. After Currency for Petra, we reached Philosophy to start temples just as the granaries completed, then Engineering for aqueducts just as the temples completed. This all interlocked as smoothly as anything I've ever done in Civilization and was greatly satisfying.
Why temples before aqueducts? Happiness from another belief, Religious Center. I had learned from my incomplete games that another source of happiness from religion is required to replace the missing pagodas. I was tempted to take Asceticism (+1 happy from shrines) to have it right now (frontload frontload frontload), but that was shortsighted and Religious Center was the right call for the longer term.
The catch is that the temples require 5 followers to enable that happiness. This entailed enormous amounts of micromanagement, not just to build the temples and abuse the overflow, not just to grow to size 5, but also to calculate exactly when each city would convert that 5th follower by pressure! As always, I was straining right up against the happy cap and avoiding growth in several cities. Those that would kick in the Religious Center happy the soonest got priority. I spent loads of time micromanaging everything here - fifteen minutes per turn - but I still love doing this and Civ 5 still entertains me here.
Back to the religion itself: my second prophet spawned on turn 59 to found it. One missionary followed as usual to convert my two biggest cities and let the rest go by pressure. Then the enhancement prophet on turn 79. All standard stuff, the only nonstandard part being that early settled holy site that was speeding up all of this.
There's also Itinerant Preachers (+30% pressure range) in there. It depends on the map layout, but I'm finding this works better than Religious Texts (+25% pressure strength) probably more often than not. This was one such case. Gdansk in particular was my most problematic city to convert because of its distance, 12-13 tiles away from Warsaw and Krakow, exactly where Preachers would add more pressure and convert it sooner than would Texts. I also had quite a number of 11-13 tile gaps between some other city pairs.
I've come to realize this over the past few games: Religious Texts doesn't do enough when it's increasing pressure from just one or two city sources. The target still doesn't convert fast enough to matter. Pressure modifiers start to matter once there's three or four sources involved. And Preachers works better than Texts for this reason: if you have 3-4 cities pressuring a target, you most likely also have 3-4 more behind them that Preachers can enable. So Preachers does add more pressure than Texts.
Here's an amusing not-quite-a-bug. Why are those tiles producing two faith? Religious Tolerance, the policy that says that you also get the pantheon belief of the second-most-popular religion in your cities. Here, my own religion is counting as the second-most-popular to my own pantheon! So we get the pantheon in addition to the pantheon, haha. (Of course now I'm thinking about how to deliberately abuse this, but it seems pretty infeasible to keep your own religion in second place without converting for any length of time. At least this is some compensation for the cases when your own pantheon and religion are each just below 50% in a city so neither is a majority and you get the yield of neither.)
Policies: the Piety opener had come on turn 52, Organized Religion on t58 via Poland's classical-era freebie, Religious Tolerance on t67.
The Reformation was next, and now I was in one of those rollicking one-more-turn sessions, every click electrically charged. Would I get Jesuit Education or miss it for the fourth attempt? I came to realize that I wasn't racing the AIs to Reformation itself. AIs that go all Piety get that on their 4th or 5th policy, which is going to be faster than even Poland can manage 7 total policies after starting with Collective Rule.
No, the actual race was my culture versus the AIs' religions! Because a civ can only pick a Reformation belief once it has a religion. That's why Jesuit Education kept falling in the 80s or 90s each time -- that's when the AIs get religion, often from their Piety finisher prophet itself.
Presently America founded the first AI religion, on turn 75. But they weren't into Piety. I counted ahead on my culture (looking to buy a monument if it would gain a turn) and saw that Petra's +1 culture would just push across into gaining one critical turn to that next policy. Then on turn 79 France got a religion, and they were in Piety. The Reformation belief notification scrolled down...

 whew, they didn't take it! I was just two turns away now, and triumphantly landed Jesuit Education on turn 81. We're finally in business after three weeks of attempting this.

The next thing that happened was... well, way too much faith. With Desert Folklore, the settled holy sites, and all the shrines and temples, it skyrocketed over 100/turn by turn 90. I had nowhere to spend it before we actually reached Education. No Pagodas, and I didn't really need more missionaries for anything at the moment, no city-states with faith quests in reasonable range. I used to be rabid about flooding AIs with missionaries as fast as possible, but that was back in the previous expansion. In BNW, that doesn't do so much with Ceremonial Burial nerfed to half effectiveness, Religious Texts also nerfed, and the AIs are better at fighting back with their own prophets too.
The goal now was to store up as much faith as possible before Education to instabuy as many universities as possible. This would involve taking and settling the 800-faith prophet, not so much for the holy site itself, but just to raise the ceiling on faith storage to the next value of 1200. Then I would stay just under that ceiling by bleeding off faith on a few missionaries anyway. (I briefly wondered if I could have fit in pagodas anyway, but no, there wasn't enough faith for all of them.) It wouldn't help to take the next prophet to raise the ceiling again, that would be a net loss, we couldn't spend 1200 on that then rack back up to 1200 again before Education. The surplus missionaries spread to a couple neighboring AIs, which would add a bit of extra income with Tithe although nothing really significant.
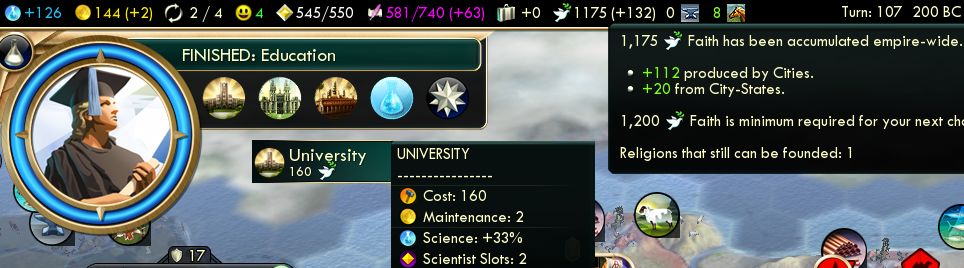
Education arrived on turn 107, not a record (Spain t103) but pretty fast. And here's the moment I've been trying to achieve for a month. I instabought seven universities with 1120 faith, then the last five over the next few turns. My science instantly jumped from 126 to 206 beakers, and 250 after the rest of the universities. There we go, that is how to leverage Poland's ability to complete all the universities ten turns faster than otherwise possible.
I never really thought before about how much raw value Piety yields. Half-price on shrines and temples is 70 hammers for every city, more in total than Tradition's four monuments and aqueducts. And actually more like 90 once you factor in the overflow tricks. Organized Religion's faith is worth the equivalent of +2 hammers per city, more than Republic, as long as you have a roughly hammer-equivalent faith sink (Pagodas, Jesuit Education, Holy Warriors.) And Mandate of Heaven functionally boosts all of it by 25%, also a bigger multiplier than anything in Liberty or Tradition.
I would later take the next prophet (1200 faith), build the Hagia Sophia just to raise the faith ceiling again (from 1700 to 2300), collect the Piety finisher prophet (doesn't raise the ceiling), and settle all of them to make a total of five holy sites.
So to summarize, the overall religious sequence was this:
- turn 23 Desert Folklore pantheon
- t44 first Great Prophet, settled
- t59 second prophet, found the religion
- t68 first missionary to convert two of my cities
- t79 third prophet, enhance
- t90 fourth prophet (800 faith), settled
- t90-100 a few extra missionaries
- t107 start buying universities with Jesuit Education
- t110 Piety finisher prophet, settled
- t124 fifth normal prophet (1200 faith), settled
- t130 Hagia Sophia prophet, settled
And the policies:
- t11 Liberty opener
- t15 Republic
- t30 Collective Rule
- t52 Piety opener
- t58 Organized Religion via Poland's classical freebie
- t67 Religious Tolerance
- t81 Reformation
- t96 Citizenship
- t96 Meritocracy via Oracle
- t96 Mandate of Heaven via Poland's medieval freebie
- t110 Theocracy and the Piety finisher
Yes, that's three policies all on turn 96 in the list above, not a typo. I put together this cool moment of getting three policies all on the same turn, one regular, one Oracle, and Poland's medieval freebie.
")
Moving ahead, here's the next overview at the usual 1 AD. Finally I had a game with enough frontloaded growth; the cities at size 9 are finally competitive with that Shoshone game so long ago.
I had added one more city for a total of twelve, Bialystok at the pearls, because any city with a unique luxury is worth founding. It was also my third coastal city, which is an important number. Two coastal cities can have two sea trade routes, but three can have six. The only problem with that is the cargo ships do take quite a while to build. Finally at this time I had them all swapping a decent number of trade routes, but that had delayed the rest of the build queue drastically, two of them are only now finishing their libraries. (And those missing libraries had delayed the National College, which Warsaw would finally get to next.)
Most cities there are building Gardens, which are always the next item after universities, for the seven cities that are slated to produce a Great Scientist by the end of the game. Next came watermills, an item that often gets squeezed out of the mix after higher-priority libraries and universities and gardens. But here with the universities taken care of by the Jesuits, that cleared up space in the build queues to get the watermills done in good time as well.
That picture has the happiness Golden Age going on, but doesn't capture the run-up to it. Before this GA, I was in near-disaster territory on money, crashing to -20 income for quite a while. The fast-growing cities needed so much worker labor (without Citizenship for a long time thanks to the race to Reformation) and I only built the roads for the trade connections very recently. The Theocracy policy also presently accounted for 20 gpt including the gold it adds to the settled holy sites.
And I had spent two hours micromanaging the happy total just under the Golden Age threshold until after Chichen Itza completed. This actually involved selling some temples to temporarily shed the happy, then rebuilding them (cheap when accounting for the 100% overflow abuse, and also each sale gets 25 gold which saved me from bankruptcy for a few turns.) I also sold luxuries to divest myself of them briefly where I had another sale expiring in the near future. And finally I had to deal with a mercantile city-state alliance expiring which would cost 8 happy. A big change in happy on one turn was problematic: if I kept the other happy sources, I'd trip the GA too early; but if I sold the others, that -8 would drop me into unhappiness. Finally I realized the solution: hold off and then make the Meritocracy road connections on exactly the same turn that that CS expired.
I entered the Renaissance at Banking, as visible there. I didn't quite have enough time before the next policy (the 12th total) to get to Printing Press, but could at least get to the more useful Banking rather than Acoustics.
 And I'm getting the Colossus. I often don't manage that in the space speedruns. But this time there were very few coastal AI cities but I had a strong one, so got it. I'm also getting Machu Picchu, for which I amusingly had to "outrace" one AI city trying to build it at size 3. (Side note, why is it "the Colossus" but "a Machu Picchu", what's with the grammar there?)

I importantly got two rounds of We Love The King Day for the capital. This matters; each cycle of that typically adds roughly one city size. Warsaw was still undersized; it didn't really have enough flood plains (just three), but at least the WLTKD got it into a somewhat respectable range.

I also alertly overpaid for gems for a big haul of rewards: 5x WLTKD and also one CS quest. And it wasn't even really an overpay, because I could replace all three of those luxuries: had another copper sale expiring soon, and also CS alliances soon to come from ongoing quests that would supply both ivory and cotton.

Presently I wasn't sure what to spend money on. Normally after universities, all money gets saved to buy public schools, but Jesuit Education had that covered. I didn't have any particular missing buildings of great need. And so I turned to the other usual money sink: city-states. This one in particular would be tremendous value. That's 18 turns of alliance now, and notice that Great Artist quest in the queue, which I'd also satisfy just about as the bought alliance ran out.
I would later buy two more maritime allies as well, ending up with five total through the second half of the game, still a big boost worth of food. That really is the best use of spare cash, especially without Mercantilism to discount building purchases. Other civs need to get Mercantilism sooner, with medieval-era policies, because to fill up Rationalism and an ideology takes everything they can get between Renaissance and endgame. But Poland here could postpone Mercantilism and come back for it with the later-era freebies.
World Congress: I reached Printing Press on turn 126, my fastest yet by two turns. As usual, I took Sciences Funding, rotated around my diplomats, ignored the AIs that hated it... and ended up passing it with my own 25 delegates from city-states anyway.

A happy day: Sweden friended me! Those extra missionaries I'd sent out for lack of anything else to buy with the faith ended up flipping Sweden into my religion and friendship. Finally in this run of games since I started picking them as an AI, I got the +10% GPP from their friendship. Although in the end the numbers didn't come out for that to actually convert into an extra Great Scientist.
Policy update: t120 Rationalism opener via renaissance era Solidarity, t121 Secularism, t131 Humanism, t141 Free Thought with industrial era Solidarity, t144 Sovereignty. Yes, that's another very significant thing Poland does. Just this slice of Poland's civ ability, adding the Rationalism science modifiers faster, may save two or three turns on the end date.

That led to Scientific Theory on turn 141, also a record -- and that was without spending any bulbs yet! I had saved up to the faith ceiling again, 2300 this time, enough to buy seven public schools instantly and again fill in the rest over the next few turns. Science jumped by 50% from 580 to 850 immediately, then to over 1000 with the rest of the schools plus an increasing number of trading posts for the Free Thought beaker.
")
The turn 150 overview. The current Golden Age was from the first Great Artist, which I timed 12 turns ahead of when the Taj Mahal (in Krakow) would finish, to run the GAs together consecutively.
There was no question about the industrial tech order this time: straight to Sci Theory first, then Radio for the ideology and Poland's next freebie, and only then Industrialization. Actually I would spend my my first scientist bulb on Industrialization. Because that was just over 8 turns past public schools and Free Thought, so there were no more science adders to come before Plastics, so the bulb was essentially near its max value already. And also I could see the time horizon to Plastics and buying research labs would require starting Big Ben now.
And conveniently and perfectly timed, the modern age Solidarity freebie took the Commerce opener to enable Big Ben. Also, as always, I rolled together 8 turns of a Golden Age, the Sistine Chapel, and the industrial-era cultured city-state value, to maximize the culture value for Great Writers. I spent my first two on t160 to reach both Landsknechts and Mercantilism.

Because that would sync with Plastics and the research labs. I spent another bulb (my second total) towards this. I could have done one more to reach Plastics another 5 turns sooner, but I've learned that that doesn't help until you can actually buy the research labs.
Yes, buy them. I had seen ahead of time that even my massive 213 faith/turn could not rack up enough (5760) to buy twelve research labs. The timeframe between schools and labs is short, just 12 turns here after the last school, not enough to save up much faith. But I had seen this coming, and planned ahead of time to save cash and get Big Ben and Mercantilism in order to buy research labs as usual.
My moves here all derived from working backwards from the end date. I hoped for the spaceship launch by turn 180, meaning 20 turns left from here. Those faith numbers of 2200 + 200/turn would come to 6200, so I could still buy two labs at 480 faith each and still get to 5000 to buy three great scientists. The other 10 research labs were bought with cash (810 each with the discounts). My worry with the Freedom ideology was that the labs would consume money that needed to go to the spaceship parts, but that actually wasn't a problem. 500/turn income times 20 turns would still come to the 11000 required to buy the spaceship parts. (Slightly short, but that would be made up from resource sales, AI loans, and selling all the labs on the last turn.)
Where did that income come from? Trading posts. I've learned and calculated that once trading posts are at their maximum yield (Free Thought, Economics, and Golden Ages through most of the rest of the game), they are the best tile to work. Starting around Economics, I build trading posts everywhere, replacing farms and even mines. (Unlike Civ 4 cottages, Civ 5 allows a trading post on any hill.) This is where the food saved by the Civil Society tenet of Freedom goes -- not into more growth, but into supporting citizens working trading posts. And this game had the Theocracy policy for an extra multiplier on that gold too.
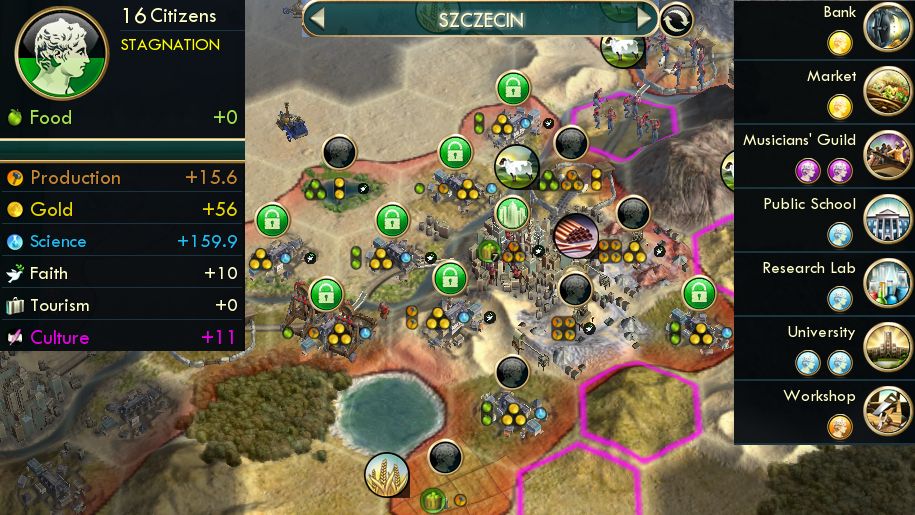
This is what a typical endgame city looked like. It can work all specialists and trading posts for maximum beaker and gold productivity -- it doesn't need or want any food tiles at all. The maritime food, granary, watermill, Feed the World, the trading post tiles, and the Civil Society food discount all add up to exactly zero.
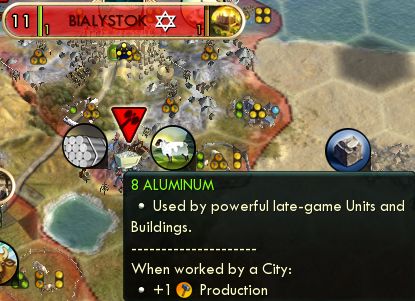
Hey, another advantage of Freedom: don't need much aluminum. I only had this one source of 8, but it was enough. We'd use it for the 6 SS parts and two hydro plants. Didn't need anything else - didn't need SS factories or any more hydro or solar plants.
This also happened thanks to Freedom, specifically the +50% Golden Age modifier on the Universal Suffrage policy that I always forget about. My second Great Artist spawned, with 20 turns left on the +100%-length Taj Mahal Golden Age. That was already enough to last until I would pick up the Representation policy for that GA, which would in turn last until the end. So a Golden Age with this artist would be completely superfluous! So he settled as a Great Work, which is something I never do in the space games, but 2 culture is better than nothing.
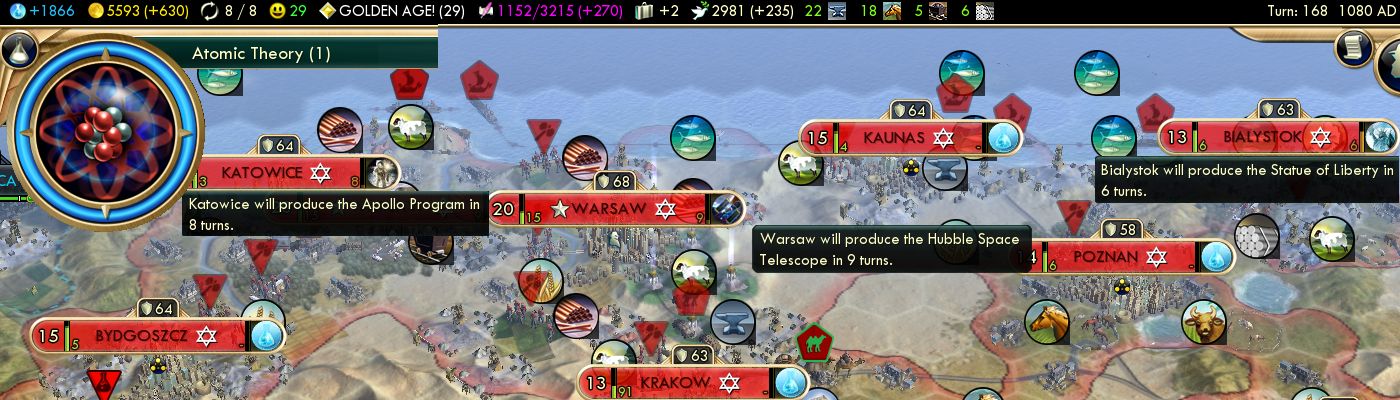
And here's a look at some endgame setup. I smartly set up three strong cities for the big endgame wonders in parallel - Statue of Liberty, Apollo, Hubble. (You don't need any other wonders past Big Ben. Everything else completes too late with no time to pay off. Broadway, Eiffel, Cristo, Sydney, CN Tower are all junk here.) Two of the wonder-builders are coastal with two big production trade routes each. That's how to do it, those sea trade routes are bigger than any amount of hills (non-Petra) that a landlocked city can work.
I've bulbed to Satellites here, only 8 turns after research labs. This is what I kept getting wrong in the end games and finally got right this time. This is the principle: overproducing Great Scientists gives you leeway to spend them even when the 8-turn yield window is not at maximum value. All along, I'd been trying to manage the whole scientist subsystem to maximum yield all the time, but that's not the whole picture, timing matters too.
The first of these bulbs was on t164, only 3 turns after the labs, but I had to do this now in order to start burning the overflow into techs (1-turning Railroad and Flight.)
t166 then burn another on Electronics, to 1-turn Ballistics and Astronomy with overflow. (Astro isn't on the line to Satellites, but it was the one way to burn overflow into a 1-turn research that turn. Hey, wait a minute. You can launch the Hubble Telescope without ever knowing Astronomy?  Civ logic!)
And on turn 168 I outdid my previous cool moment of three policies on one turn, with four! All on this turn, I:
- spent two bulbs on Radar and Rocketry
- used Poland's Atomic Era freebie for the Rationalism finisher
- used the Rationalism finisher for Satellites
- used Poland's Information Era freebie for Representation and the Liberty finisher great scientist
- took a regular policy after Rep's discount kicked in to drop the cost, taking Capitalism (level 1 in Freedom)
- spent my last two Great Writers (the third normal one plus Globe Theater), taking New Deal (level 2 in Freedom).
I'd then continue to Wagon Trains on t173 via the Statue of Liberty, and t176 Space Procurements with the last regular policy. (So the Statue wasn't ultimately needed, Wagon Trains is superfluous, but I built it to make sure of getting Space Procurements just in case my regular culture didn't get there fast enough.)
I skillfully weaved everything together in the endgame almost perfectly. After Satellites, I spent bulbs carefully in order to have the right amount of overflow to 1-turn another couple techs from each. End-turns are a limited and valuable resource here. I had 16 techs to go and 8 more scientists to spend. The scientists at 14,000 beakers each would be enough value for all the techs -- but each scientist can discover only one tech at a time, so that means it would take at least 8 turn-ends to actually burn all the scientists' overflow into techs. I sometimes fumble that by a turn or two but got it right this time.
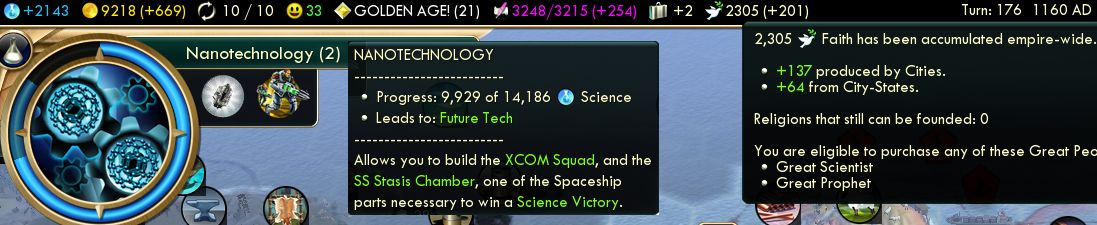
The imperfect blemish came here: I came to the end of the tech tree one turn short of enough (2500) faith for the third purchased Great Scientist. I had correctly anticipated when buying labs back at turn 160 that I'd have enough faith for that scientist before t180... but didn't account for the possibility of finishing the rest of the tree by 176 instead of 180! So that ultimately cost two turns (because it takes one more turn after buying a scientist until he can be spent.) I could have saved those two turns by buying one fewer lab with faith and by cash instead.
I also could have saved one of those turns by another means: I forgot to ever build or buy the observatory in my one mountain city (Krakow)! 30 beakers times 10 real turns plus 80 virtual turns of bulbing would have been enough beakers to just cut off one turn of normal research on Nanotechnology. Hah, oh well.
So I bought the first five SS parts on t176, researched Nanotechnology at the end of turn 177, bought the last SS part on 178, and won on 179.
Finally broke 180! I'd felt that was possible ever since Babylon and the previous Poland game made 185.
As often happens, I'm not sure exactly where the improvement came from. The variables here were Jesuit Education, Feed the World, the great early start on survivors and expansion and maritime food, and Freedom over Order. I don't really know which of these factors gained how much time, but probably the safest guess is about equally accreditable to each of them.
So that may have been the magnum opus I was trying to deliver. I still have a few ideas in mind, but not sure if any would beat this, but may try anyway.