My previous game showed what I found to be the best path to achieve a fast science victory on Settler difficulty. Start with the top half of Liberty, save three policies to go into Mercantilism, save money from tributes and the Initiation Rites belief, and buy universities with the discount.
What disappointed me was that there's only one possible choice of best civilization for this, the Shoshone. Ruins on Settler difficulty can yield settlers and workers, and only the Shoshone can maximize that with the choose-your-ruin ability. Nobody else can come close. I tried a couple partial starts, hoping that enough quantity and retrying might manage to turn up something competitive. It was actually possible to get enough, just too slowly; an entire huge map's worth of 70 ruins could yield ten each of settlers and workers, but took over fifty turns, fatally late to compete on speed.
But I really wanted to try some different civs on Settler. And then it dawned on me that it's possible after all. If I'm willing to break another taboo in search of speed.
The seldom-considered New Random Seed option. With this enabled, I can save and reload repeatedly until each ruin gives me what I want. With any civilization.
This is of course outright cheating, by Realms Beyond or CFC HOF or most any standards. I'm aware of that. But on another level... the option does specifically exist in the program and represents a deliberately supported way of playing. Many video game performances are judged by the context of "anything the code allows." Tool-assisted speedruns of console games have long included and embraced luck manipulation. What I'm really doing is a turn-based TAS of Civ 5. Of course this isn't fairly comparable to anything else on RB or CFC or anywhere else, but I'm not claiming it is. I simply want to explore this possibility and see where it will go.
And my civ of choice would be Poland. The one thing I sorely missed in the previous game was the Consulates policy. I had so many city-states (twelve to fifteen) in friendship-tier influence, after one quest to clear a camp but with no good way to upgrade that into alliance. It felt like my cities didn't quite get up to proper size with only a middling amount of maritime food. And social policies didn't come fast with few cultured allies. But I just couldn't cram Consulates into the plan; it can't outweigh sacrificing two policies of the Liberty opening, can't fit before Mercantilism for universities, and ultimately displaces out of reach either Mercantilism or the Liberty finisher.
Of course Poland plays perfectly with Consulates. They get the extra policies to do it, and perfectly timed with the first freebie coming exactly as Patronage opens with the classical era. And as always Poland can pile on plenty more as well: here the Tradition opener (needed to get enough workable tiles without Great Expanse), Aristocracy, and more later.
Besides that, the previous game showed me that I should be going wider on city count. Here's some discussion on that topic.
The previous game sparked this revelation: the speed to a science victory is determined not by your speed to the last tech. It's determined by the point at which your research pace reaches 1 turn for every tech. There is no way to compress the timeline any more than that, since the game hard-limits you to one tech researched per turn. To finish faster, you need to hit that pace sooner. My original benchmark for that on higher difficulty was after Rocketry/Satellites. In previous games on Settler difficulty it had become common to hit one-tech-per-turn throughout the modern era after Plastics. The previous game nearly managed that as soon as Electricity in the industrial age.
The time still remaining to squeeze out is between Education and the industrial age. There's not much left to speed up anything before Education, just expand wide and build libraries. But there's fat to trim in the renaissance. How soon in the renaissance or industrial eras could we reach that tech-every-turn pace? Ideally, it would happen as soon as the first Great Scientist spawns with all of the overflow from that. Not sure if it can exactly work out that way, but that's a clear target to aim for.
So where do we find the beakers to hit that pace so soon? Go wider. More cities. The Shoshone Mercantilism game stopped at 9 cities because I was worried about affording more universities than that. But that's not a problem. It's OK to simply build most of the universities and schools. Buying the science buildings is critical only in the six or seven cities where the GPP will turn into a great scientist. Cities even before constructing the newest science building are still positive value towards the tech pace and finish date. The Shoshone game had about 400 beakers/turn after buying universities and enacting the Rationalism policies. With the tech cost penalty of 3% per city on a large map, any city producing 3% of 400 = 12 beakers/turn still breaks even on tech pace, which means size 8 with a library, quite reachable. Then the university once completed is all positive value. Same goes for schools.
What about labs, there's no time to build 500 hammers, how could we buy all of them? Answer: we don't need to. Buy whatever few we can afford in cities that are the biggest or still need GPP... and that with all the great scientist overflow is enough to saturate the science pace at one turn per tech from Plastics to the end.
More cities means upgrading back up from large size to a huge map. It's all about the quantity of ruins. A large map has about 40 for up to about 12 settlers and workers; a huge map can yield 70 for 20-plus cities. Ruins depend on the amount of unoccupied space on the map, which is drastically boosted by upsizing, since the occupied space remains constant so all of the additional space is empty. The only real downside to a huge map is taking longer to reach city-states and clear camps, but that is tolerable.
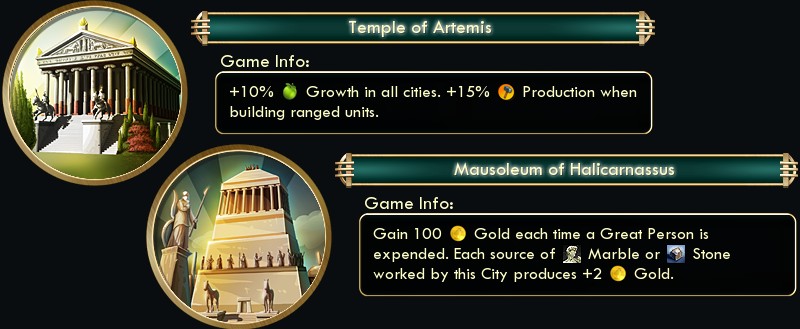
Finally, one more adjustment. I finally bought the DLC for the Temple of Artemis wonder. It just happened to go on -75% sale right as I was starting this game. It feels silly to pay for DLC that I may well use only once, but it was worth the $1.24 to get this nagging omission out of the back of my mind. Mausoleum of Halicarnassus is also included and worth building in the later game.
Full recap of the settings: Settler difficulty, Inland Sea map, huge size, max 41 city-states, minimum 1 AI opponent (Dutch), hot climate for desert, young world age for hills, Abundant Resources, Enable Policy Saving, New Random Seed. I restarted from the game setup screen until getting a favorable mix of city-state types: 11 maritime (this is 80th percentile among possible distributions), 8 mercantile, 9 cultured, 5 militaristic, 8 religious (all of them!, maximizing the chance to find two for an early pantheon.)
We begin here after much map rerolling. No mountain but a great spread otherwise: three wheat, lots of hills including several hill-resources that the tile picker will actually pick quickly, plus marble.
And my warrior popped a settler from the first ruin. I reloaded about four times to get that to happen. The settler veered west towards that next ruin while the warrior went south. And here is the real reason I chose this map to play out:

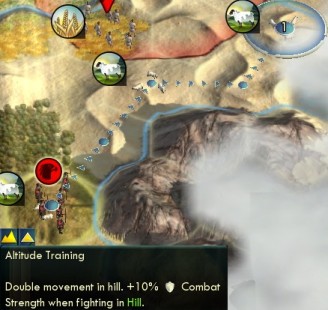 Right near me was Mount Kilimanjaro!
Here's how it works for anyone unfamiliar. That Altitude Training promotion halves the movement cost to move into hill tiles. For a scout, all tiles already cost only 1 movement, which Kilimanjaro makes 0.5. An altitude-trained scout can move up to 4 tiles per turn through hills. That is the perfect engine to clear a huge map worth of ruins much faster.
On top of that, Kilimanjaro also has a workable tile yield that includes 2 culture. That's enough to boost up to the Liberty opener and Republic quickly without spending a precious ruin on culture.
Here's the rest of the opening. I had looked ahead to see the layout of ruins and city-states and then reloaded (if I'm going to cheat with New Random Seed, may as well go all the way.) My first scout was built normally from Warsaw, and walked down to Kilimanjaro for the altitude training before moving on. This cost some time now, 5 movement points to reach KJ and then 2.5 to return back northeasterly through the hills. But this was the right way to play it. 7.5 movement points spent now on this would be recouped after 15 more steps through hills, which I correctly expected would happen long before traversing all the way across a huge map.
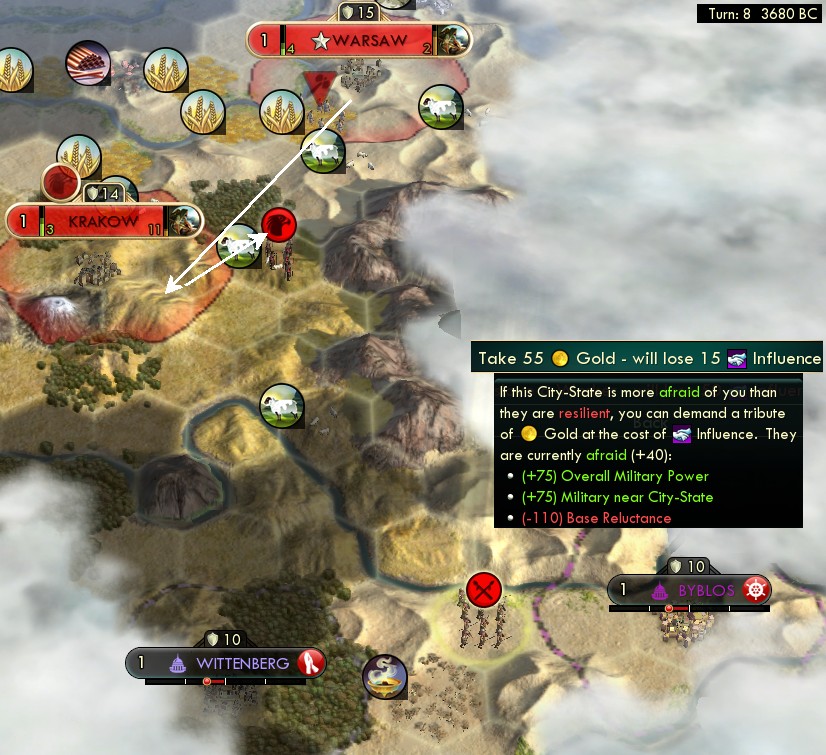
Meanwhile, my settler had gone west to the second ruin where I reloaded until it yielded a worker. And my warrior received a spearman upgrade from the ruin that had been on Krakow's site. Then the settler founded Krakow next to Kilimanjaro to work it and to buy scouts immediately adjacent.
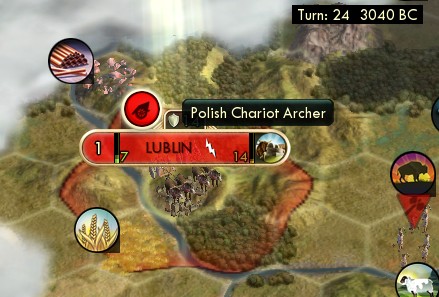
My now-spearman continued south where he found those two city-states and seized tribute from them, enough to buy a scout very early on turn 8. One more tribute and a second bought scout followed on turn 11. Warsaw built two scouts and Krakow built one, making a total of five plus the initial warrior-spearman. Six exploring units is the right number for a huge Inland Sea, three to go in each direction around the center.
")
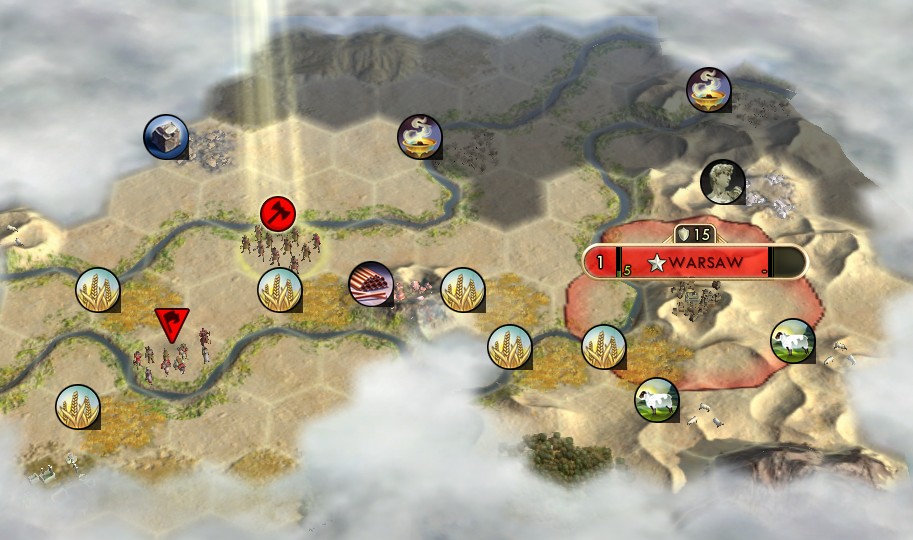
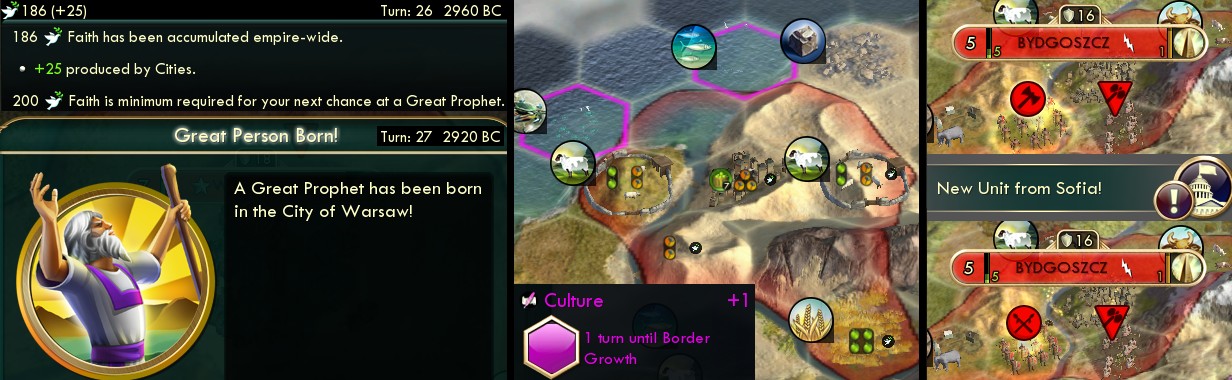
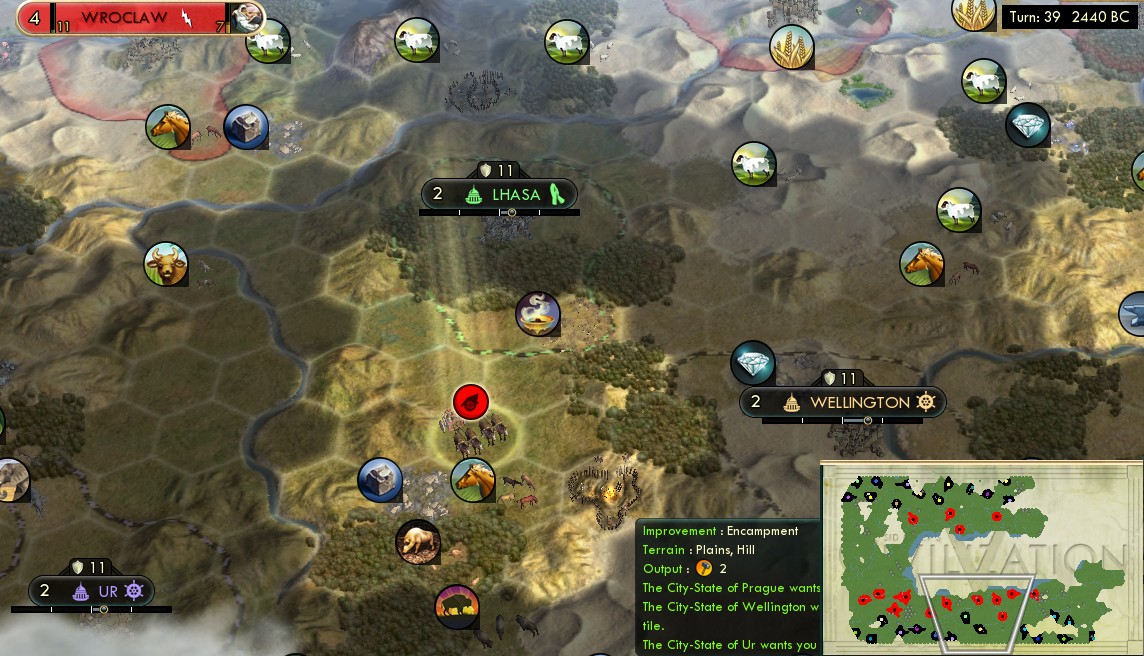
Here's a look 15 turns in. Thanks to the scouts taking time to visit Kilimanjaro, this opening wasn't as bursty as the Shoshone El Dorado game. That had five cities already by this time, this has three plus one settler about to plant. But now the scouts are hitting their stride. See the icons on the side there where I discovered five ruins in this one turn.
For every ruin, I saved the game and repeatedly reloaded until getting what I wanted. Same as for the Shoshone, this followed a three-stroke cycle of a settler, a worker, and something else. For that last "offcycle" slot I thought hard about what was most needed each time. Tech? Money to buy tiles and maybe a worker? When do I start taking archer upgrades? Eventually I decided that the best result was population to the capital whenever possible; that would be how to best speed research up to the classical era (still targeting Consulates) and Education. In this shot Warsaw already got population once and is about to get another from the highlighted ruin up north. It would go on to get four population ruins total going from size 2 to 6 that way.
")
Just five turns after the previous picture, here's a look at how much ground those three northern Kilimanjaro-fueled scouts have covered, each with a ruin to choose right now. I kept carefully sequencing my ruin choices on every turn. I took settlers not here in the jungle, but with the eastern scouts that were exploring more desert along the southern shore of the inland sea. With these ruins in the jungle I mostly took workers, and population when it would go to the capital.
Of course, all this reloading took forever to play out. A single turn took as much as thirty minutes through thirty or more reloads to get all the ruins to cooperate. It took me five hours to play from turn 20 to 30. Well, I may only ever do this once, so let's force through it and see what happens. I'd actually toyed with this idea long ago as an adventure at Realms Beyond, an event where the gimmick would be to permit and encourage any amount of reloading. I never figured out any angle cool enough to justify all that repetition, which is probably for the best.
The reloading also made for a nasty one-more-turn feedback loop. Okay I want to get through this ruin, reload reload reload. Now with that done I can actually play a turn, let's do that. Another ruin, let's get through that before bed, reload reload reload. Now I can play another turn. And so on. Along the way I was also executing all the usual plans for city micromanagement and worker movements and so on, which took that much more concentration to keep in my head over the extended period of real time.
")
Back to the game, here's an overview of my cities at turn 20 to compare to the Shoshone. I'm still a little behind compared to the El Dorado start in that game. Six cities plus two settlers here, compared to all nine Shoshone cities already planted. But we're moving fast fast fast now, collecting two to four ruins every turn.
You can also see the trail of angry city-states in the wake of my spearman collecting tribute on the south edge there. Also Lhasa was the second religious city-state I encountered, on turn 16, which made for enough faith for the Desert Folklore pantheon.
Research: I arranged everything to open the classical era for Patronage and Consulates as fast as possible, which meant Mathematics. (This can be done faster by way of Sailing-Optics, but those techs are uselessly offline from everything else important.) So this started with researching Animal Husbandry and Archery.
Then I pulled a new trick. One trick that New Random Seed can do that the Shoshone can't is to rig which tech comes from a ruin. So with the next ruin, I reloaded until not only it popped a tech, but the correct one of The Wheel out of four possibilities. So I could start research on Mathematics as early as possible, on turn 16 as shown above. Perfect. Although next I also had to get Pottery from another ruin to get cities started on granaries.
Builds: Warsaw built scout - scout - monument (because no Pottery yet) - granary - Temple of Artemis - library - Petra. Several other cities built their monuments first before I got to Pottery.
In these speed games, my capital usually builds the Pyramids soon, right after its granary. That didn't happen here because Masonry got squeezed out of the early research plan with the beeline to Mathematics. But I had a substitute available in the Temple of Artemis which requires only Archery. Warsaw started that on turn 24 and finished on 36.
This was my first time playing with the DLC for that wonder, so I'd never built it before. I knew how it works: the 10% multiplies all food produced, not just the surplus like the Tradition finisher does. I wasn't sure how early it would be worthwhile; the multiplicative factor doesn't do much until the cities get up to some size. But it was decent enough right away and of course amazing after some city growth.
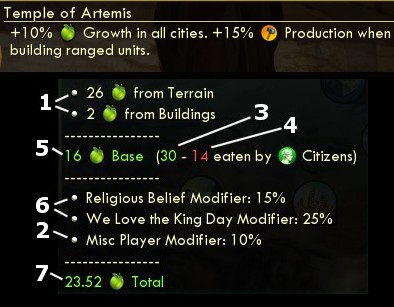
Even though the display is major screwy, listing the wonder as that bizarre "Misc Player Modifier" after other modifiers that it actually applies before. To help you navigate, I labeled this screenshot with the order that each of these numbers is actually calculated.  Even that doesn't get it exactly right; steps 3 and 5 include unshown decimals, here actually 30.8 and 16.8.
I hadn't entirely thought this through, but now I realized that the Temple of Artemis is so great because its food gets multiplied by the other bonuses as well. Since you're always running a food surplus, the 10% always becomes more surplus that gets multiplied by Swords Into Plowshares and King Day. This city is producing 28 base food, but Temple of Artemis is yielding more than 2.8; with the other multipliers the total actually comes to 3.92.
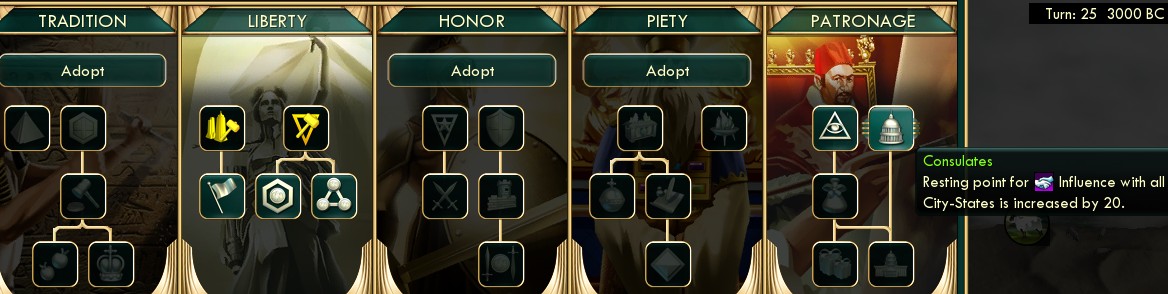
Policies: The Kilimanjaro culture helped me to the Liberty opener on turn 8, Republic on t11, Citizenship on t16. Mathematics research completed on turn 25 and I happily put the next policy into Patronage and claimed Consulates as Poland's first freebie. That should be soon enough to start ticking up influence to get maritime allies early.
My next two policies would go into the Tradition opener (turn 31) and Aristocracy (t39). I correctly calculated that with the Tradition opener itself plus several monuments and some cultured city-states, I could still make two more policies past those plus Poland's medieval freebie in time to reach Mercantilism along with Education. I knew the Tradition opener would be mandatory for this game; without the Shoshone's Great Expanse there would be no other way for the fast-growing cities to have enough workable tiles. Aristocracy was a bonus which came in conveniently timed just as we started the Pyramids, Petra, and Great Library.
Researching Animal Husbandry first also had the benefit of finding and improving horses quickly. That led to my next move: with money from a few more city-states plus one ruin, buy a chariot archer.
What's so exciting about that? Here's another trick with ruins that not even the Shoshone can pull. It can only happen by chance. But this game is all about breaking the rules to take control of chance.
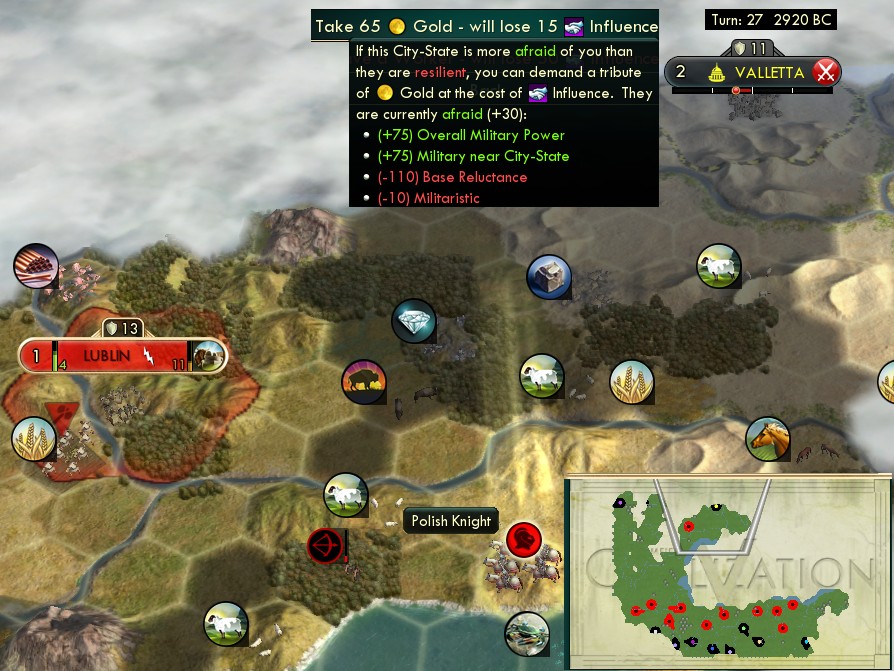
I saved a nearby ruin to pop with that chariot archer, and reloaded until it yielded a unit upgrade, which would take him all the way to a knight! The strength of this unit would be enough to seize tribute from most city-states on the north side of the sea. And of course a knight is fast enough to cover plenty of ground on the huge map and strong enough to easily clear camps as well.
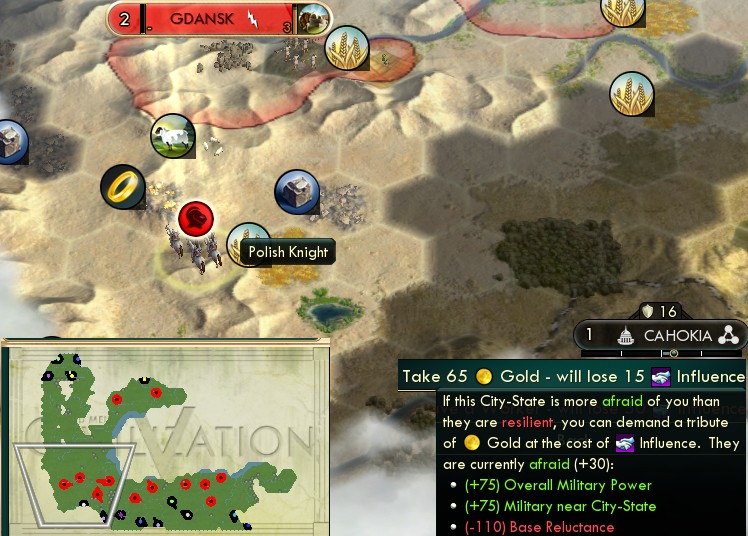
That tribute money bought another chariot to pull that trick again, this time in the southwest corner, where I could get tributes from three city-states that my spearman had missed originally. This knight went on to clear camps as well.
The first knight in the north also made this helpful play. I just got that settler from a ruin, but there's a barbarian in the way of getting where I want to settle by those desert hills. I could cover the settler with the scout, but that would waste exploring time. Instead, just let the settler get captured because the knight can immediately kill the brute to recapture it.
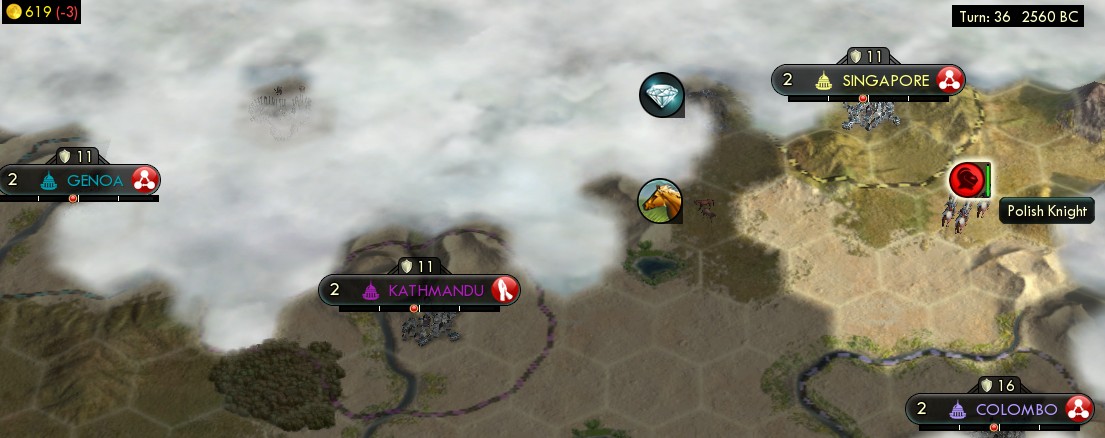
There he is a few turns later; check out that trail of angry city-states and my fat treasury.
Also later on I got one more fun upgrade from a ruin, a landsknecht into a Winged Hussar.
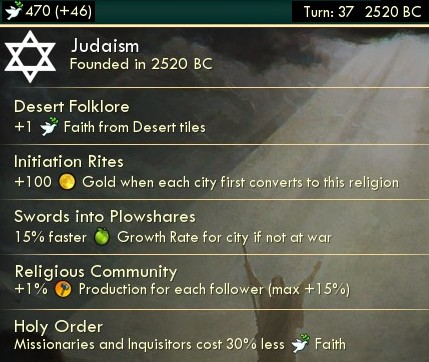
Religion was standard stuff. I spawned the first two prophets and held onto them while collecting more faith from ruins; got a total of one for 90 and two for 160 each. I both founded and enhanced the religion on turn 37, with enough saved for three missionaries at the Holy Order discount. Then it was a continuous stream of missionaries going everywhere to spread Initiation Rites.
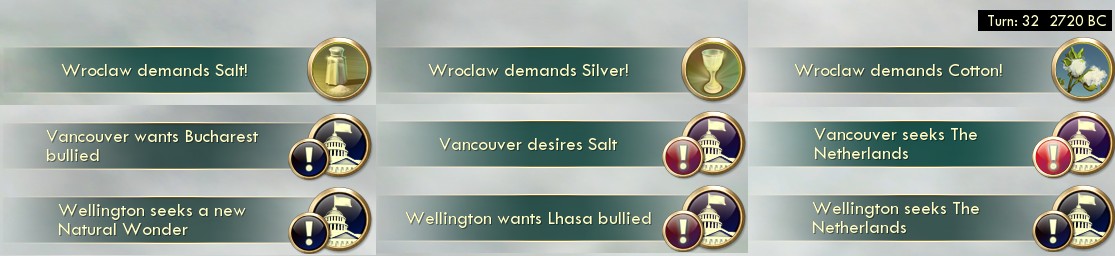
Here was an exploit I hadn't anticipated. Here's something else that New Random Seed can rig: city-state quests. Here's how it works: it's predetermined that a particular city will issue a quest on a particular turn, but which quest will change upon reloading. So here I reloaded this turn until Wellington and Vancouver both gave a quest that I could complete easily. We Love The King Day demands also behaved the same way: constant for which city would ask, but which resource would be rerandomized on each reload. Finally, if you reload from an autosave instead of a manual save, the CS quests are already set but the King Day demands are rerandomized.
I continued to do this on every turn. Save before ending the turn and reload until the King Day demands and city-state quests were easy to fulfill. It occurred to me that this might have been wasting Consulates somewhat, since a camp quest plus a rigged-to-be-easy quest add up to a solid alliance even without any help from the Patronage policies. But on the other hand, I could take advantage of this by continuing to demand tribute even from allies, when two quests had given enough influence to withstand the loss.
More things to abuse with New Random Seed. 1) reload until a Great Prophet spawns at the first chance. 2) reload until a city's culture expansion claims the right tile, here the crabs over the fish. 3) reload to reroll what type of unit you receive from a militaristic city-state until you get a good one. I used that last a lot throughout the game to get knights, far better than anything slower to cover ground towards tribute and camps.
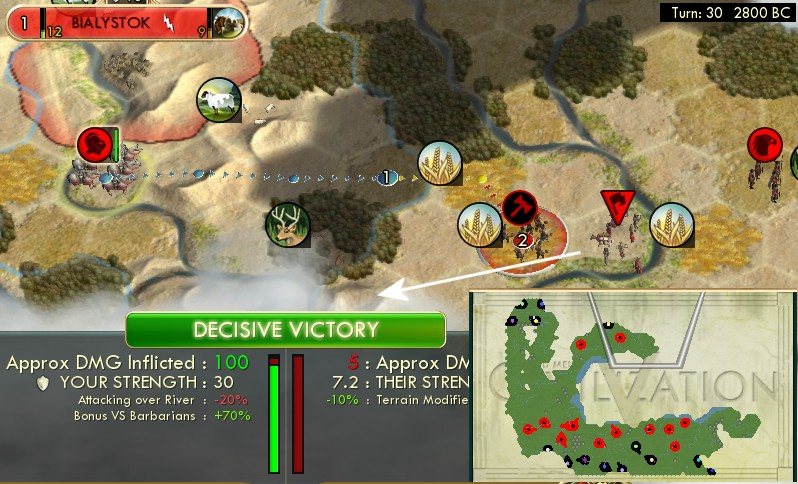
I also made the most obvious use of luck manipulation, rerolling combat results. It's much less impactful in Civ 5's combat model than in earlier games, and not all that consequential on Settler just fighting a few barbarians. But I would reload to get better damage values to clear a camp in one fewer hit when possible.
Here I got my first two maritime city-state allies. I bought that chariot (my third) to do it here (sadly, no ruin nearby for a knight upgrade.) Wellington's influence was already up from Consulates and I got a nice alliance there. Ur was lower because it was still recovering from an earlier tribute demand; it came to exactly 59/60 influence after the camp quest so I decided spending 250 to top it up into alliance would be worth it. (As always, note that the Patronage opener actually improves buying influence more than does the Philanthropy policy. -25% decay means the duration is 100/75 = 133% as long, while the direct boost comes to only 125%. I would not take Philanthropy in this game.)
I'll leave off showing all the camps, but here's a summary. Turn 41 got one for another mercantile and again paid 250 into alliance. t43 maritime ally #4 from another camp, now with Consulates high enough for the alliance to last long enough until it issued another quest. t47 maritime ally #5 from a spread-religion quest, which wore off briefly until a camp quest for it a few turns later. I didn't write down the rest of them but I kept getting many allied city-states of all types, and by turn 60 I had allied all 11 maritimes on the map. Between the two knights and several Kilimanjaro-trained scouts now ruins-upgraded to archers, I could cover most of the territory on the huge map in good time.
Also got a classic worker steal. Can't count on one coming available on Settler difficulty, but here it happened in just the right time and place at my newest city in the farthest corner that needed it the most.
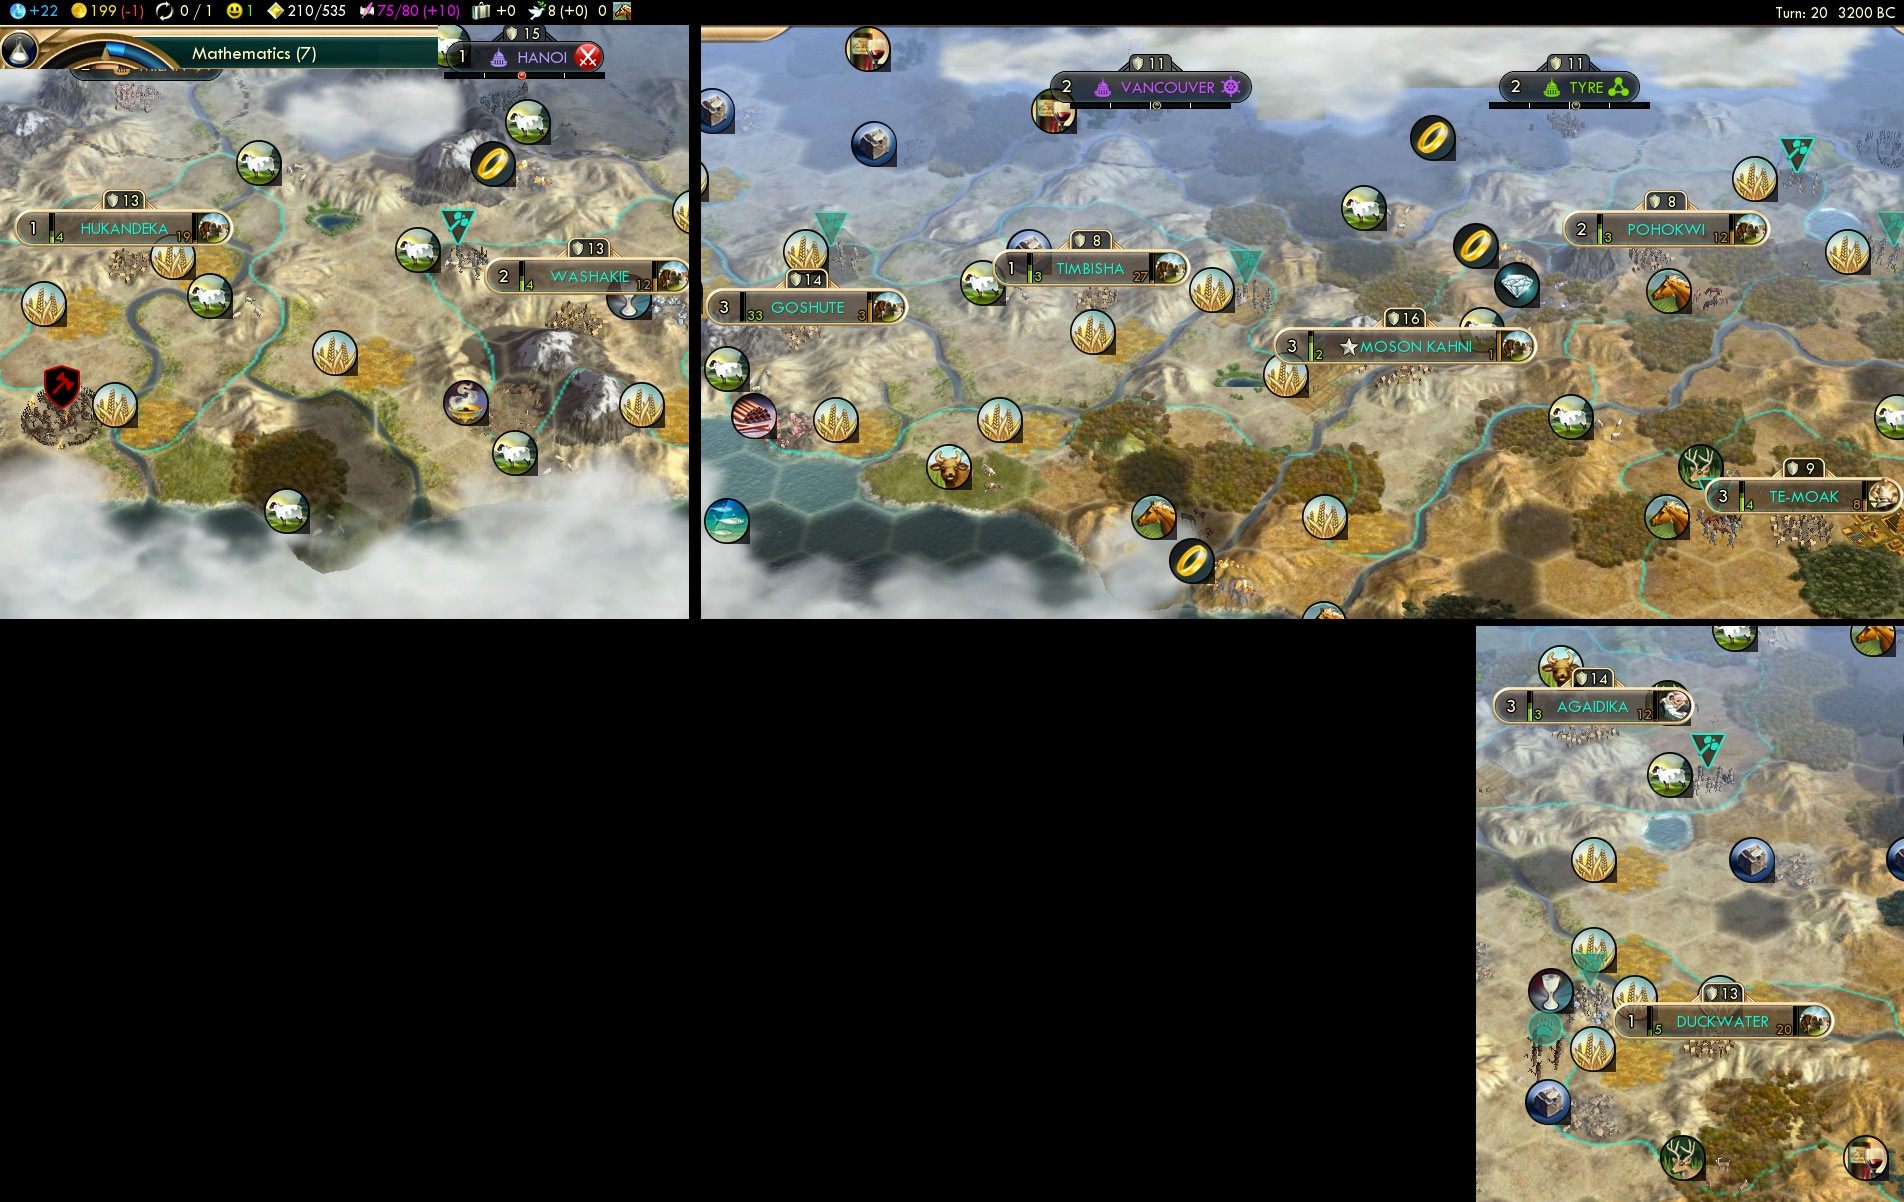
The minimap also shows how far I had explored and settled (as long as you're not red-green colorblind), so let's finally take an overview of all my cities at turn 50.
")
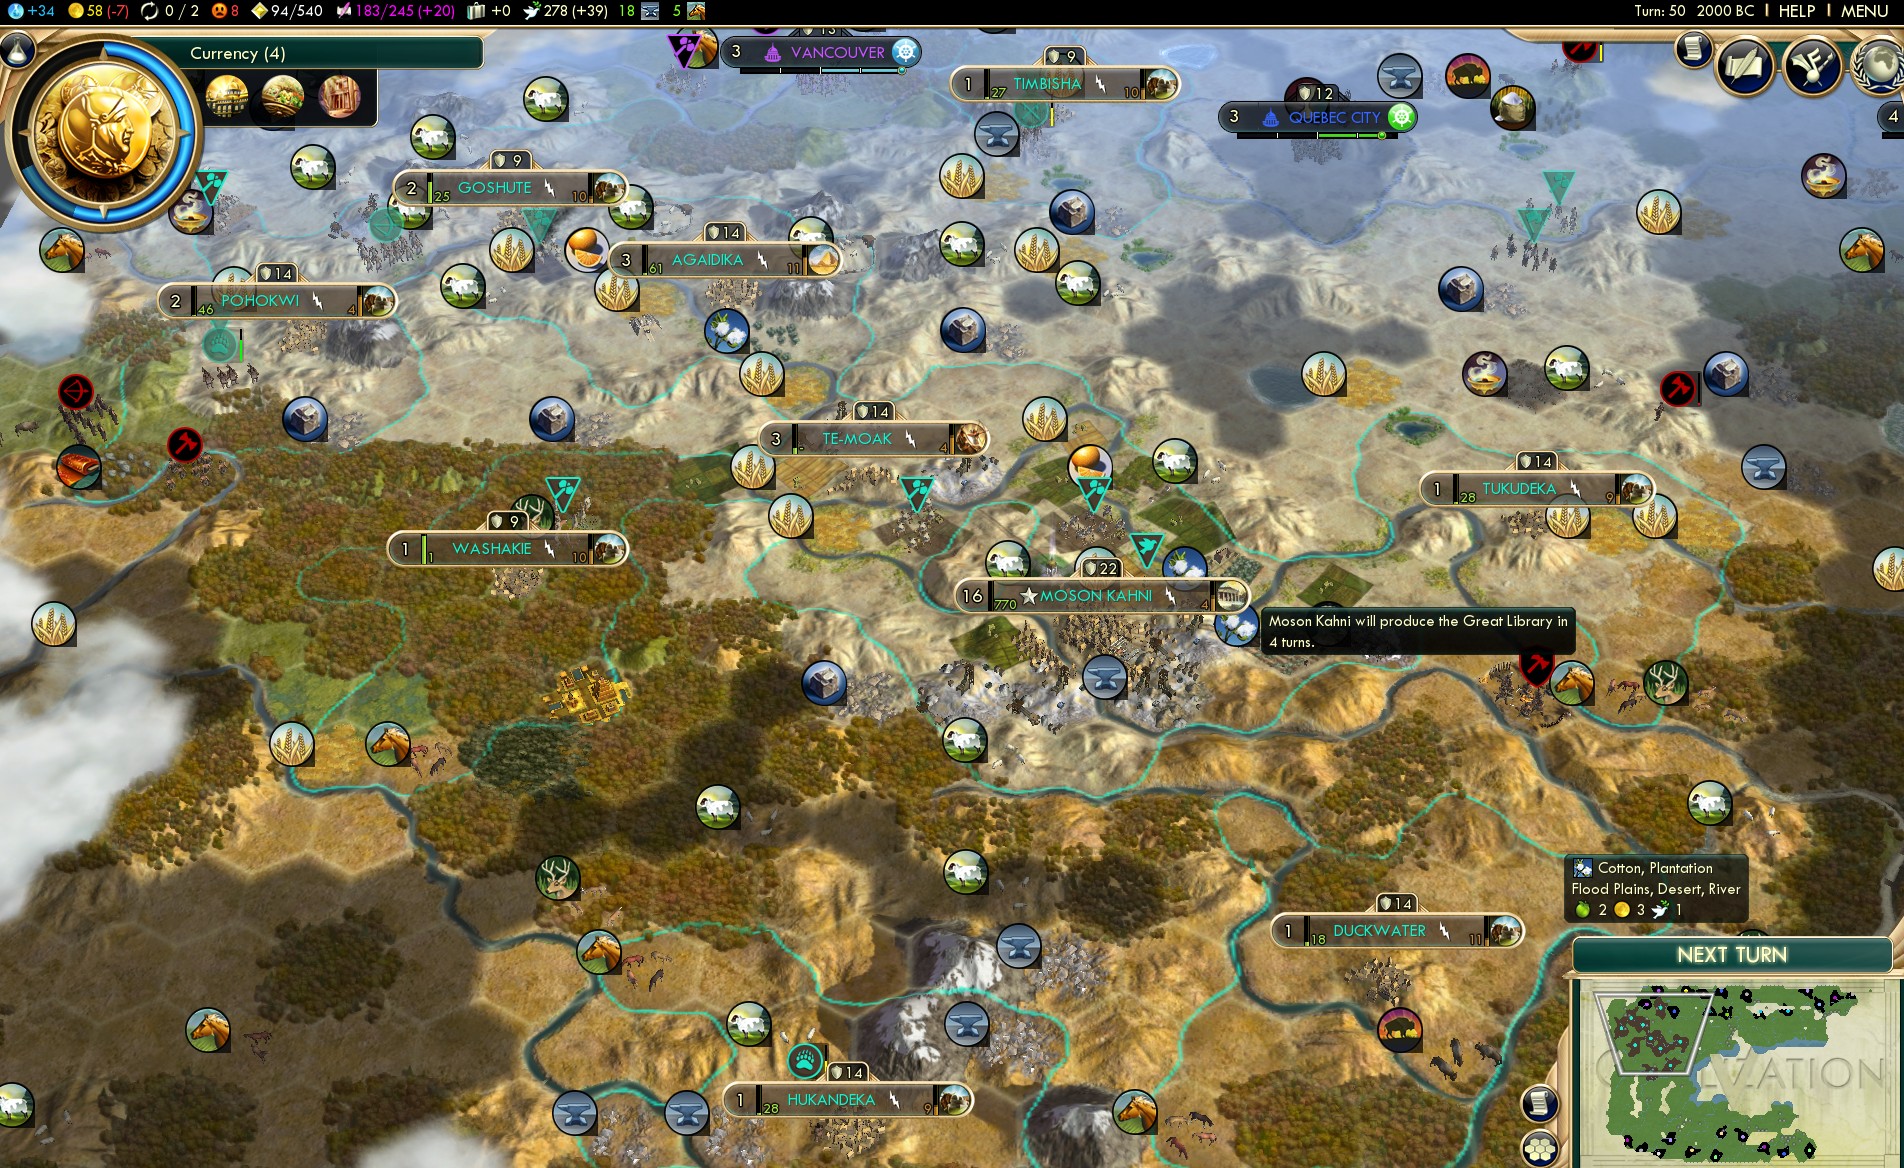
I got a total of 17 cities. I hadn't predetermined that number, but that was how many settlers I got from ruins at good locations in good time. Also I did start to run low on happiness eventually, even on the lowest difficulty. The locations were somewhat haphazard based on where the settlers spawned. I carefully sequenced the order that I took ruins in order to get settlers at the best spots, but it wasn't always perfect. I ended up with four cities on the north side of the sea that wouldn't ever get connected by road.
The minimap shows that I'd now explored almost all the way around the sea in 50 turns. My last huge map game got about two-thirds in that time, and that's the difference that Kilimanjaro made. By now it was too late to take any more settlers for cities; they wouldn't catch up on building universities and schools. I continued to find more ruins on the east edge of the map, which added up to about five more cycles of gold / population / unit upgrade or culture as the only other useful options remaining.
Civil Service came on turn 48, four turns behind the Shoshone game. But actually only about 3� considering there was a lot of overflow. And having nearly twice as many cities was certain to make that back up and more. Education came via the Great Library on turn 53, now just two turns back of Shoshone. I put two more social policies (since Aristocracy) plus Poland's medieval freebie into Commerce to reach Mercantilism on turn 52, exactly as planned.
I felt like I had been leaking a bit too much money along the way: bought the three chariot archers, quite a number of tiles (no Great Expanse), twice spent 250 for maritime alliances, and also bought a work boat for a needed luxury resource. But I arrived at Education with 2500 saved, which was enough to buy five universities right away, and the sixth a couple turns later (in the Great Library city because that GSci point could catch back up on GPP.) I knew six Great Scientists would be the limit in this accelerated timeframe. And as I wrote pregame, it's OK to simply slowbuild the rest of the universities.
One thing that's missing in that overview is mountains. I just didn't end up finding much of any good city sites for them, including the capital. There's a feedback factor here: with fewer mountains, going to Astronomy early is less attractive, which makes mountains less of a priority, which makes Astronomy less attractive, and so on. Here I would just skip Astronomy until rather late, sometime after schools.
Capital's build order around this time: Petra - Ducal Stable - watermill - Oracle - National College. I had actually thought I just might never build the NC. It costs 635 hammers with 17 cities, which is very expensive, worse than a research lab. But the capital didn't have anything else urgent to build presently, and the marble and Aristocracy bonuses would apply to blunt the cost. So I built the NC, and along the way bought the capital's aqueduct, since that always pays back over 100 food almost immediately.
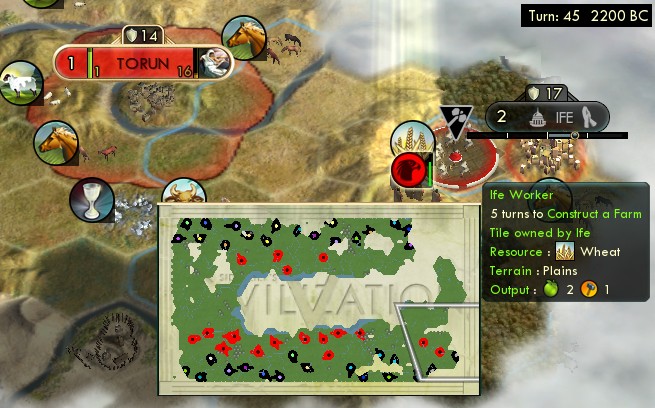
I picked six "elite" cities that would get their universities and schools bought, for Great Scientist purposes. These cities built granary - monument - library - garden - aqueduct - sometimes a Ducal Stable - and they would spread out the important but not time-critical wonders in Chichen Itza, Machu Picchu, Mausoleum of Halicarnassus, Angkor Wat, and later the Leaning and Porcelain Towers and Oxford. Non-elite cities built granary - monument - library - university - aqueduct - public school - market. Skipped workshops, markets were more important. I wasn't sure how worthwhile the aqueducts would be with such a short time remaining, but I can never resist building them as soon as I can.
On that list was Angkor Wat, which I haven't done in speed games recently. But it felt like a good idea here, with so many cities outgrowing their workable tiles so quickly with all the maritime and Artemis food and without the Great Expanse of the Shoshone. Angkor Wat made a surprisingly big difference; with the Tradition opener, the wonder cuts the expansion cost typically from 40 to 30 culture, which is quite significant, that's 3 turns saved on every tile for an ordinary city making 3 culture/turn. It also made a noticeable difference at the capital expanding to more Petra hills sooner.
After Education I researched straight to Acoustics to unlock Rationalism. That came on turn 58 and I immediately plowed one normal policy, the Oracle, and Poland's renaissance freebie all into Rationalism. Next regular policies came on t63 for Free Thought and t68 for Sovereignty. Poland's industrial era freebie would claim Representation.

Now the wide number of cities started to kick into high gear on research. After Acoustics, I hit a run of nine straight 1-turn techs: Construction, Engineering, Guilds, Iron Working, Metal Casting, Machinery, Optics, Chivalry, Physics. Filling in the classical era was cheap, but the later medieval techs became more expensive, but by then I was completing all the slowbuilt universities to keep pace with the costs. Several researches looked like this picture, just a little short of truly 1-turn but made it with overflow from the cheaper techs.
Presently my first Great Scientist spawned, on turn 67. I was sorely tempted to spend him right away to adhere to my original plan of that tech-every-turn pace from here onwards. But the math revealed that it wasn't quite so; he could overflow for about three more 1-turn techs but would peter out two turns short of Scientific Theory. So I held on to him during 2-turn researches of Printing Press and Banking. Then bulbed Economics when the overflow would carry through on one turn each for Architecture and Sci Theory.
That came to Scientific Theory on turn 73 - that's eleven turns ahead of the Shoshone game! One bulb spent which the Shoshone didn't, but I knew the wide city count would catch back up on that and more. I also saved 4200 gold since universities from more tributes and Initiation Rites, just enough to buy six schools in the six Great Scientist cities. I'd correctly refrained from buying aqueducts and other tempting items (did buy the capital's aqueduct, and refreshed one more maritime alliance.)
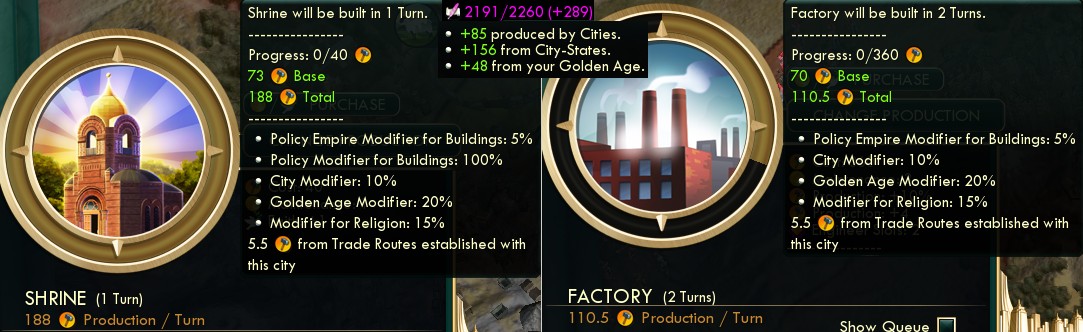
Next came Industrialization (to start Big Ben in time to finish it for buying labs) and then an unavoidable gap of 4 turns to research Electricity. But from then on, I would indeed hit my goal of one turn for every research from now until Alpha Centauri. So after opening Rationalism at Acoustics, there were a total of only five possible turns to cut from the timeline. Here's a chart to show that visually, and you can see exactly where the gaps were. � indicates completing with Great Scientist overflow. † indicates a tech that was off-line from my main goal at that moment, but was cheap enough to take as a 1-turn research with no time lost to the next target.
| Turn | Researched | Great Scientists |
| 58 | Acoustics | |
| 59 | Construction | |
| 60 | Engineering | |
| 61 | Guilds | |
| 62 | Iron Working | |
| 63 | Metal Casting | |
| 64 | Machinery | |
| 65 | Optics | |
| 66 | Chivalry | |
| 67 | Physics | |
| 68 | Printing Press | |
| 69 | ||
| 70 | Banking | |
| 71 | Economics | |
| 72 | Architecture � | |
| 73 | Scientific Theory � | |
| 74 | Compass † | |
| 75 | Industrialization | |
| 76 | Electricity | |
| 77 | ||
| 78 | ||
| 79 | Radio (Rationalism finisher) | |
| 80 | Astronomy † | |
| 81 | Steel | |
| 82 | Gunpowder | |
| 83 | Metallurgy | Rifling |
| 84 | Steam Power � | Replaceable Parts |
| 85 | Plastics � |
This involved the Rationalism finisher at an unusually early time, for Radio. That would get the ideology policies in play at the soonest possibility, but that wasn't the primary reason. It was to unlock buying Great Scientists with faith. I knew I'd want to spend two scientist bulbs up to Plastics and three or four more up to Rocketry/Satellites. But those scientists hadn't spawned yet! Faith-purchasing is the only way to bring Great Scientists forward in time without screwing up the GPP cost counter.
So as that chart shows, I got Plastics on turn 85. And I had another 6000 gold on hand to buy eight research labs right away. Remember that I bought only six schools and slowbuilt the rest. One detail that worked out nicely was that those slowbuilt schools came to completion at the same time as reaching Plastics and buying the labs. That meant the 8-turn Great Scientist history window would fill concurrently for both the slowbuilt schools and the bought labs.
And now the wide city build could pay off. After Plastics, I could hit several more techs in one turn each, so I didn't have to spent a Great Scientist bulb yet until it mostly came up to maximum value after the labs. And now each Great Scientist produced over 16,000 beakers and often overflowed to multiple techs. See below for the rest of that tech chart. I bought a total of 11 research labs, and left the last 6 unbought as unnecessary since the research pace was already at the limit.
This game saw a truly continuous string of Golden Ages. I got Chichen Itza done before the happy Golden Age triggered, which lasted from turns 64 to 79. The Representation golden age extended that through turn 94, and one great artist tacked on enough more to last the rest of the game.
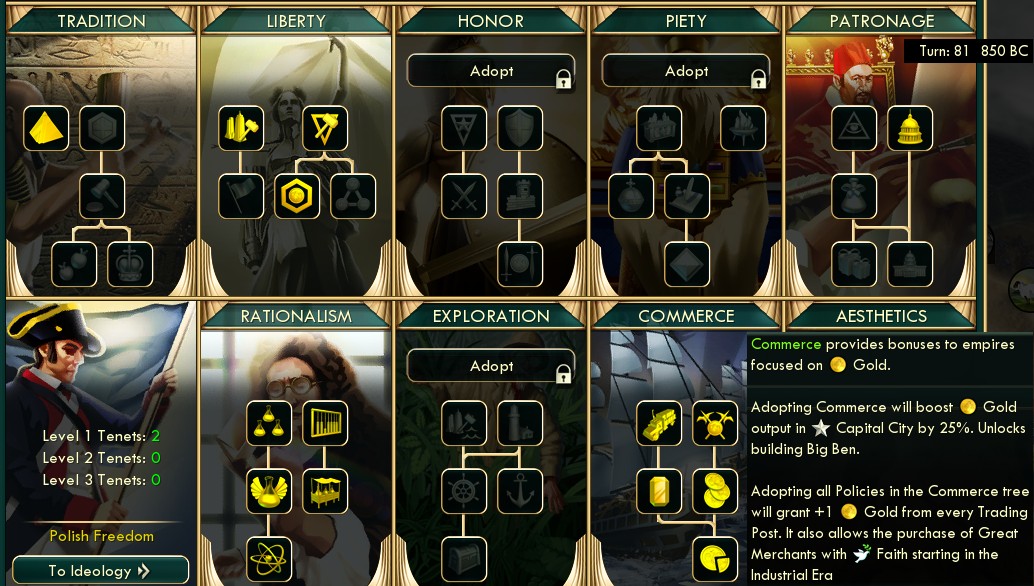
Recall that, compared to the previous Shoshone game, Poland's civ ability has accounted for four extra policies so far: two in Patronage and two in Tradition. The rest of everything would be identical across Liberty, Rationalism, Commerce-to-Mercantilism, and the ideology. But Poland gets seven total extra policies in a game. Where could I go with those other three spare policies? The Commerce finisher!
I was actually really excited about this. You readers have no idea how many times I've tried to put together a policy game plan that would include all of Commerce. Protectionism is the best happy policy anywhere (not relevant on Settler but would be on higher difficulty), and the finisher of +1 gold per trading post is outstanding. But it's just impossible to cram in six policies between Liberty/Tradition/Patronage frontloading and Rationalism/Freedom later. But I finally managed it for once here. The finisher yielded about 40 gold per turn right away and ramped to about 100 by endgame with more trading posts and market multipliers.
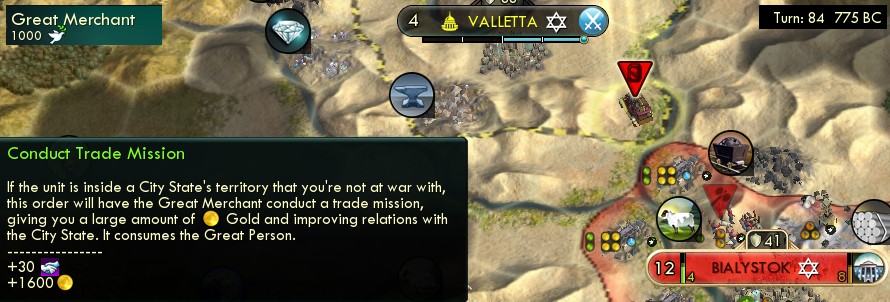
As big as the trading post bonus was also a Great Merchant. I never get those since it's never worth displacing a slot that could be a great scientist instead. But for once it worked here. Faith purchasing is the only way to get a merchant or engineer that doesn't increase the cost counter for scientists. I foresaw that the wide city build would accumulate enough faith to spare 1000 for a merchant and still reach 5000 more for three faith scientists. And with the Entrepreneurship policy along the way (double trade mission yield), the merchant came to 1600 gold to account for two of the research labs. 1000 hammers worth from a great person - that's actually better yield than a Great Engineer.
Also thanks to many allied cultured city-states, I'd even have yet one more policy to spare beyond Commerce. This went into the Piety opener to enable the usual abuse with shrine overflow tricks. (Maybe I should have done this sooner, but Warsaw's base hammer production didn't get much above 40 until it presently completed its hydro plant.) Before that had come Volunteer Army in Freedom for the units to go keep collecting tribute, and after came up to Space Procurements and the last two policies towards the Liberty finisher.
")
Here's a look at all the alliances. Most every one that wasn't allied was because I'd been hitting it hard for tribute. Mostly mercantiles, a handful of religious and cultured. I continued to reroll to get favorable quests for maritime city-states. I stopped bothering for other types, so there's a number of resource quests shown there that I'd never complete but didn't need to.
")
And a city overview at turn 100. It surprised me how the cities never stopped growing. Even with several maritimes, growth tends to level off once a city's entire population is working trading posts and specialists. But that didn't happen here, thanks to the Temple of Artemis, every city continued to have +10 to +15 surplus food all the way through to the end. It didn't make any difference on the finish date by now, but it was still satisfying.
| Turn | Researched | Great Scientists |
| 86 | Chemistry | |
| 87 | Fertilizer | |
| 88 | Military Science | |
| 89 | Navigation † | |
| 90 | Archaeology † | Dynamite |
| 91 | Railroad � | |
| 92 | Flight � | |
| 93 | Biology �† | Ballistics |
| 94 | Electronics � | |
| 95 | Radar � | Rocketry, Satellites |
| 96 | Atomic Theory � | |
| 97 | Combustion � | |
| 98 | Refrigeration | |
| 99 | Combined Arms | |
| 100 | Computers � | Robotics, Nanotech (Oxford) |
| 101 | Penicillin � | Ecology, Fission, Telecommunications |
| 102 | Mobile Tactics � | Adv Ballistics, Particle Physics |
Here's the rest of the tech timeline. There was one more gap where I didn't research a tech, where it took two turns for Refrigeration. I couldn't avoid this, with no scientist on hand at that point; both the last regular (600 GPP) and third faith (2500) scientists were due to come on turn 99.
But that didn't cost a turn, because the limiting factor turned out to be the build time to Apollo and Hubble, as shown in the overview above. As always, I also constructed the Leaning and Porcelain Towers in parallel, and claimed those scientists plus the Liberty finisher after the last regular scientist spawned. On turn 101, those three "free" scientists bulbed the three listed techs with overflow to Mobile Tactics. Then on turn 102, Hubble finished and those two scientists bulbed the last two techs.
One detail: I didn't have six cities within railroad range of the capital to buy all six SS parts on the same turn. (This is not an issue if Apollo completes before Hubble, or if the Hubble scientists don't directly bulb the last tech but need a turn to complete it via overflow. In either of those cases, you can buy some of the parts a turn ahead. But here I completed Apollo and Hubble and the techs all simultaneously so needed all six parts at the same time.)
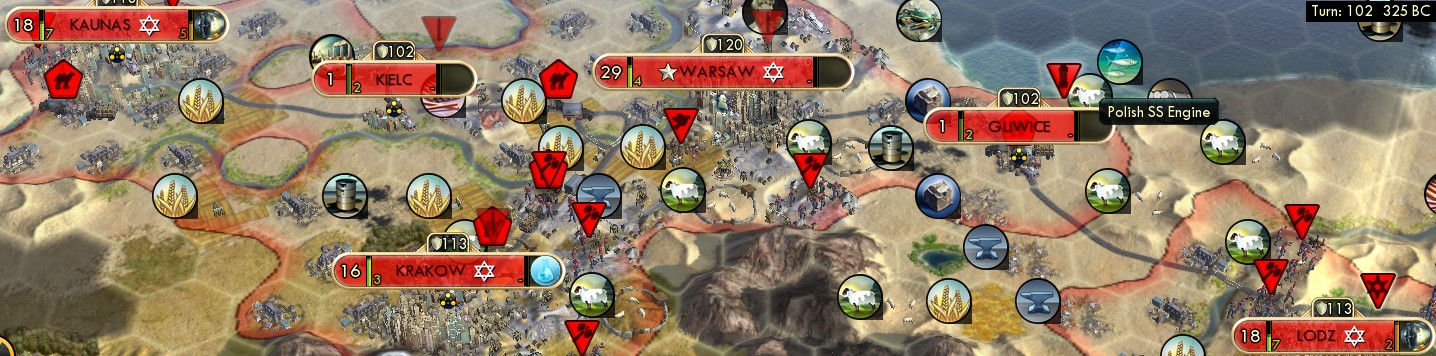
Here's the workaround to save that potential delay: I founded two extra cities on the railroad just as places to buy SS parts. One was even free as the Collective Rule settler that came from getting the Liberty finisher. So I bought all six spaceship parts on turn 102 and won on turn 103.
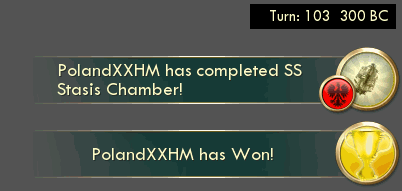
Another ten turns faster than the last Shoshone game!
Where exactly did the gain come from? With so many variable components, it's always hard to pinpoint, but here's a guesstimate. Of course the wide city build was the biggest factor; that shortened research times by about five turns through the renaissance and industrial eras. On the front end, I think the acceleration from Kilimanjaro roughly broke even against El Dorado for the Shoshone. I think Poland's civ ability accounted for about three turns, about two from Consulates and maybe half-a-turn each from Aristocracy and the Commerce finisher. And the Temple of Artemis was worth about the same amount of food as Consulates (4-5 per city) and about the same two turns of time gain.
I'm having more fun on Settler difficulty than I might have thought, and do still have another idea or two in mind.