So Poland shattered my previous science record, coming to 179 turns with the help of Jesuit Education. That's great, but yeah I'm still trying more.
On my list of civs to come back to has long been the Shoshone. I've gradually been discovering how much it matters to frontload expansion and productivity, and of course the Shoshone are the frontloadiest civ of all. On more than one axis: choose-your-ruin is obviously their prime feature, but the Great Expanse free land-grab matters too, and so does the high strength of Pathfinders.
And my previous Shoshone game had been with Tradition, but I had to try them with a Liberty start as well. Then I had to add Jesuit Education which is the strongest turn-saver I've found in the middle game. Thing is, this gets very crunched on policies. The Reformation in Piety requires four to reach, plus Mandate of Heaven is also a must. This means we'll only fit three policies outside Piety before Rationalism, so I'd have to live without Citizenship or Meritocracy. But the three policies into Liberty's left side are the strongest part of that tree and certainly more bang than three into Tradition (all its power is in its finisher) or anywhere else. Finally, the Shoshone's free land grab UA covers up the biggest weakness of Liberty in slow border expansion without the Tradition opener.
And I have one more adjustment to make: I'm taking the drop to Prince difficulty in search of faster times. I'd resisted this, but then finally realized what I'd assessed wrongly. Before BNW, the big reason to play on Emperor or higher was to have strong AIs for research agreements. A few of those would account for a few tens of thousands of beakers, well worth the tougher competition. But research agreements are nerfed to uselessness in BNW: the worse of the two partners, which would come to like 500 beakers the few times I tried them. If I'm not all the way up on Deity, I'm really not proving any measure of toughness by pretending that Emperor is high difficulty (it isn't), so Prince it may as well be. (But I still have enough dignity to stop at this "fair" level and not slum it even lower.) Finally, the Shoshone have the most to gain by playing on Prince, with more ruins to grab with fewer AI units around.
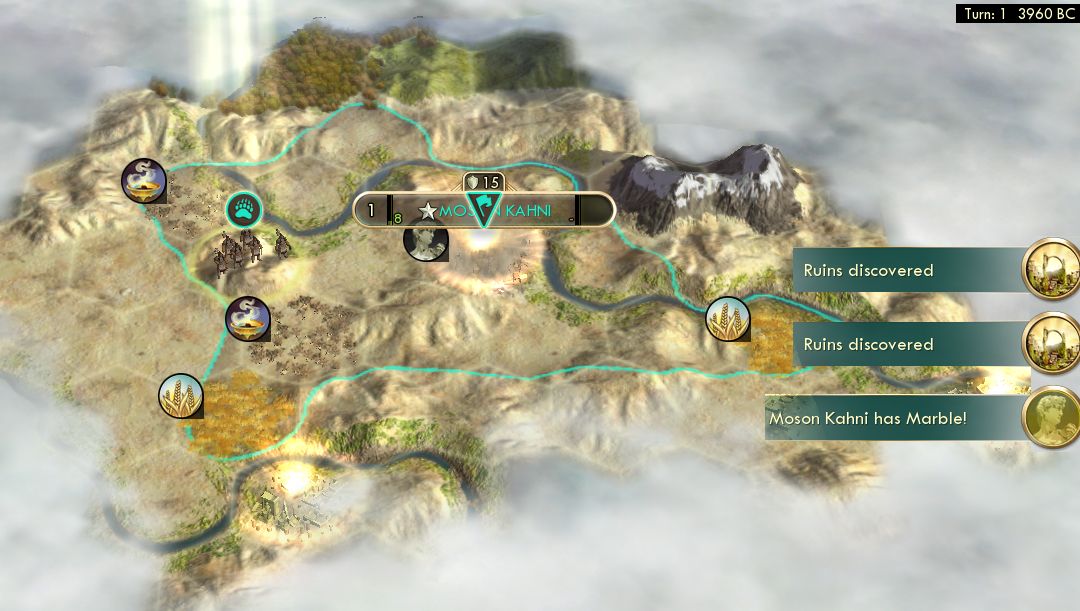
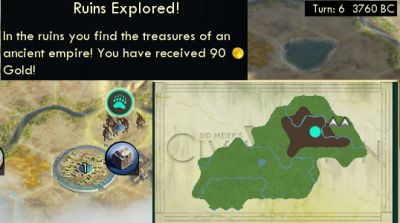
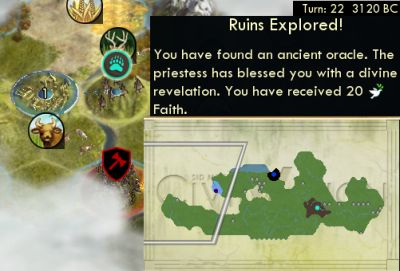
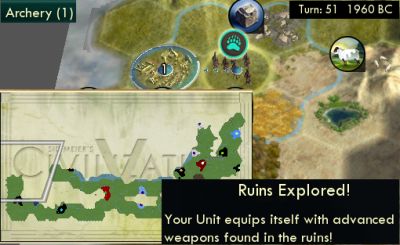
 Here begins our story, on a beautiful start that must be in the top 5 percentile. On marble, two wheat claimed thanks to Great Expanse, tons of floodplains and Petra hills. And two ruins visible already.
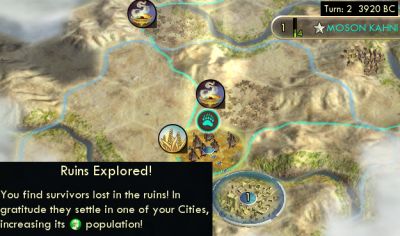
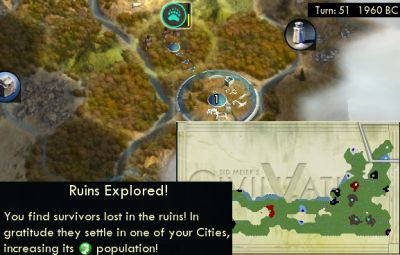
And I did take population from that first ruin.
In a few partial starts, I nailed down my starting strategies here. For other civs, I make a big deal of growing on a 3-food tile before population from ruins kicks in. But the Shoshone think otherwise in two directions. One, they want to take population right away in order to enable it again as an option ASAP. But two, they really want to work hammers, because the pathfinders are so expensive. Even the 10-hammer opportunity cost of growing to size two is noticeable in getting the pathfinders out slower.
But I'm working a 3-food tile anyway. Because that's still the way to get the highest total yield. This food would be used not for growth, but for hammers by working hills at a food deficit shortly later. In fact, any 3-yield tile is effectively eventually 3 hammers once you grow and can work more hills to burn that food into hammers. In further fact, actually the best turn-one tile to work is 1-food 2-hammers (such as a sheep hill), since that gives the same 3 yield with the least dependency on deficit-burning later. (A 3-hammer tile would be even more optimal, but none exist until iron is revealed.)
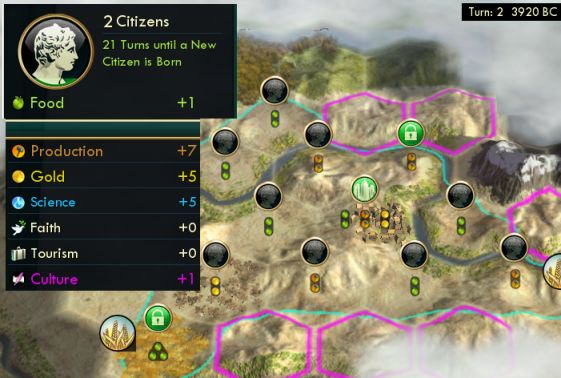
So at size 2, I found it best to work a 3-food tile and a hill continuously for +1 food surplus. With other civs, I would alternate from the food tile onto a hill to burn the surplus -- but not with the Shoshone. Because they are assured of getting another growth from ruins soon, they are assured of being able to burn that food surplus more efficiently at size 3.

Burning the food storage gives twice the mileage at size 3 (working 2 hills costs -1 net food, thanks to the wheat) than it would at size 2 (working 2 hills costs -2 net food, without the wheat.) So that 9 food in storage would now convert to 9 hammers over 9 turns, rather than the 4� I'd get over 4� turns at size 2.
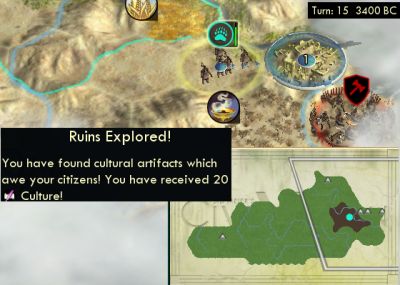
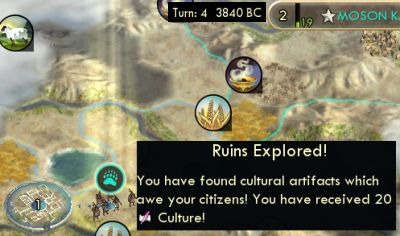 Back to the ruins. Like the previous Shoshone game, I can't resist the urge to chronicle each one. Here I am picking culture to get to the Liberty opener as fast as possible on turn 6.
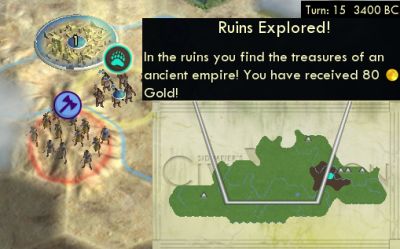
 Gold came next; I think this is more important very early than tech. Get the snowball started by building up to that first worker purchase. Most early techs don't matter until you have a worker to improve the resources they enable.
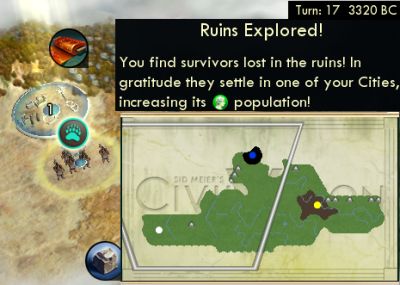
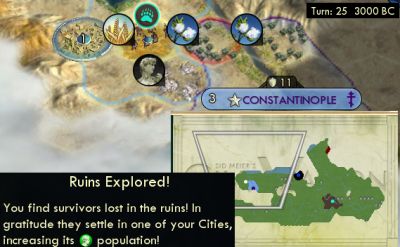
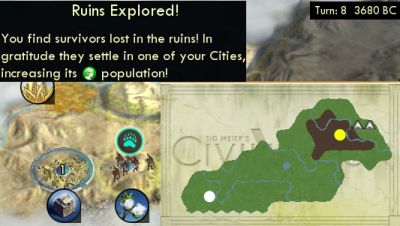 My starting pathfinder was fantastically successful, four ruins in just eight turns! Here's population to size 3.
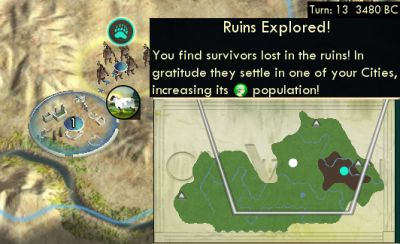
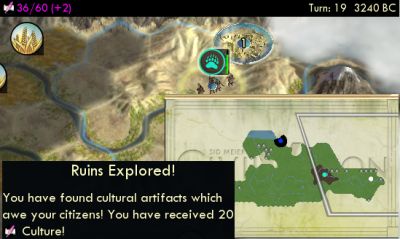
 Make that five in ten turns, helped by having to divert north around that barb camp there. Culture now was the choice to get Republic as fast as possible on turn 11.
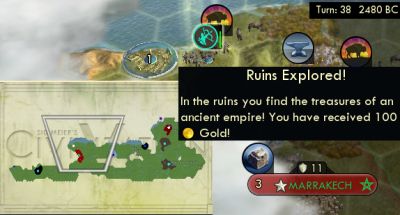
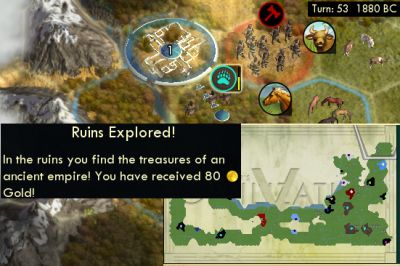
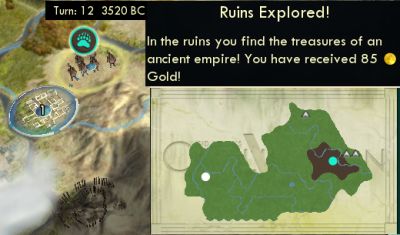 Six in twelve turns, the luckiest scout I've ever had. Gold again, with another good roll of 85.
 Now my second pathfinder is getting in on the act, bumping population to 4.
 My third pathfinder finally went the other direction for the ruin that had been visible since game start. (I knew I was near the southeast corner and there wouldn't be any other civs in this direction, so this one could wait a bit.)
 Pathfinder #2 scored next, just ahead of a Byzantine warrior, getting a third above-average roll on the gold amount.
 The starting pathfinder next got the population to size 5.
 Now the guy going east got my fourth culture pick. I was going so heavy on culture for two reasons. First, to reach the Collective Rule free settler at the impossibly early date of turn 21. Second, because now culture can take a back seat for a while -- Piety is coming next but there's no need to rush for it. Which means that the capital can skip the monument to get going on settlers faster.
 Now past turn 20 and at the least important spot in the rotation of options, this is the right time to take faith for the classic free pantheon. (Also this is where playing on Prince is starting to help. An Emperor-level nearby Byzantium probably would have grabbed this by now.)
 Um, yeah, an Emperor Byzantium obviously would have gotten that within 25 turns, but I happily took my population to 6 instead.
 More gold, a fourth straight above-average amount.
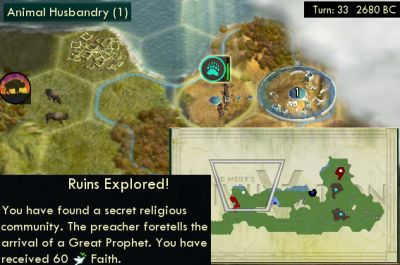 The good options here were tech or faith. (I didn't need culture now.) It was a bad time to pick tech just 1 turn away from Animal Husbandry, so went with the big faith.
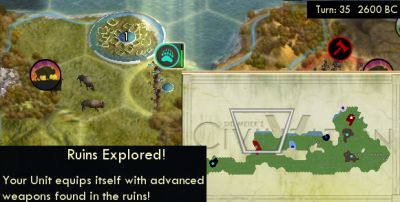 Now population was available, but I didn't want it. Because from this position, population would go into my second city (from Collective Rule). I had already sighted another ruin in a correct spot to get pop into the capital instead. So I figured the best option here was an upgrade, since now it wouldn't be long until the priority changed from finding ruins to clearing camps for city-states.
 Continuing with the great gold rolls, this time a perfect 100. (And yes, Prince AIs suck at finding ruins.)
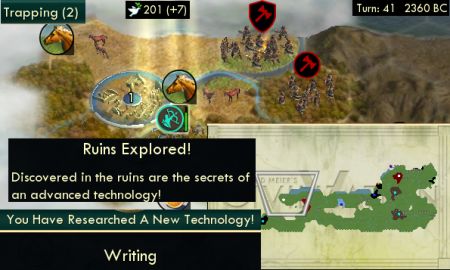 Still didn't want pop for the same reason. Faith was available but would go to waste at this time, with the counter already at 200 and just about to spawn the prophet anyway. So a tech was the best choice now, even risking the chance of wasting most of Trapping research. But it was Writing, no great slingshot, but a nice prize anyway.
 This guy finally broke through a barb camp to get this ruin I'd sighted ten turns ago, in the right place for the population to go to the capital up to size 7.
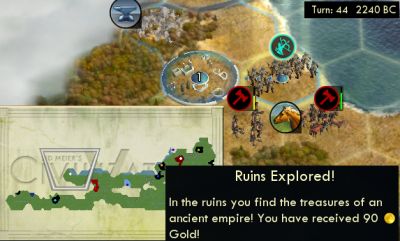 On Prince with +40% combat vs barbarians, I figured that comp-bow could withstand two warrior attacks to grab that ruin, for a sixth consecutive above average gold amount.
 No great options here. Faith is unavailable after your religion is founded. Bad time for tech, since it was a 50/50 shot of Sailing or wasting research on Archery. So take another upgrade.
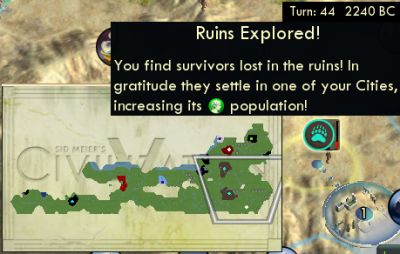
 Now population is available again. I now couldn't ever get more ruins-pop into the capital because of its location - it's closer to the corner where I'd now fully explored, with other cities closer to the bulk of the map. But the second city would get to size 5 here, which was still well worthwhile.
 More gold, and still above average.
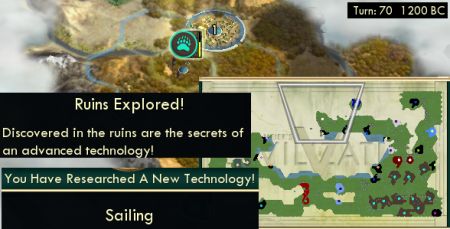 And finally, this one on turn 70 would wrap up the party. Neatly pulled Sailing as the last ancient tech to wrap that up too.
Total score: seven population (281 food), 615 gold, 80 faith, 80 culture, two comp bow upgrades (60 hammers), two techs (160 beakers), and all the accumulated snowballing of frontloading all that population and policies and purchased workers.
And so I was snowballing by the usual means at home as well. Jumpstarted by the social policies literally as fast as is physically possible: turn 6 Liberty opener, turn 11 Republic, turn 21 Collective Rule.
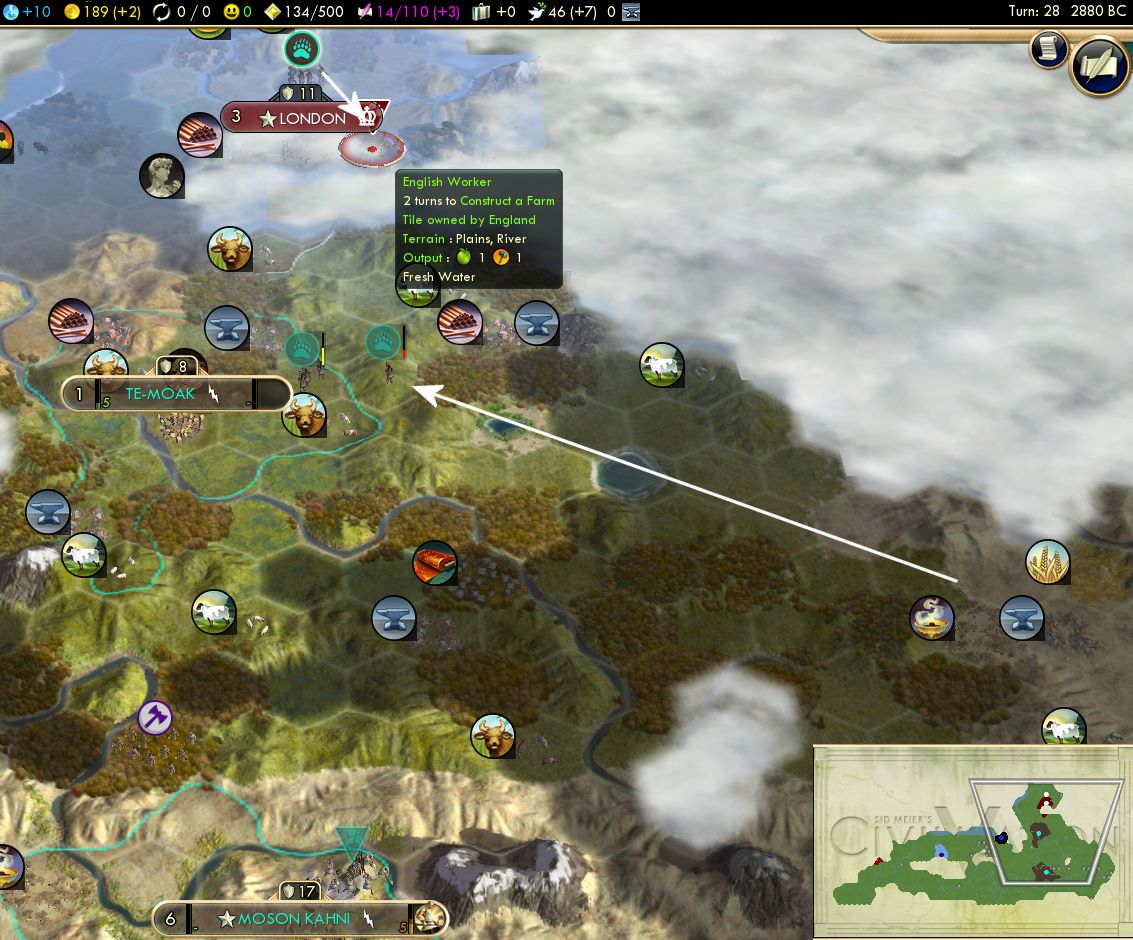
The CR settler went here, to establish a strong pink dot towards England. It grabs two luxuries (truffles behind the city billboard), two iron, three animal resources.
But the other thing going on is my northernmost pathfinder there, in position to steal that worker from England. I did so. I always refrained from doing this before, since I always felt like I wanted to keep the AIs friendly for later dealing. But Manpanzee and chumchu were pushing me in the Realms Beyond thread to abuse the AIs more, and down on Prince is going to be the time to try it.
The arrow there is indicating where that one pathfinder traveled. He was supposed to scout along the easternmost map edge, but a gaggle of barbarians chased him away from there on that diagonal. But this would prove important:
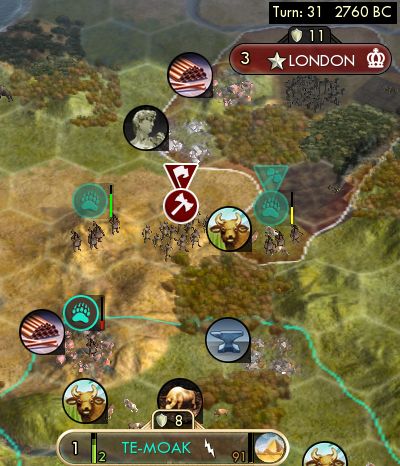 Incredibly stupidly, England moved a settler out towards me right in the middle of our war. Thanks to that extra pathfinder, I was able to surround it here!
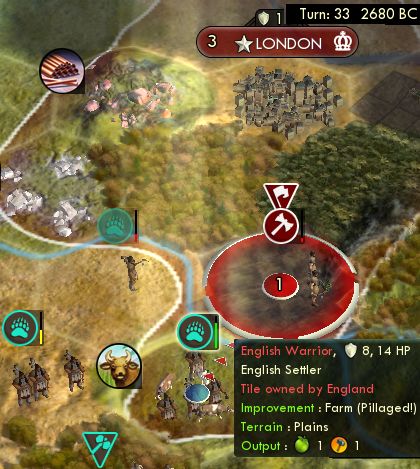
And two turns later I captured it too. I thought the damaged pathfinder would die in a worthy sacrifice, but then he survived the city's return shot at 1 HP! They all quickly scrambled out of there with their enslaved bounty. The whole episode did delay my northward scouting by quite a bit (10 to 12 turns), but two stolen workers is surely better than anything I could have gotten from a few more ruins by this time.
Also got a classic city-state worker steal. And as usual, kept that war active until swiping a second worker later.
That whole war was possible thanks to having built a lot of pathfinders at the capital. It had built seven total: three to scout (plus the starting one), then two to defend the capital and the early Collective Rule city, then a worker, then two MORE pathfinders for defending workers. Then it finally got onto the classic build order of settler - settler - settler - settler - settler - settler - etc. Notice it skipped the monument, because we slinged to Collective Rule so fast on ruins, and then there was no rush to accelerate into Piety, and also the Shoshone don't need culture expansion for tiles.
Tech order: Mining - Bronze to find iron - Masonry to enable the happy from the marble under the capital - and then I actually don't remember exactly but the general idea was most of the ancient age, then Philosophy for temples, then up to Currency.
After the aforementioned seven pathfinders and one worker, my capital finally got onto the starvation settlers. A bit late, but it's going strong with four hills mined already which would eventually come up to seven.
")
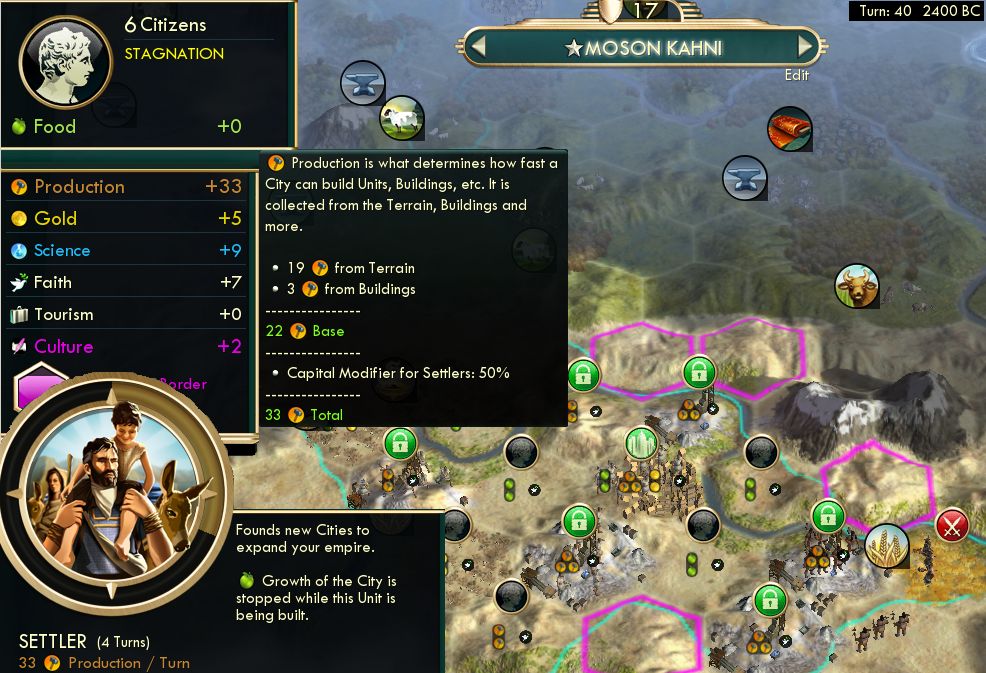
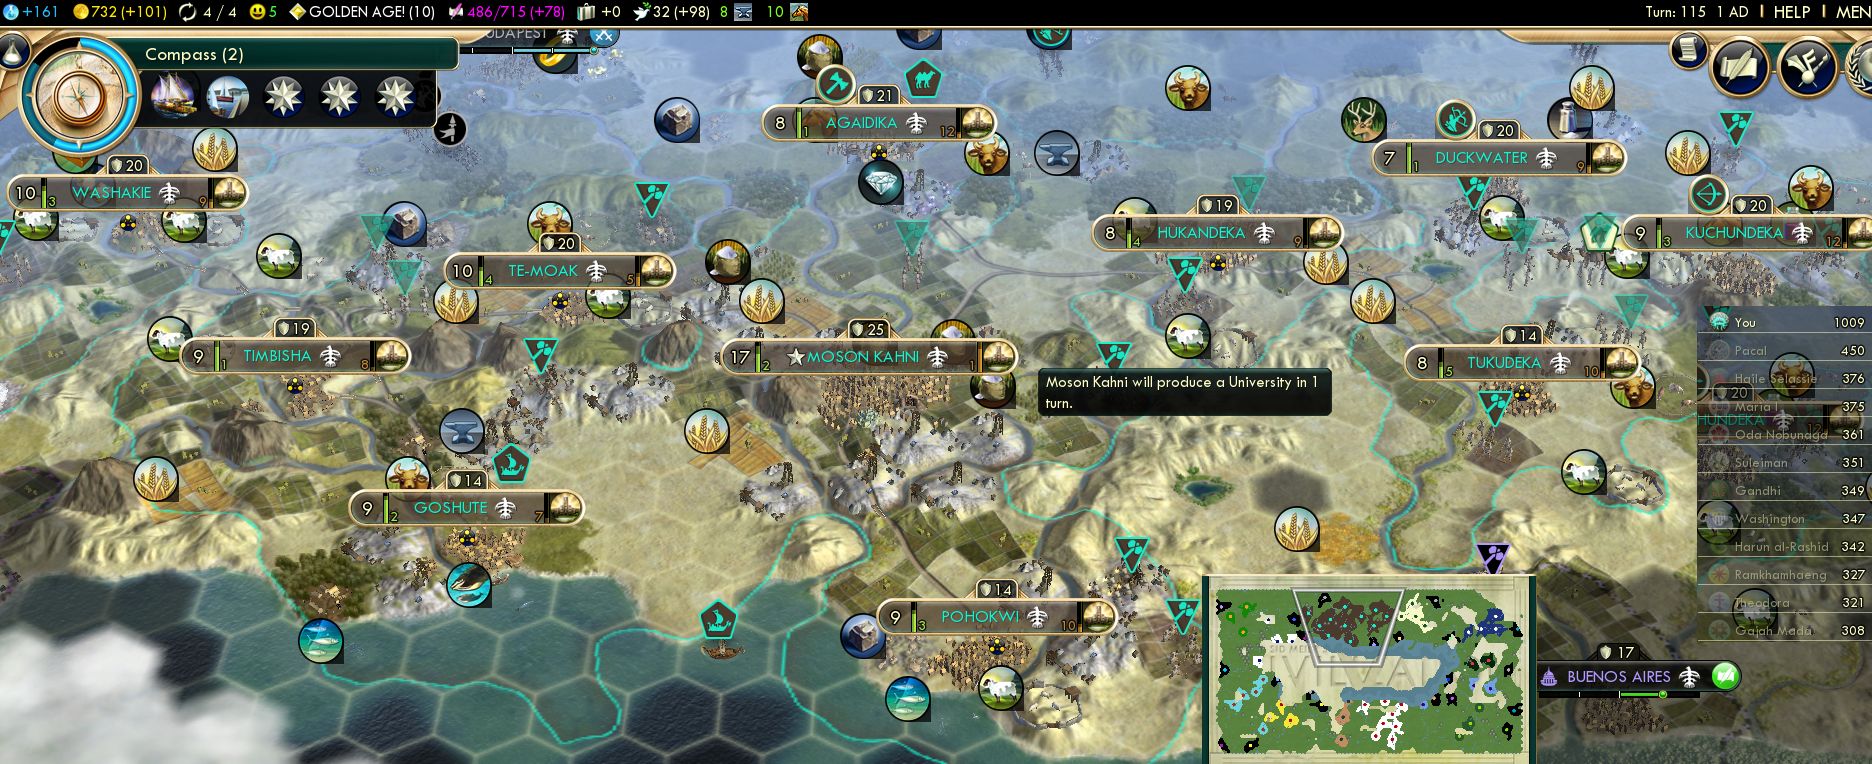
And here's the lay of the land. Fantastic map for the Jesuit Education plan! Look at that enormous amount of desert for Folklore. And there's seven unique luxuries within range: two each at the capital and Te-Moak, the silk between them, plus the cotton just on the left edge there and the silver on the right. So Moson Kahni grinded out those starvation settlers to rapidly populate this land. And for once I'd actually built enough defending and escort military units that they didn't lose much time working around barbarians.
Te-Moak is building the Pyramids, my now-standard move to do that in the second city to let the capital do the settlers.
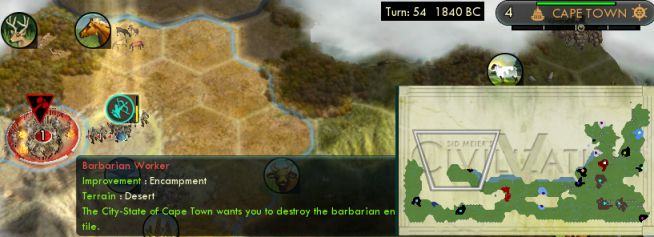
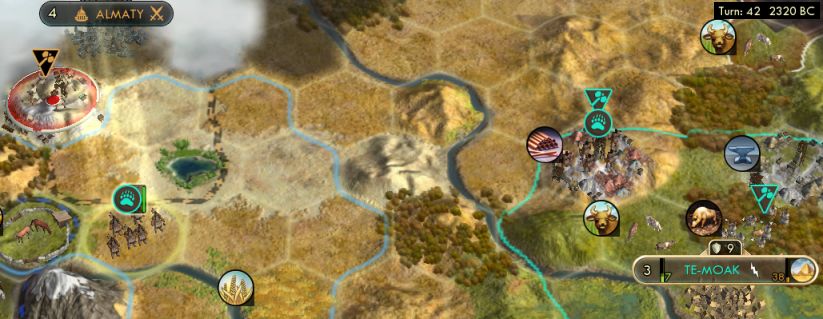
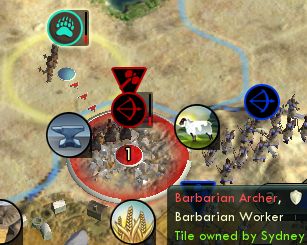
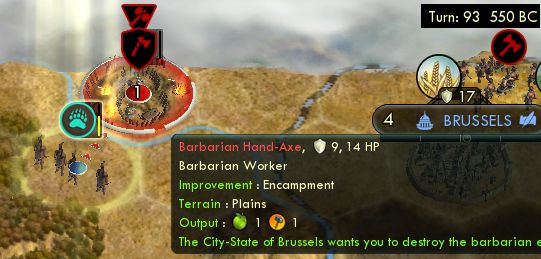
Presently the focus of my exploring units shifted from finding ruins to hunting down barbarian camps. Here's the first one. A composite bow with the Prince-level +40% combat vs barbarians can clear out a defending unit very fast (just two or three shots.) Unfortunately this worker didn't belong to Cape Town so I didn't get a maritime alliance here, but it did belong to the Iroquois who friended me right after returning it which was good too. I sold them an incense for their 148 gold, correctly gauging that a Prince AI wouldn't have significantly more cash anytime soon, and a bit later even had a pillaging barb cancel that sale so I could repair and resell it again.
Second camp clear, again nothing super exciting, just a cultured CS friendship.
Third, again lost out on rewards when that worker turned out to belong to something I hadn't contacted yet so there was no option to return it. I just explored it with a bit until it got recaptured again.
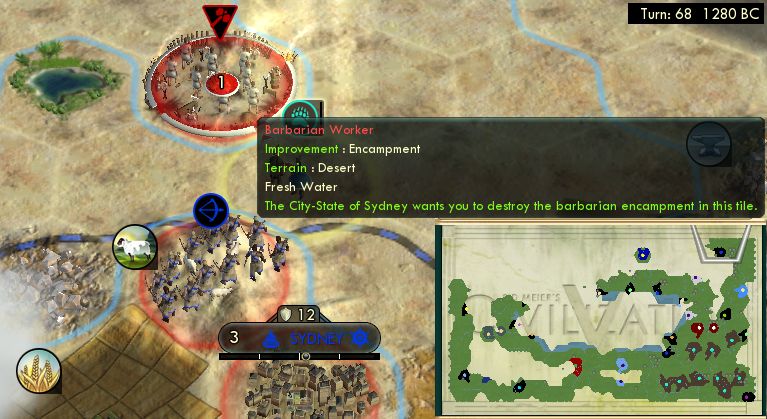
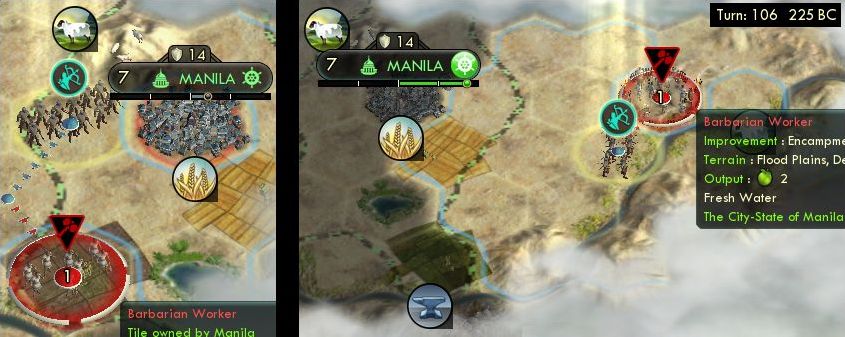
 But now we're talking. This time the worker belonged to the right target, so there's an instant maritime alliance, further boosted by re-recapturing the worker for Sydney again a turn later.
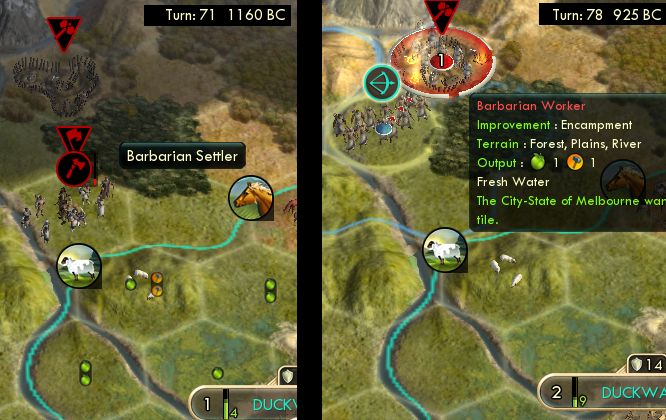
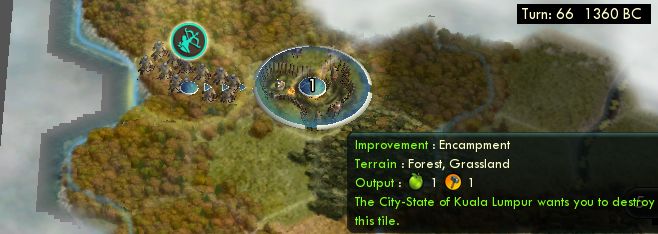
This one was close to home. Notable not for the reward itself (a filthy unreliable mercantile friendship), but the two captured workers I could put to work.
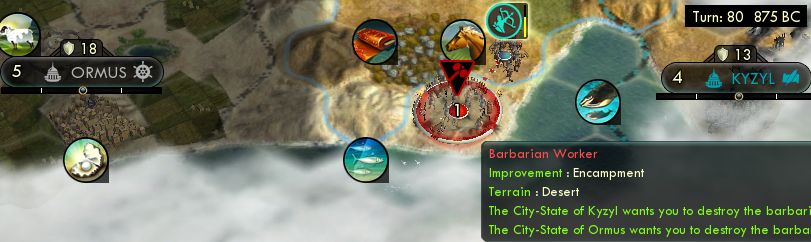
Three-for-one including the worker, although again it belonged to the lesser of the possibile owners, coming to alliance with the less valuable cultured Kyzyl rather than maritime Ormus.
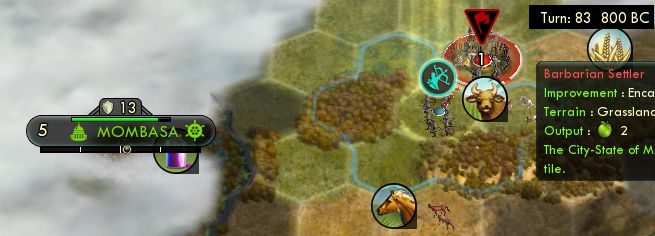
Again just worth a friendship and not alliance, but now just the friendship was pretty useful, 3 food in the capital that was now building Petra and could work more hammer tiles thanks to this. I would a bit later pay 500 gold to Mombasa to upgrade into alliance. It would last at least 36 turns, worth over 500 food for the 500 gold, plus the Dyes were a unique luxury for me and even triggered several WLTKDs.

This now wasn't a lone unit, but a classic case of two explorers meeting at the Inland Sea antipode after circling it in opposite directions. Again the worker belonged to the wrong target though, just boosting my alliance with cultured Kyzyl rather than getting one with maritime Wellington.
Another cultured alliance, and a backup source of dyes since Mombasa kept getting theirs pillaged.
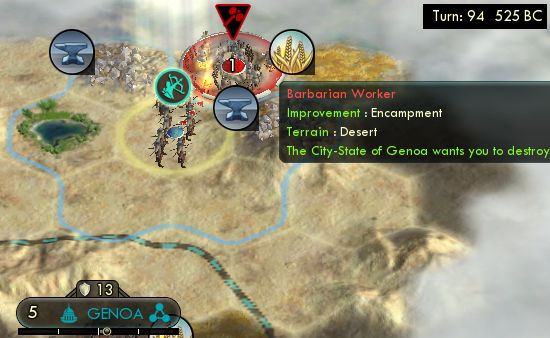
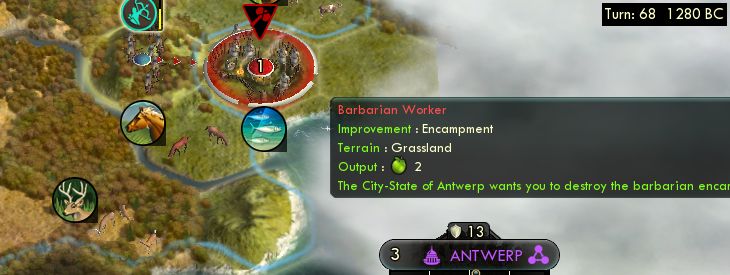
I hate trusting mercantiles, their happy always runs out just as you need it. But a camp clear plus worker retrieval comes to 95 influence, 45 turns worth of alliance, yeah that's good enough for long enough to be worth dealing with later. (It actually did turn into a headache later as the alliance expired at a really inconvenient time. I actually resorted to gifting a couple archers to Genoa for the 5 influence each, until Notre Dame completed for happy and I could sustain losing the porcelain.)

This time the worker belonged to Wellington and got me that alliance, my fourth maritime one.
This one involved two retrieved workers, enough for the alliance to last longer than the game would.
I think that's enough camps, you get the idea. This was surprising, I didn't know that massive amount of camp clears would happen. It wasn't just the +40% combat vs barbs on Prince, though that did help. The real secret was not experiencing the usual tactical problem with ranged units. The problem is that a ranged unit can kill the defender, but then has to wait a turn until it can walk into the camp, a turn during which a unit from another civ or the city-state itself can swipe the camp. That often happens on Emperor, but not here; turns out there are far fewer AI units wandering around on Prince.
And this also happened thanks to the Shoshone's UU, of course. With the 8 strength and +40%, a pathfinder is strong enough to clear most camps by itself, and certainly if ruins-upgraded to comp bow. I've toyed with game plans based around lots of camp clears, using war chariots or companion cavalry or some such UU, maybe Terracotta Army for even more units... but no, just use the Shoshone, who clear camps very well along with everything else they do.
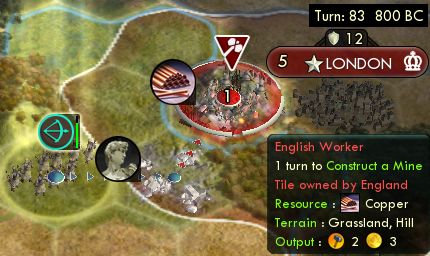
I kept my original war with England going until we got this opportunity to steal another worker, then signed peace.
From the stupid-easy quest department: this request for a religion that the city was already on the verge of converting to anyway.
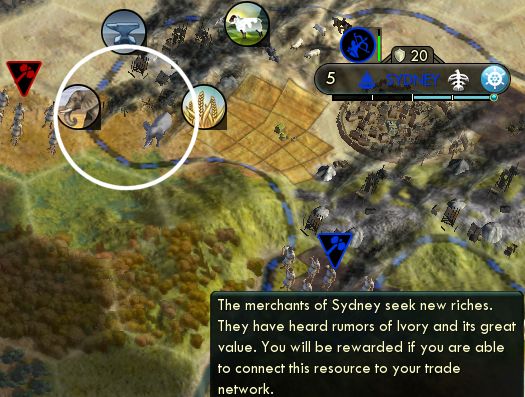
And also from the stupid quest department... rumors of ivory? You have it right there! Oh wait, of course you wouldn't know what it is, you've been letting barbarians pillage it continuously for the last thousand years. In fact, this turned out to be an unexpected consequence of Prince difficulty. Barbarians pillaged my CS allies a lot more, since they had fewer units to fight back. On Emperor, a CS typically has three or four combat units by this time, but most on this map had just one.

And so all that work ended up with this many alliances by the calendar change.
I was kind of jumping around on the timeline there, let's get back to a coherent narrative.
")
Here's an overview on turn 70, to compare with my previous Shoshone game. Thanks to the frontloading of Liberty, this game is ahead by 10 cities to 8, 27 population to 22, quite a bit in technology, and the Pyramids.
Almost all those outlying cities had to do an archer or pathfinder as their first build. My civ was so spread out, trying to take maximum advantage of Great Expanse to claim maximum possible desert, looking for long-term payoff with Jesuit Education. This was how to use Great Expanse: you still need to position cities so that they have hills in the first ring of tiles. The tile picker still hates hills even with Great Expanse. So the right way was to rely on the land-grab to pull in flood plains and resources in the outer rings.
In that shot is another move I hadn't planned at the outset: Te-Moak, after the Pyramids, built the Great Library! The GL never lasts this late on Emperor. It can fall as early as turn 35, and usually goes in the early 50s. I didn't know this until I looked it up afterwards, but Emperor AIs start with Pottery and so will get to Writing much faster. These Prince-level AIs took much longer.
When I started the wonder, it wasn't a gamble: I knew I could get it. Because I checked every rival civ and only about three of them had Writing (you can tell if your option to accept an embassy is available), and an embassy with each of those showed their capital not building the wonder. So it came in to me uncontested on turn 72. The reward was Currency, no great slingshot (the capital was still building settlers and not Petra yet) but still helpful beaker mileage towards Education.
Technology: I followed the same path as the Poland Jesuit game: ancient age, Philosophy for temples, Currency for Petra, Engineering for aqueducts, then up to Civil Service and Education. My build order in the cities started the same way too: shrine - granary - temple - library - aqueduct.
Well, for about the first half of my cities. The second half didn't get to the aqueducts before Education came for the universities and they also had to build gardens... and as always, it's really hard to finish an aqueduct and keep growing when two of a city's six population are sitting in a university.
Why were the cities only at six population? Happy cap, of course. I had expanded all the way out to 14 cities. Every one claimed a huge swath of desert and some sellable luxuries, every one felt worthwhile... but the pain came back in the form of the happy cap of course. I had a feeling that might have been one or two too many, but really wanted to go all the way big with faith for Jesuit Education.
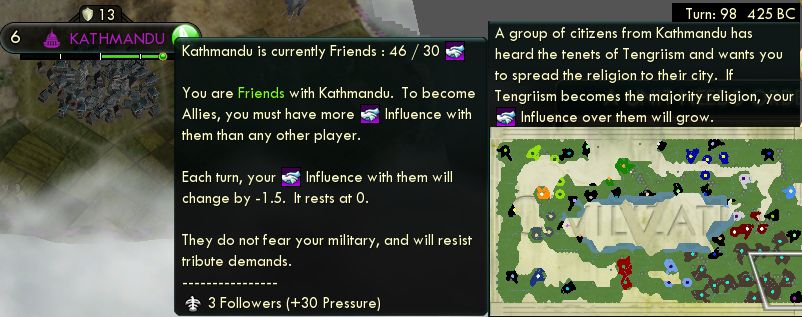
Religion: This followed a standard development sequence, a little slower than the Poland game but the wide swath of Desert Folklore would catch back up. I decided that Poland's plan of settling the first prophet was overthinking it, that I'd rather get the conversion pressure started sooner; I needed the pressure not just to convert cities but to get them to 5 followers to enable the Religious Center happy.
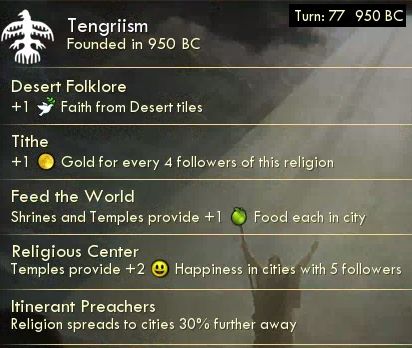
Pantheon on turn 21 from a ruin, prophet on t47, one missionary on t63 to convert two cities which would snowball to the rest (after holding a couple cities at size 1 to convert), enhance on t77. The beliefs were Desert Folklore, Tithe, Feed the World, Religious Center, Itinerant Preachers.
My Piety policies: turn 59 the opener, t78 Organized Religion, t96 Religious Tolerance, t97 Reformation via the Oracle, t106 Mandate of Heaven.
(Full disclosure: I had to reload and replay about ten turns here. After I realized I'd mistakenly enhanced with the shrine-happy belief instead of temple-happy. Whoops. As always, I value the ability to fix silly mistakes like that over rejection by the CFC HOF. Of course a few details went differently in replaying, notably city-state quests, but the reload didn't make any significant macro difference in this game.)

 One thing I didn't know was how much time I would have on Prince to get my Reformation belief before an AI swiped it. And I didn't have Poland's freebies to help out this time. So I targeted the Oracle at the Reformation to get it as soon as I could. Turns out it took until turn 96 for any AI to found a religion here on Prince (mid 70's is typical on Emperor.) It was the Netherlands, which was worrying since they were four policies deep into Piety... but no Reformation belief appeared for them meaning they must have taken every policy but that. And so I got Jesuit Education cleanly.
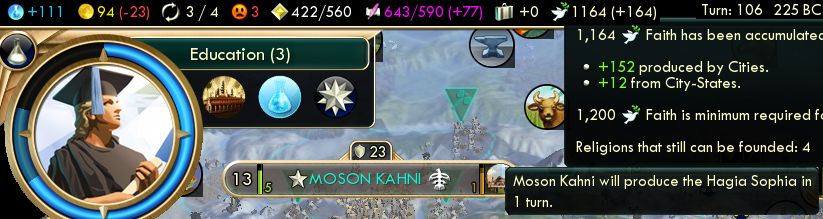
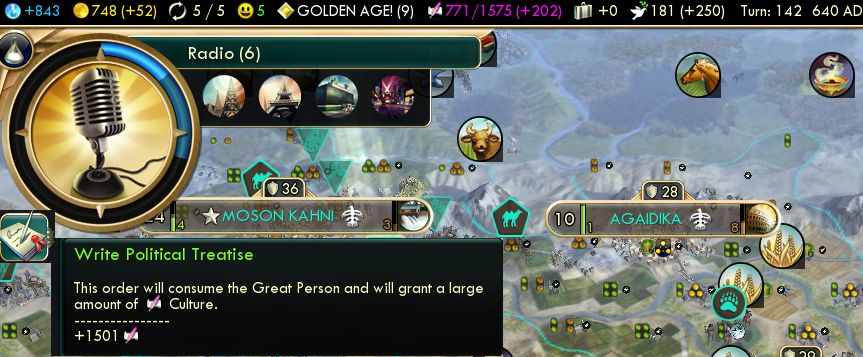
My next goal was to save maximum faith before Education, in order to dump it all into Jesuit universities right away. I spawned and settled the 500-faith prophet, then the 800. I had to bleed off faith on one extra missionary (who went to good use on two city-states.) Then I cleverly built the Hagia Sophia which would count as the 1200-faith prophet and raise the ceiling to 1700.

And so I got to Education with 1675 faith banked, 500 more than Poland had managed. This instantly bought 10 universities, where Poland had seven. It was two turns slower to reach Education than Poland, but the wider build may still turn out stronger by the end.
The question that everybody keeps asking: what about pagodas? Could they have fit in here? What would those faith numbers have looked like?
My faith production before Jesuit Education totaled to 3200. (1400 for the two additional prophets, 200 for the one extra missionary, and 1600 banked.) Some (let's say half) of the 14 pagodas would have come before Mandate of Heaven, for a total cost of 200 � 7 + 160 � 7 = 2520. The pagodas would have produced a little more (let's say 200) than the two settled prophets did. 3400 production - 2520 for pagodas comes to 880 faith to go into Jesuit universities. That is 800 less than I had in this game.
That's closer than I thought, but 800 less faith towards Jesuit universities is still too much of a deficit. That means the average university would complete five turns later. And then so would the public schools and research labs (minus a bit to account for the pagodas' continuing payback.) Pagodas are good but I don't think they can gain four or five turns over Religious Center or Feed the World instead.
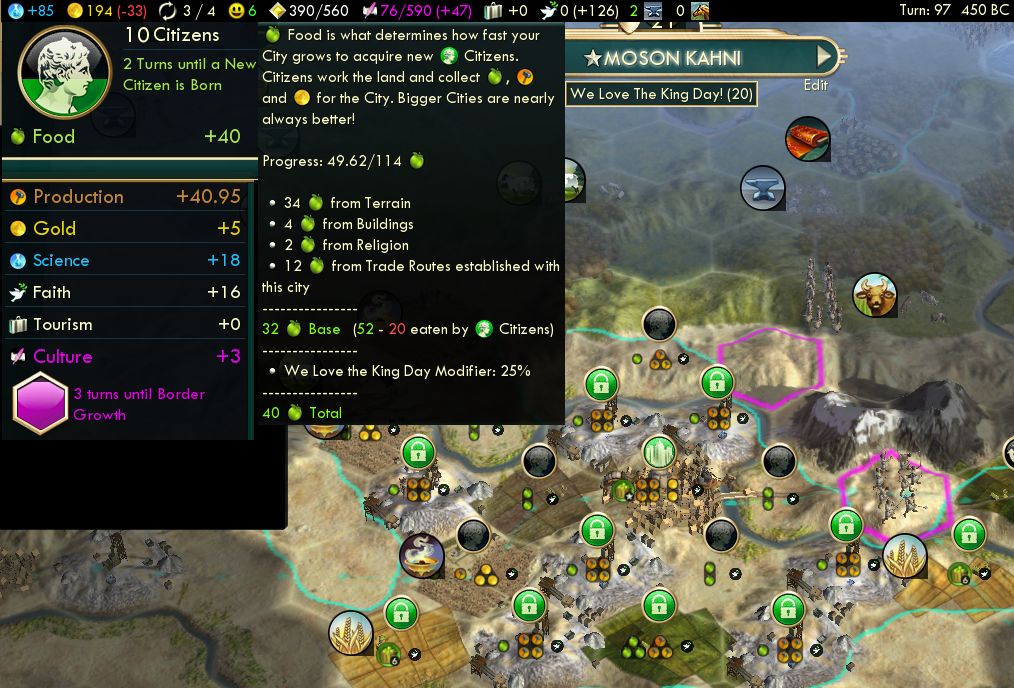
One thing that went spectacularly well in this game was my capital. It built Petra of course. Then it found itself with a massive +40 food surplus even still deep into BC years. That usually only happens with Tradition's food, but everything went right here. I sent all my trade routes here as food, because the best use of food is growing onto Petra hill tiles. It also had 12 food from maritime alliances. And the two wheat mattered too; sometimes I end up with capitals without any food resources in searching for enough hills. And it got a very timely King Day, which doesn't always happen. Finally, it had built its aqueduct quickly, thanks in part to offloading the Oracle to a side city instead.
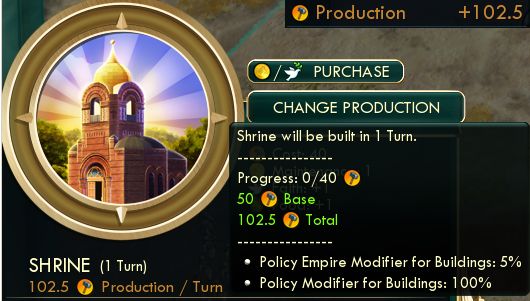
I proceeded to enhance this capital by making full massive abuse of the shrine overflow loophole. In Civ 5, building overflow is not divided back by the production modifier, so you can overflow all +100% from a shrine or temple onto another item. Right now the city wants to build its colosseum. It could put in 52.5 hammers this turn and 52.5 next turn (including the 5% from Republic), total 105. But watch what happens with this abuse. By selling the shrine and rebuilding it, we cause 102.5 - 40 = 62.5 hammers worth of overflow, so next turn we get 115 into the colosseum instead.
I abused this systematically and repeatedly, selling and rebuilding that shrine almost every other turn, dozens of times throughout the game to create that extra overflow. The formula comes to +100% base hammers minus 40. Each time you do it, you spend 40 hammers rebuilding the shrine to get an extra turn of +100% on the base hammers. Note that any other modifiers (Republic, workshop, Golden Age, production trade routes that don't get multiplied) are unaffected; they simply add to the overflow on the shrine which passes through to the next item. I also figured out this refinement: on shrine turns, work maximum Petra mines because the hammers are doubled; then on the next turn, switch back to floodplains and farmed hills for growth.
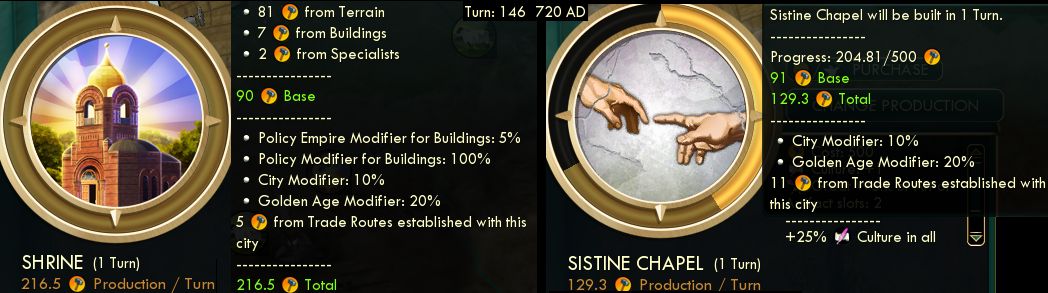
This is what it looked like later on, once the hammer numbers blew up with max Petra hills and a hydro plant. I could get 176 overflow from that shrine that would then go to complete more than half of a wonder in a single overflow turn. This is compared to the 126 that would have gone onto Sistine alone. I conjured up 50 extra hammers, by that formula of the base (90) minus 40.
")
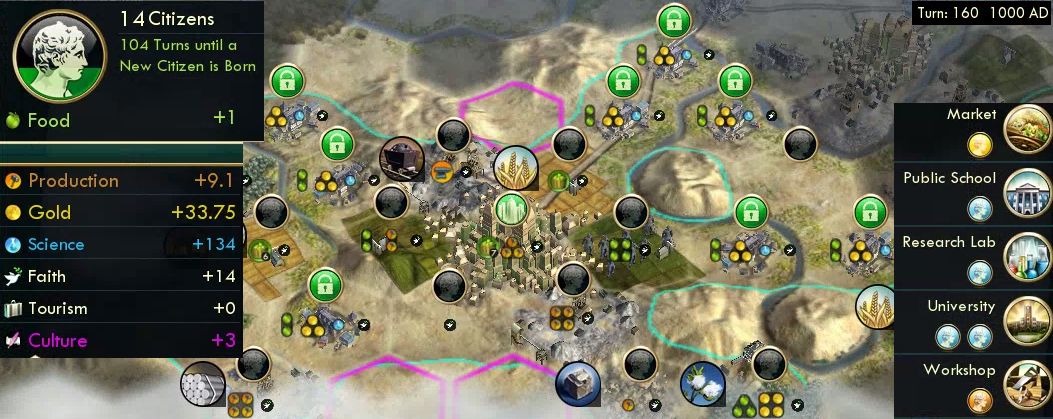
But as happy as I was with the capital, I was unhappy with most of the other cities. 14 had been too wide. I spent too many turns (around fifteen) with growth halted to stay at the limit of happiness. This took a toll in most of the aqueducts coming later than I would have liked (after gardens). The Piety game plan with the shrines and temples is fun, but even at half price, they do significantly delay the other important stuff. Feed the World can make up for those hammers if it operates continuously, but not if we have to stop growth frequently. Size 6 compared to a more usual size 8 sounds like little difference, but with two citizens plugged into the university, that's actually 50% more laborers and a lot more net productivity after food costs.
Still, this 1 AD overview is competitive with my old Shoshone game. This one is actually behind in population (104 to 100), though I guess that's not surprising comparing against the Tradition finisher. And of course the big swing here is completing the universities twenty! turns faster thanks to reaching the tech sooner plus Jesuit Education.
A predictable consequence of Prince difficulty: the AIs were broke as hell. I had something like 22 iron resources of which about 10 were usually going unsold at any time for lack of anyone with a spare penny of income to buy it. But on the other hand, I did get a good number of AI luxury imports -- because they were too broke to buy from each other either.
One thing that ended up waiting forever was the National College, as the capital was busy first on all of Chichen, Hagia, Machu, Notre Dame, and the Leaning Tower before finally doing the NC. But I think this was OK; the NC makes less difference on a big wide map as opposed to four-city-Tradition dogma.
That picture has me on the verge of Acoustics and the Renaissance, on turn 116, five turns ahead of the other Shoshone game although still two behind Poland. I hit the Renaissance one policy sooner than normal (8 including the Oracle before Rationalism, where 9 is normal); I was expecting that having built monuments late and pagodas never.
Turn 128 Printing Press, also two turns slower than Poland. The World Congress choice was definitely Sciences Funding; I wouldn't need the World's Fair policy since getting into Rationalism one policy early should mean no problem finishing that and an ideology.

The next milestone was Scientific Theory. I spent one scientist bulb to reach it, remembering my analysis that a bulb's position on the science timeline doesn't matter as long as an 8-turn window isn't still filling. It was undervalued by one modifier, that I didn't have Free Thought yet, but I ate that loss in order to have the faith numbers work out perfectly. 2296 faith here was right under the current 2300 ceiling, so I could use that to buy seven public schools instantly and the other seven over the next few turns.
Sci Theory on turn 135 was a new record, 6 turns faster than Poland, although they didn't spend a bulb to do it.
This next move needs a little explanation. I spent one culture bulb here. But it wasn't for maximum value, since I didn't have the Sistine Chapel yet. And it wouldn't just reach that policy, it would overshoot (which means sooner would have been more optimal.)
The answer is that this move was targeted not towards the current policy, but the NEXT one. I badly needed a policy to come available as soon as we hit the ideology (we would with Radio in 6 turns), for Universal Suffrage (the specialist anger saver.) The current policy would come too soon for that. But spending this writer now would synch up that next policy correctly. He would have the same effect towards Suffrage any time over the next six turns, and his culture value wouldn't go up by anything meaningful in that time, so it was correct to spend him now and enjoy the extra few turns of Free Thought along the way.
Summarizing the policies here:
- T116 Rationalism opener
- T128 Secularism
- T139 Humanism
- T142 Free Thought by great writer
- T148 Avant Garde and Civil Society as Freedom free tenets
- T148 Universal Suffrage
- T159 Capitalism
- T164 Sovereignty by great writer
- T164 Urbanization by Statue of Liberty
- T173 Rationalism finisher by great writer
- T176 Space Procurements by great writer
So I've been talking about Freedom, but that wasn't an easy decision. Throughout the game I was actually agonizing continuously whether to go Freedom or Order. The big problem for Freedom was a social policy path that didn't include Mercantilism. That makes the spaceship parts galactically expensive with no discounts at all, 3000 gold each, 18,000 total for six. And the Prince AIs weren't being of any use in buying my resources.
But I didn't like the idea of Order either. Because my cities beyond the capital were still undersized and weak, still building basic stuff like workshops and markets. They were in poor shape to build even factories and hydro plants, never mind spaceship parts. Lacking Mercantilism also hurts Order, since it's that much harder to buy power plants and SS factories.
Finally I settled on Freedom. 18,000 gold by endgame is quite a challenge, but I keep finding in each Freedom game that somehow I do manage to come up with the required cash. And if any game can ever manage that much, it would be this wide build. The major determinant here was calculating ahead on faith production to buy the research labs. I would have enough to buy 12 labs with faith and still have 2500 left for two great scientists by turn 175. So I wouldn't need to spend cash on them. That's what Poland didn't manage (bought only two labs with faith), but the greater faith production here did cover almost all of them. Which freed up my cash to save for SS parts instead, and so we went Freedom after all.
So as usual, I started building trading posts everywhere, first on empty tiles then replacing farms. Once each city gets its research lab, I have it work food long enough for one more growth to use up whatever happens to be in the food box, then shut down growth and sell the aqueduct. Ideally, a city now will work nothing but Secularism specialists and Free Thought trading posts for the rest of the game. Not all my cities had enough trading posts to do that (lacking Citizenship was still hurting), but many did. This is the right way to play a Freedom endgame: the last thing a city needs to build is the market (sometimes the bank), then all that matters is beakers and gold.
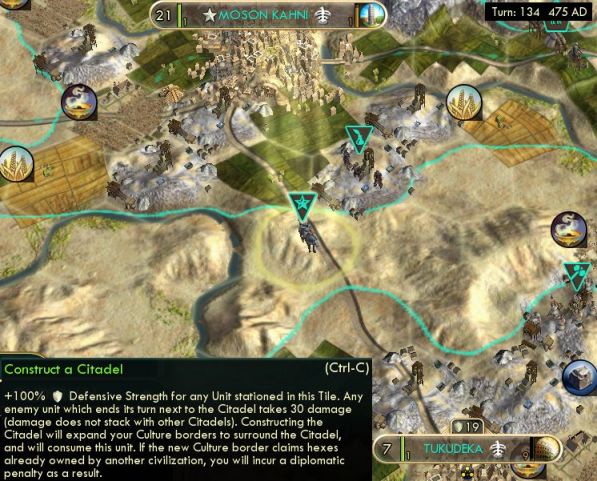
I still don't understand how the rules work for getting Great General points from barbarians, but apparently it can happen and I got one. There weren't any interesting resources within grabby range, so I just planted the citadel here, saving money on buying three desert hills.
Another amusing detail: I never built Taj Mahal. Didn't need it. The happy Golden Age had started late, around turn 135. Then two Great Artists with the full boosts from Chichen Itza and Universal Suffrage were enough to chain the golden age until the end of the game.
")
I reached Radio on turn 147 (after one bulb back at Sci Theory) and Plastics on t158 after two more bulbs. The latter was a record, two turns faster than Poland, although it took one more bulb to do it. But the wider number of cities should (and did) turn out to be enough beakers to make up the missing bulb value by the end of the game.

I had also been somewhat sloppy with the Great Scientist points in the Poland game, building the Gardens late and haphazardly. But I got that correct and sharp this time. I also finally got smart enough not to predetermine the number of Great Scientist cities. Instead of predetermining exactly how many cities should build gardens, I just had them all do it. I wasn't sure exactly how many would spawn (because I didn't know exactly when my end date would be), but the opportunity cost of an extra garden or two is small and the payoff of an extra scientist would be big. It would turn out that I'd get 8 total from city spawns, which is one more than typical, thanks to starting the scientist GPP so early via the Jesuits. Also Sweden friended me, which gives +10% GPP, which actually did save a turn on the last scientist (although not the finish date.)
I didn't bother keeping track of all the endgame bulbs and overflow management this time. I did three more bulbs after Plastics to get to Rocketry, the first one being for less than maximum value less than 8 turns after labs, but necessary to start burning overflow onto more 1-turn techs. I calculated that the scientists would neatly finish the tech tree with about 4k beakers of cushion. This is actually where the real advantage of a wide build is. The greater beaker production means you need fewer scientists to finish the tech tree after Plastics, so you can afford to bulb more of them sooner to the intermediate milestones.
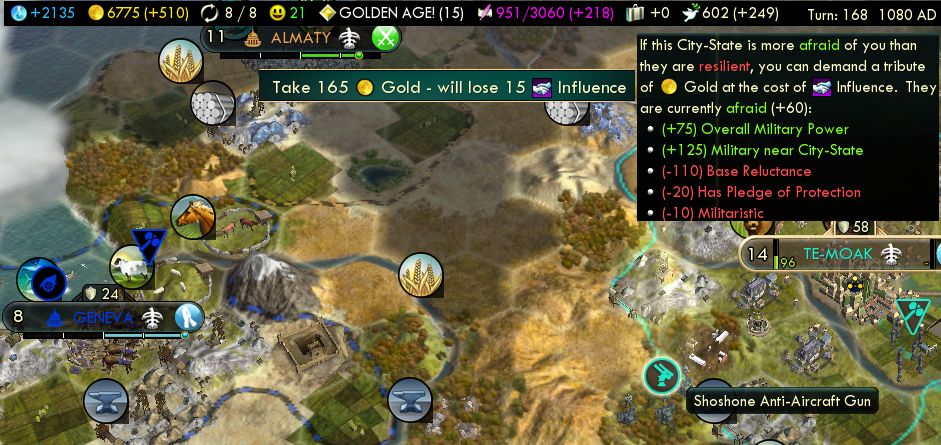
The interesting part was trying to pull together that 18,000 gold to buy the spaceship parts. Here's one amusing way to get cash. Almaty just gave me that anti-aircraft gun... and I turned around and immediately used it to hit them for tribute! Also Geneva next door too.
7000 on hand, 500/turn, with 10-12 turns to go... still going up a bit with more trading posts and banks... going to come close but still short of 18,000... if only we had one more policy to spare for Theocracy's +25% gold!
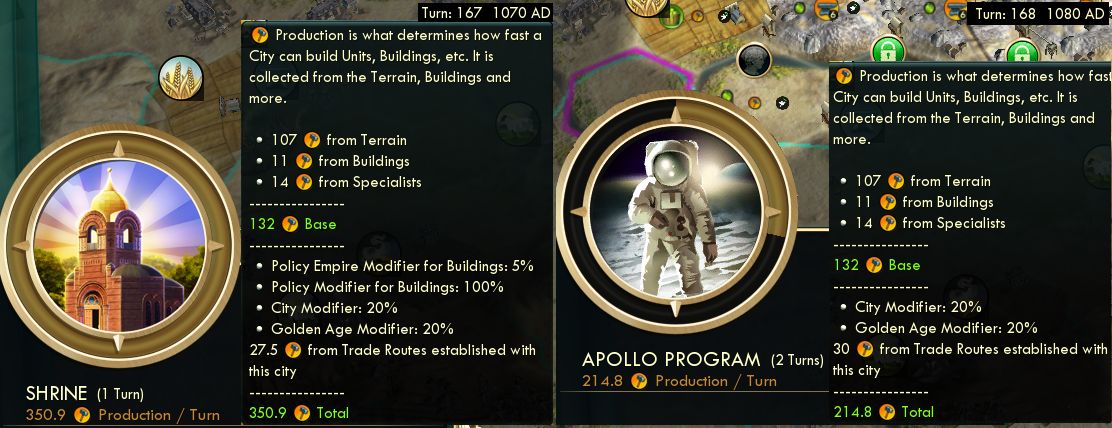
One more look at that shrine overflow abuse. I overflowed three hundred and ten hammers, completing the Apollo Program in just two turns! That always seems to be my bottleneck in Order games for building the SS parts... must keep in mind that Piety saves a turn there thanks to this.
As usual, I skillfully weaved together all the threads for the end game. I still like doing this in Civ 5 even after quite a few plays by now.
T172 spawn the last regular Great Scientist and bulb Combined Arms, overflow to Computers, build Porcelain Tower end of turn
T173 bulb Robotics with the PT scientist, culture-bulb Rationalism finisher for Nanotechnology, faith-buy scientist, build Oxford at end of turn
T174 bulb Nuclear Fission with the faith scientist, so that Oxford can claim the more expensive Adv Ballistics on this same turn (not a last-column tech, but wanted to get Oxford out of the way so it wouldn't tie up the capital's build queue for a turn later), start Hubble to put the overflow from Oxford onto it
T175 do one last shrine sell-and-rebuild to gain a turn's worth of hammers on Hubble
T176 complete Hubble, culture-bulb Space Procurements, buy second faith scientist
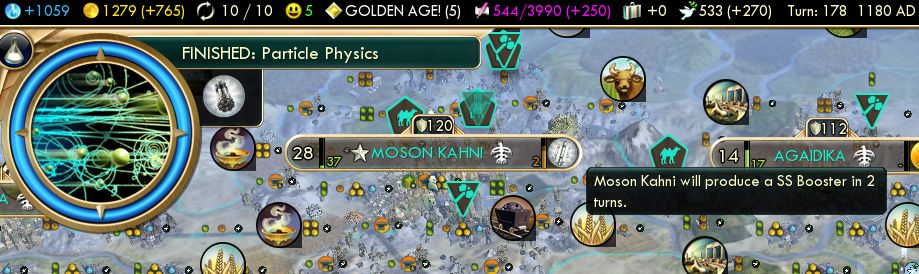
T177 use last three scientists to bulb all of Ecology, Telecommunications, Mobile Tactics, and overflow to Particle Physics at end of turn. Sell all the research labs for money. Fire all scientists.
T178 purchase 5 spaceship parts.
I ended up with the backup plan for Freedom. I got enough money to buy five SS parts but not six, so built one in my capital here. (Not the last part on the tech tree; I started building this booster a turn before Particle Physics came in; the part from that tech was bought.) This cost one turn on the finish date, short by either 1800 gold for buying or one turn of hammers in the capital.

Science victory on turn 180, one turn behind Poland. But both Jesuit Education games were still five turns faster than anything else. That really does gain those turns in the midgame.