This is a brief report of a casual game. I was looking over this civilization "tier list" thread on CFC and a couple others linked from it, and noticed the Shoshone consistently ranked highly in a number of opinions.
The civ UA is "Founded cities start with additional territory", which in practice appears to be an extra 8 tiles worth, not in any particular pattern, just the first 8 picked by the usual algorithm. Their other aspect is the Pathfinder unique unit, which I didn't even know about until I came across it somewhere last week on CFC. This unit replaces the Scout, has 8 combat strength, costs 45... and can choose its result from ancient ruins.
I don't really agree that the civ seems all that good. It doesn't really do anything towards any of the win conditions. But it does look fun and I suspect that's why it gets ranked highly so I had to give it a shot. My plan is to go for a straightforward science victory, aiming at fastest finish. I know the Shoshone won't be competitive with more focused civs, but this is a good way to set a baseline of comparison for future attempts. To make the baseline more relevant, I am indeed going with the cooked map Inland Sea desert setup.
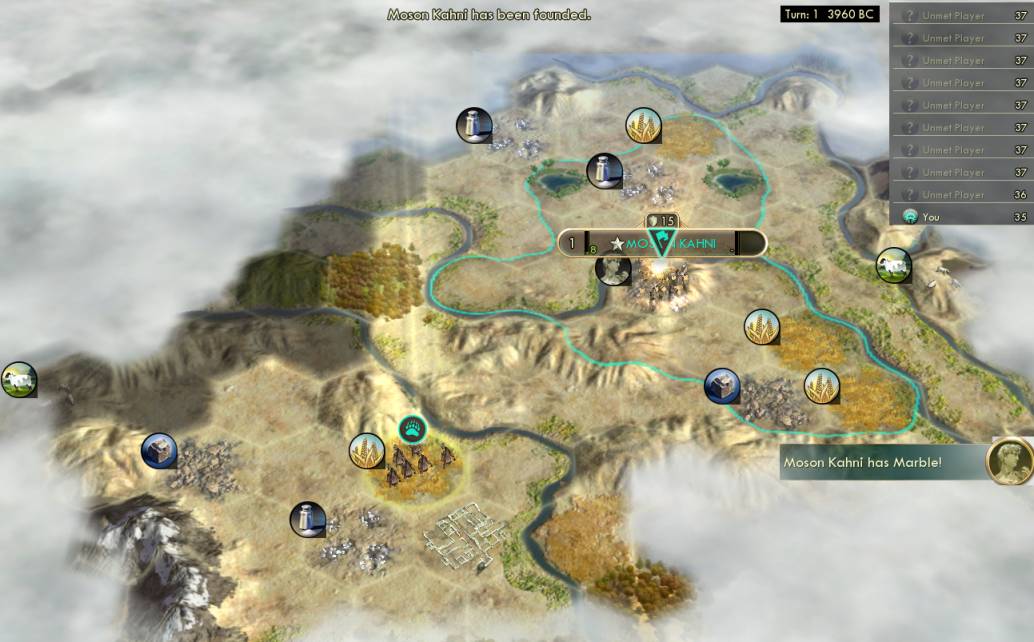
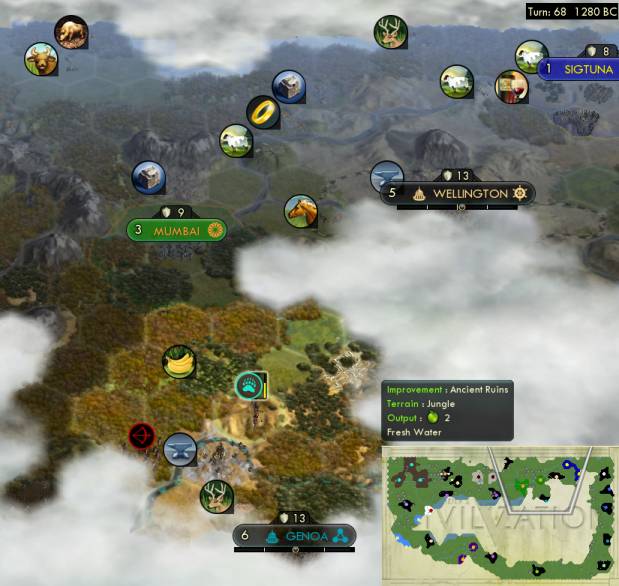
Here we go. Immediately we can see the Shoshone ability sprawling all over the place, pulling in a big swath of two oases and three wheat from turn one. This spot is also beautifully Petrable; one problem with Petra can be the city taking forever to actually acquire all the desert hills (always low priority for the auto-picker), but the Shoshone get a big head start towards that.
Another head start is beginning with a Pathfinder instead of a warrior. This is great not only for the Pathfinder's ability, but just for the ignore-terrain-costs ability of the scout, getting going faster to find ruins in the first five turns.

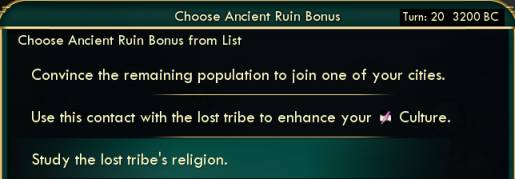
Here is what the Pathfinder ability looks like, a menu offering the choices from the ruin. It doesn't actually spell out the rewards of +1 population or +20 culture, but if you know the normal results, you know what each of these means. Importantly, if you pick the technology option, the technology awarded is random, you don't get to choose that too. The other important constraint is that once a reward is chosen, it will not appear for the next several ruins or turns, you have to pick other options for a while before you can pick the same one again.
Here on turn one I actually took population as my reward. That would get the second oasis worked immediately right away. Usually I want culture first, but you don't actually need that until turn 5 when it will open Tradition. Here it actually took me several turns to find any more ruins for that, but on turn 11 I found two to pick both culture and gold (80). With the next ruin on turn 16, I actually took a map.
The map was in hopes to find another ruin that I could pop on exactly turn 20, which happened. Turn 20 is the earliest that the faith outcome can occur. I precisely got that here for Desert Folklore.
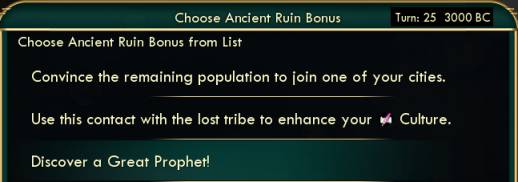
It turns out that the pre-pantheon religion result is a separate item from the post-pantheon result, so you can choose both in succession. Although here is where you have to know the normal outcomes -- despite the message, it's not actually awarding a Great Prophet, it's really just the regular 60 faith outcome. Anyway, here's the rest of the ruins: t29 population to size 7 (that's a gain of 66 food), t32 took gold (90), t52 technology (Trapping), t57 population to size 11 (holy crap that's worth 114 food!), t68 gold (65). I didn't think I needed culture any more once Tradition was developing well, but rather the population gains were huge, and the next priority was gold towards buying settlers and workers, with the one technology chosen when both pop and gold weren't available.
So yes, this was fun -- although not really much more effective than a standard civilization. The Shoshone actually get fewer huts (deliberately balanced to be so) thanks to the much higher cost of their scout UU at 45. Their total results tend to be only a bit better than normal, getting about the same number of good results total on less quantity but better quality minus dud outcomes of maps, barbarians, and first-level techs.
Possibly the nicest bit is that the Shoshone can entirely skip the shrine, counting on a faith ruin for the pantheon. Although they don't really get ahead as the hammers saved on the shrine get eaten up by the pathfinders' higher cost.
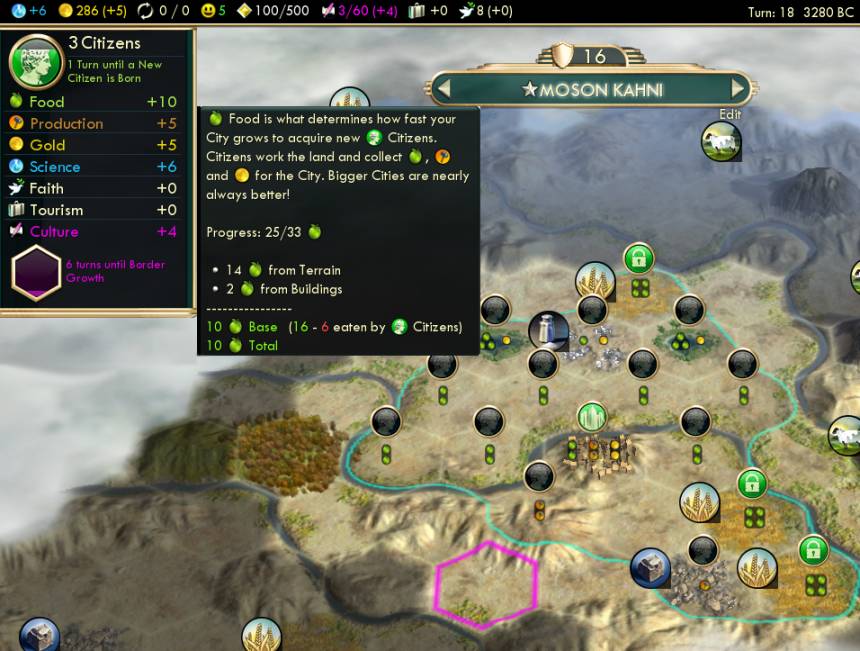
In fact, the Pathfinders compete at odds with the civ's other ability. Because of the three available wheat tiles, I built the granary early after just one Pathfinder, putting off more of them. I couldn't waste this big opportunity of working three 4-food tiles by turn 18. (Remember that turn-1 population ruin also provided research to get to Pottery faster as well.) This was cool, but delayed the rest of the pathfinders quite a bit compared to a usual scout - scout - scout start.
And even though I built three more pathfinders immediately after the granary, the waves of barbarians were in full swing, and two of them had to stay home for defense. I didn't get a third pathfinder exploring until about turn 40, and he only ever found one hut.
It was this one, and also Genoa gave me the first-contact gold bonus. I have no idea how the AIs sitting four tiles away missed this hut and city-state for 68 turns.
One other thing that's neat about the pathfinders: They have enough combat strength to fight barbarians and camps, but they are eligible for the scout promotions of Survivalism (faster healing) and Scouting (visibility), which are much more interesting than the usual warrior junk of rough/open terrain modifiers. I did have some fun with them fighting barbarian camps and recovering workers around the inland sea, getting several city-state alliances.
Anyway, that's pretty much it for anything special to the Shoshone civilization. The rest of the report will be brief as it's a standard tour over stuff we know already.
Build order at the capital: pathfinder - granary - pathfinder - pathfinder - pathfinder - worker - caravan (food route to second city) - Hanging Gardens - Petra.
Workers: keeping up on tile improvements with the Shoshone's free land was quite a challenge. I built a few workers, bought several, recovered a couple that barbs stole from city-states, and did one direct grab of my own against a CS.
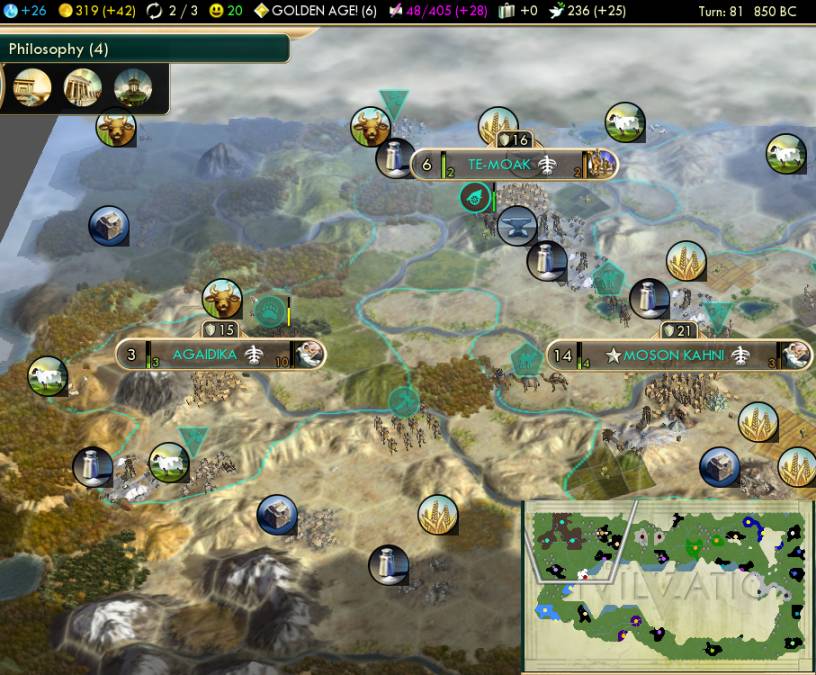
Tradition: policies came on t11, t18 Oligarchy, t33 Legalism, t50 Aristocracy, t64 Landed Elite, and t80 was Monarchy and the finisher.
Money: on turn 19, accumulated enough gold from the one ruin and many city-states to buy a worker. t27 researched Masonry and sold marble for partial value of 4/turn. t28 salt mined and sold for 5/turn. t36 second salt hooked, but I actually had to keep the happy for myself with such a big capital. t42 bought settler. t51 hooked up 6 iron at second city and sold it. t60 India friended me and loaned me money to buy my third settler.
Tech: Pottery - Mining - Masonry - AH - Bronze Working - up to Mathematics and Currency. Midgame plan was to Civil Service for the food, then universities ASAP and Acoustics to open the Renaissance and Rationalism.
Religion: I got my prophet super early on turn 43! But I alertly held him off a couple turns until the second city got founded, so it could get the pantheon for free first. My beliefs were a pretty standard set of Tithe, Religious Community (actually a sizable boost this early), Swords into Plowshares, Itinerant Preachers.
Expansion: I paused at 3 cities for the National College. With an incredible amount of food at the capital, the NC would clearly get to Education faster than would more settlers. I debated a bit on how to get more cities out there - not enough money to buy settlers and then the libraries, but didn't want to build settlers at the capital wasting its enormous food surplus. Finally I realized what to do: just build settlers in the other two cities, while the capital built the NC, then settle right after.
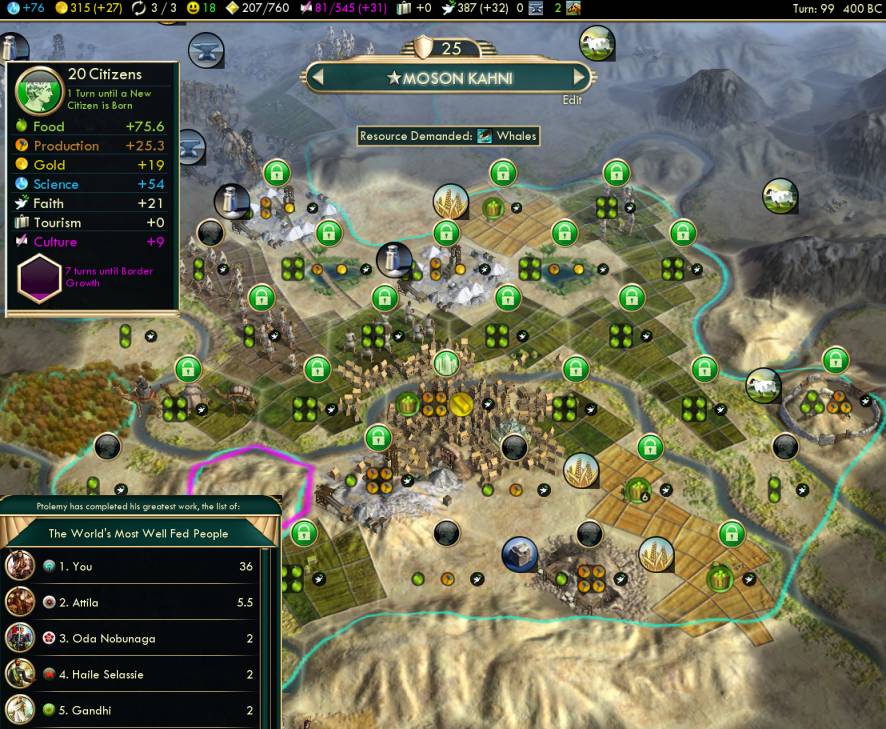
This much food. SEVENTY-FIVE surplus in BC years.
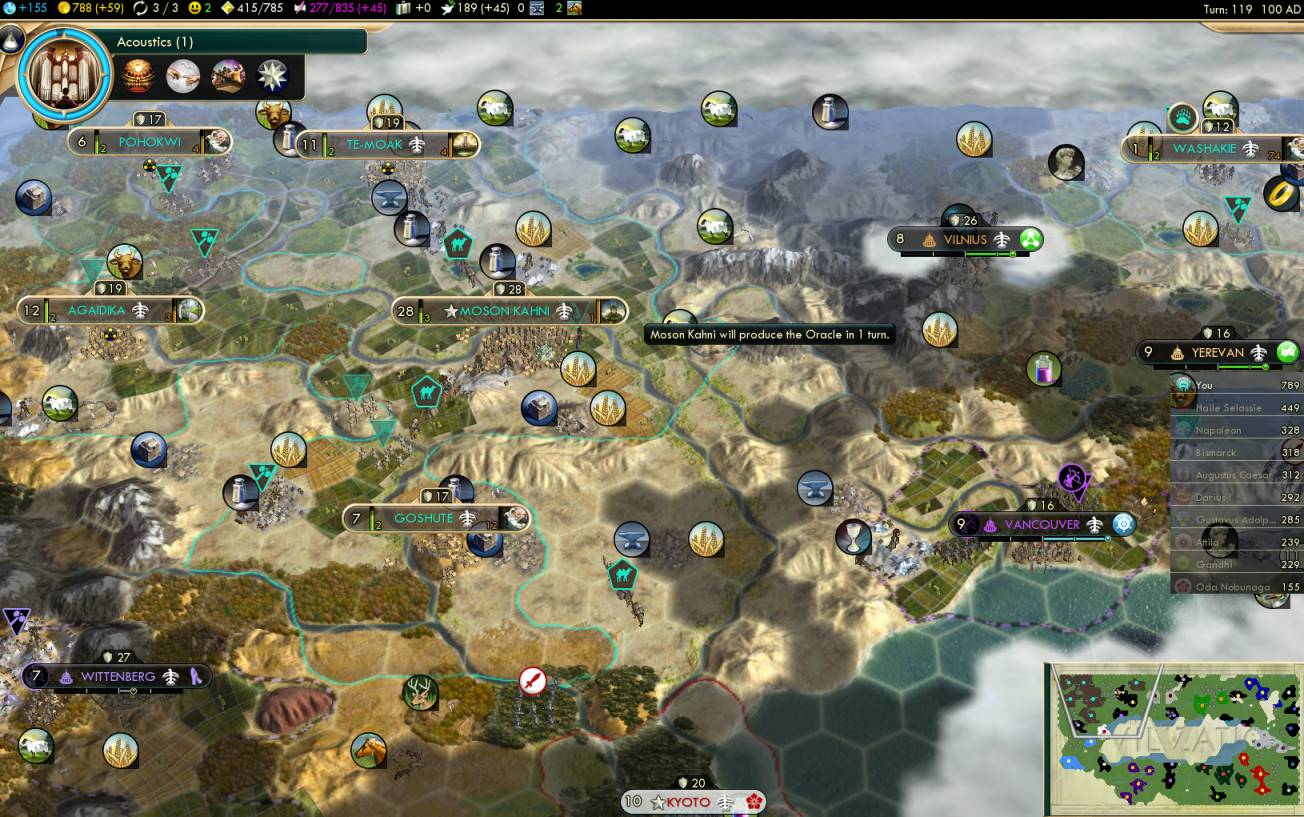
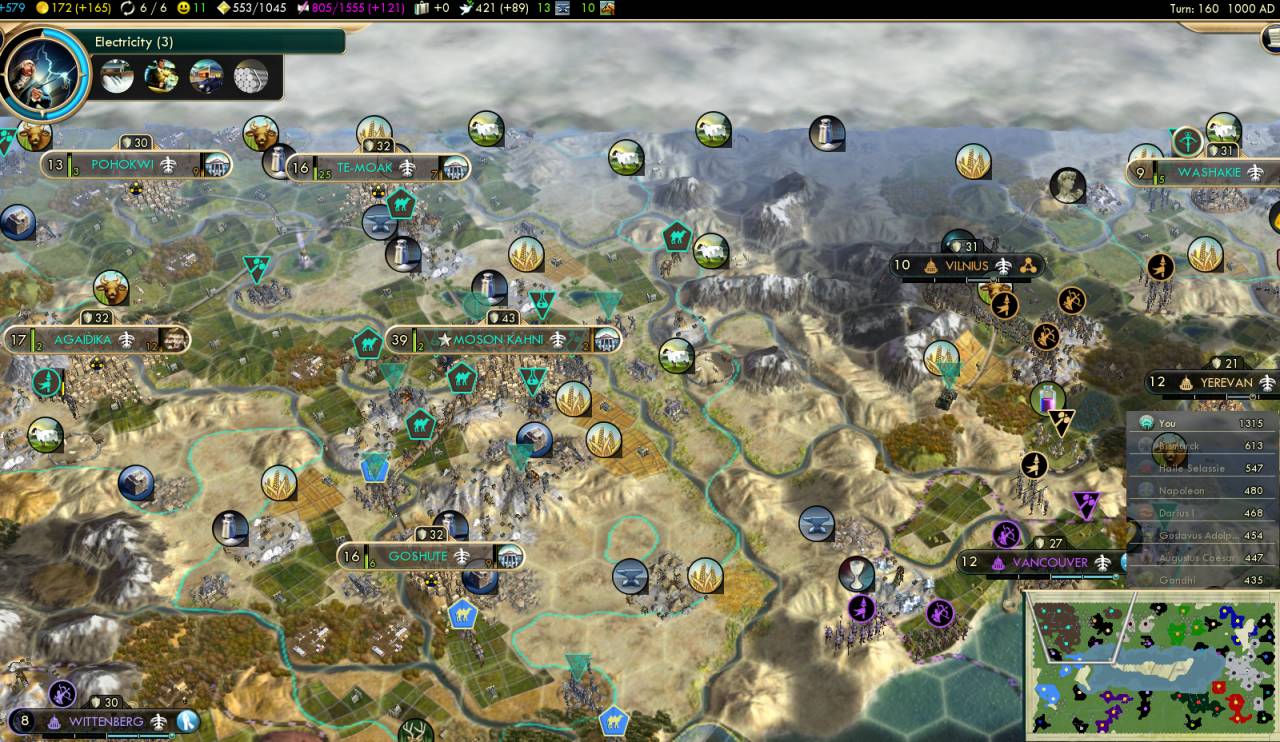
After the NC, I expanded out to three more cities, seen here. Washakie in the far east had three luxuries, one new, worth the reach even at the cost of angering neighboring Attila.
I learned in games of the previous Civ 5 expansion, and still believe, that the correct wideness for science is any city that can produce a Great Scientist before the end of the tech tree. This can be done up to the 6th or 7th city with the right approach. The limiting constraint is the availability of scientist slots, and the only way to get more is to build more cities and run them in parallel. So the right path is to reach and build universities as soon as possible and run every scientist at all times. The first two new cities (Goshute and Pohokwi) built their granary first, which was a mistake, extra food from trade routes was enough to grow them, they should have gone library first, and I fixed that mistake with the last city (Washakie). All three cities got the universities bought as soon as the libraries finished.
Note that Tradition and particularly Monarchy were a key piece of this. Monarchy is saving 14 happy in the capital (and still rising fast), and also producing 14 gold that along with Tithe were what added up to afford the universities.
That overview shows me at the verge of Renaissance entry. Happily, the Oracle had remained available long enough to shoot it into Rationalism. I also bulbed each of my Great Writers into Rationalism policies.
Policies: I followed the classic standard order for science. Fill Tradition, dump two surplus policies into Patronage and Consulates, then into Rationalism once it opened. Although now there's a bit more depth to this, with ideologies competing as well. I feel fairly sure this is the correct order: Rationalism opener, Secularism, Humanism, Free Thought, then divert to Order for the one tenet of Workers' Faculties, then finish with Sovereignty and Scientific Revolution. You actually want to delay the Rationalism finisher a bit to get into a more expensive tech. I timed that perfectly here on t176 to claim Plastics with the free tech and also kicking in the 50% RA bonus just before they matured.
Trade routes: Notice that I cannot get a port city on the inland sea. Every coastal tile is within 3 tiles of either Kyoto or Vancouver, so there is no room. So I just used local food routes as usual, though one unusual step was building a Caravansery in the capital in order to reach Washakie with a production route.
Foreign relations: India had friended me early with one of those random friendships. I didn't get another for a while, but then finally Sweden did, thanks to a liberated worker and shared friendship with India. Later also France friended me. I eventually did one round of research agreements with all three, starting in the 150s and maturing in the 180s for about 600 beakers each, not sure if that was worthwhile.
Wonders: I had built Hanging Gardens and Petra early. I added Chichen Itza, since a science game has the luxury to burn every great artist on a golden age, with no need for any great works or tourism. Also Machu Picchu which is always major value. Later added usual stuff in Sistine Chapel, Forbidden Palace, Pisa Tower, Porcelain Tower, Taj Mahal, Kremlin, Cristo Redentor.
And I built Angkor Wat. Why would the Shoshone need that, who already get plenty of extra tiles? We built it because I clicked on the wrong wonder and meant to build Machu Picchu, haha.
Religion: I played the standard plan. Got missionaries out fast to spread to all accessible virgin territory, but didn't try to push back in any contested cities. Virgin territory worked out well here, about the whole western third of the map, where neighboring France, Japan, and Rome all didn't found their own religion and took mine, plus about eight city-states. I ended up skipping the Theology wonders as Desert Folklore pushed out enough missionaries on its own. I then let faith go to the 500 prophet, since there were no more missionary targets, and settled him as a holy site. Not really for faith value itself, but just to futureshift faith production and open up more headroom to save faith for industrial-age Great People. Also because two CS wanted the prophet.
World Congress: Of course I wanted Science Funding, but the AIs always hate that and love Arts Funding instead. I'm pretty sure why this happens, because the writer and artist guilds come earlier so the AI runs those specialists but doesn't get scientists going until much later. But of course I couldn't go for Arts Funding in a science game. The good-enough proposal on the list was World's Fair.
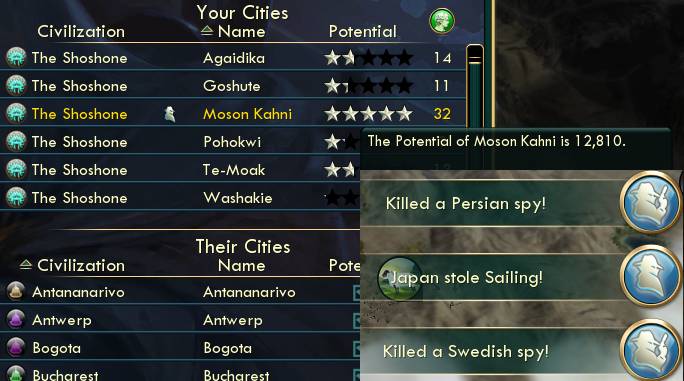
Espionage: Thanks to the Shoshone land grab, my capital grew far faster than any I've ever had before, here size 32 barely into AD years. That sure attracts spies like flies! Each new spy of mine got to level up to max within five turns of sitting in my capital. (And you're stealing SAILING?! You both can't afford forty beakers for yourself and can't find a bigger prize to steal?  )
)
Subsystems: There are too many in this game, as I'm highlighting with this paragraphic report format.
War: Yes.

He sure is.
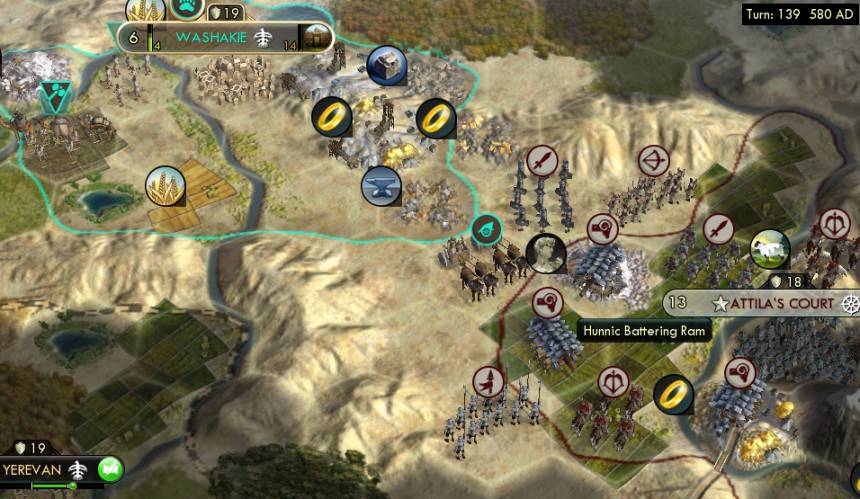
Alright, some ACTION! I actually relished this, the first war I've had in six games of BNW now. I bought a crossbow, upgraded that CA to knight, and brought another CA from home and upgraded it too. Squeezed in a walls build before his units reached the city. I'm not sure how strong Battering Rams are in practice, but this felt like enough to hold off the hordes, especially after I also got one more knight gift from a militaristic CS about eight turns into the fight.
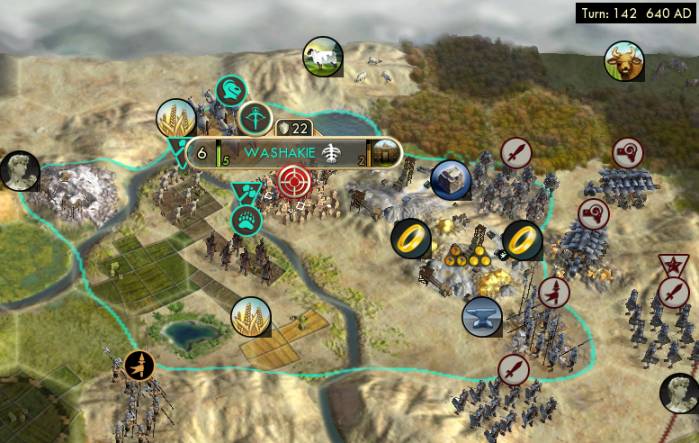
I know we all know how to fend off hamfisted AI tactics, but this is my first chance here to show any of it in BNW. Notice how badly Attila is starting off here, stupidly walking that single sword into range to get shot by my city and crossbow. I would kill off close to a unit per turn with the ranged attacks, although did lose one knight that got left exposed. I was worried about losing the gold mine which would be a minor headache, but somehow Attila never pillaged even though he had units on it several times.
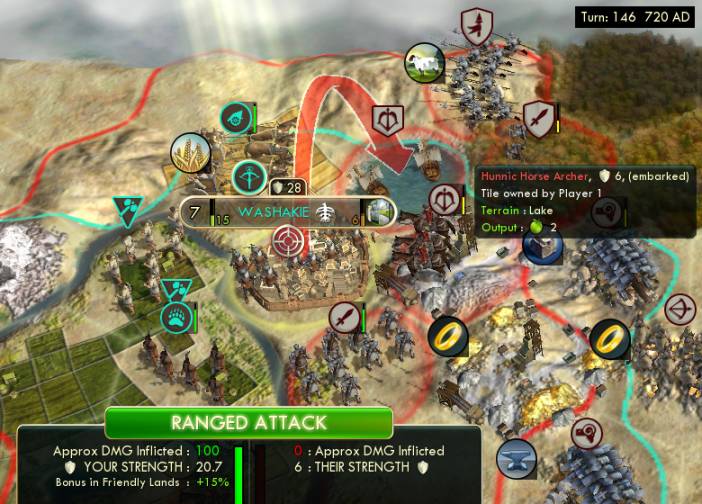
Attila even kindly embarked a unit into that lake for no reason other than to let me instakill it.
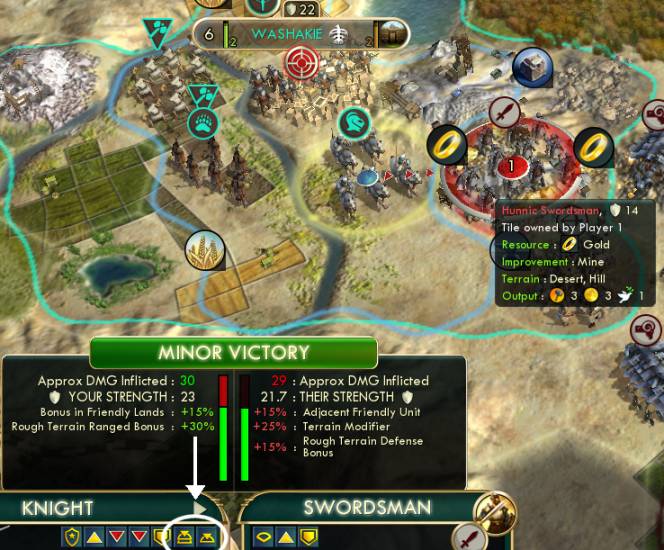
Hey, this got fixed. This knight was upgraded from a chariot archer, and has the "RANGED attack vs rough terrain" promotions. But now those promotions apply to melee attacks too so they're not useless after an upgrade. Here's an example of the sort of things that were messily broken back in Civ 5's original release but have been cleaned up in the patches and expansions.
Anyway, I worked through the Hun units. Attila wanted to give me his city of Paviken for peace. I sniped a worker. Didn't make peace that turn just yet...
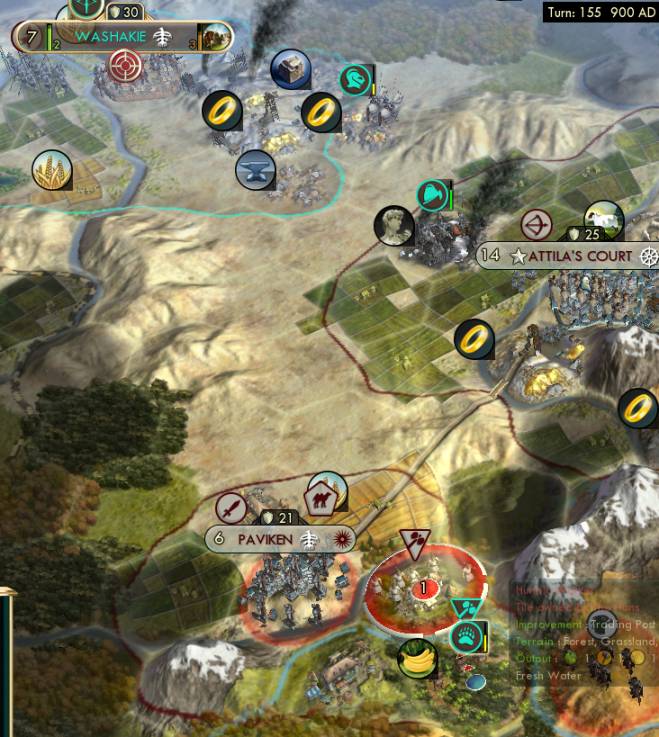
and holy crap look at this stupidity. Attila just fed me another worker to enslave. What the heck? I believe this worker was in Attila's Court last turn and then moved here. Somehow the AI didn't notice my Pathfinder as threatening to the worker. Did this happen because the AI doesn't look far enough away for threats (5 hexes) from where the worker started? Or does it not consider the Pathfinder as a threat because it's a scout class unit? Or was this deliberate bait to lure my pathfinder in where his sword can kill it? (Ha, no.)
I now took peace for his treasury of 84 + 17/turn, decent payoff, almost makes up for what I spent on units for the war.
And something indeed has gone wrong in BNW regarding the AI's threat detection for worker movements. Attila's dumb worker sacrifice was just one example. All over the place, the AIs just keep losing workers to barbarians over and over again.
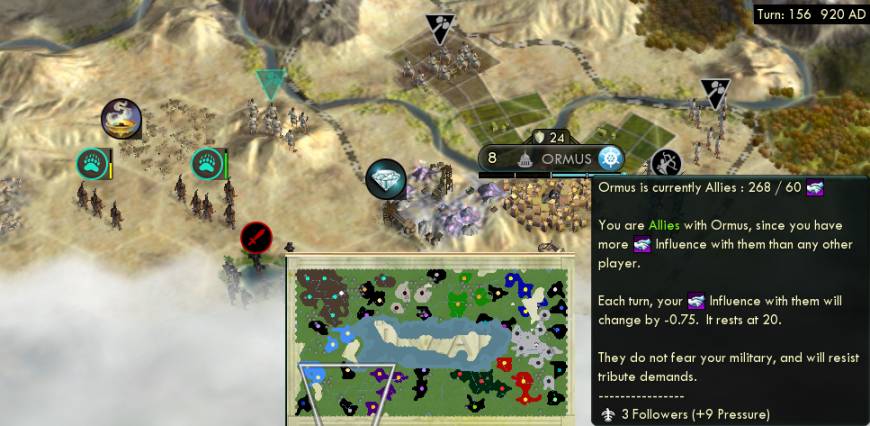
Check this out. I had those two pathfinders wandering around, killing barbarian camps for city-states, two pathfinders being strong enough to pull that off against most types of defending units. Ormus here just kept losing the same workers over and over and over again to barbarians while my guys stayed in the area. I retrieved them something like four different times, adding up to the highest influence value at 268 that I've ever seen with any city-state.
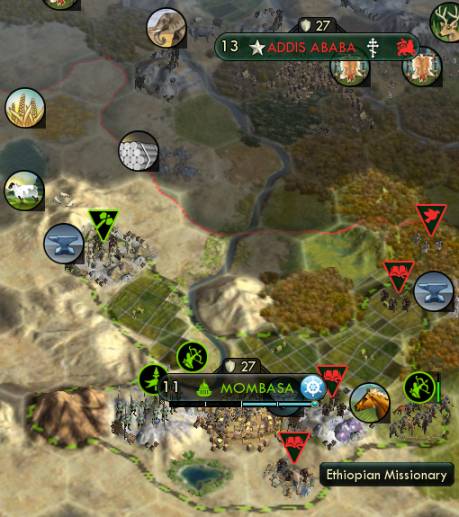
And for our entertainment, here's more AI silliness. Ethiopia here had just built Borobudur. Naturally, an AI missionary should target the closest-city state. So naturally, all three missionaries plus a prophet should all target the same city-state at the same time. Right?
Anyway, back to science.
I got the last university built on t135 500 AD. Then to Scientific Method, reaching that on turn 158.
I continued straight on to Radio to enable ideologies. I'm now strongly thinking that this is the correct move as compared to enabling the ideologies by factories. The key piece is the Workers' Faculties tenet in Order, for double factory production, which makes ideology-then-factories much more sensible than the other way around. In fact, the timing works out very well to go for Radio first, then at just about the same time, research Industrialization to enable factories and get Workers' Faculties (a level 2 tenet) to build them.
As for ideologies themselves, I'm convinced that Order solidly beats Freedom for science. Workers' Faculties for +25% science is just way bigger than anything in Freedom or Autocracy. Skyscrapers in Order is also better than any Freedom tenet, getting research labs and hydro plants bought sooner. And finally, the level 3 spaceship tenet in Order is better than the one in Freedom. Rushing SS parts either way (engineer or gold) actually doesn't much matter, since the limiting factor is only the last part anyway. But Order's tenet comes with a Great Scientist to speed up the end of the tech tree by 8 turns, more than any amount of rushing will do.
I had one policy to spare beyond Rationalism and climbing to the one level-3 Order tenet. Where should it go? The Commerce opener seemed like a good place. Big Ben would save a turn or two on buying power plants and SS factories. And the Commerce opener itself would pay off bigtime in this capital:
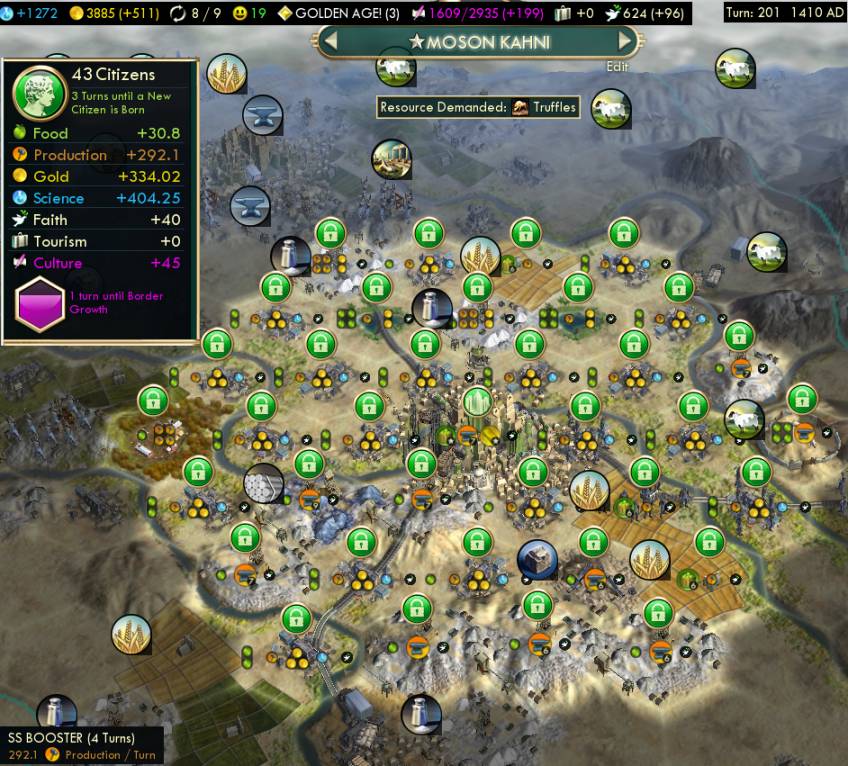
Wow. Size 43, the biggest I've ever had. And I don't think I've seen this before either: the city is actually working the whole full 37 land tiles, there's not a single mountain or lake or coastal dud.
And look how it did so with trading posts rather than farms. I had been switching the improvements as there was worker labor available to do so. There was no point trying to grow the capital beyond 40, paying over 400 food per growth! You'll get more beakers just from the Free Thought policy on trading posts. And as a side effect, the trading posts yielded an enormous fortune of gold income.
So I hadn't expected this, but the Shoshone ability does make a long-term impact on city size. Because you get all those food tiles operating sooner instead of waiting for culture to claim them, particularly with the amphitheater line of buildings nerfed on culture production in BNW.
Also there was a hydro plant adding 30 hammers to this city. In science games, I often don't have the time and materials to chase wonders late, but had enough for the Kremlin and Cristo Redentor here. The net effect was more or less building these wonders to get the Commerce opener.
World's Fair: This was the one and only proposal passed by the Congress. (The game ended before a second 30-turn session completed.) I didn't need to win the fair, but ended up doing so anyway, just because I had to put more production into it to get the free policy to arrive soon enough!
The endgame of science always revolves around managing the Great Scientist bulbs, so here's how it went here. First I'll cover their sources:
- 8 by normal means from the six cities, one from each with the capital actually producing three at 100, 200, and cycling around again at 900 GPP.
- 4 from wonders: Pisa Tower, Porcelain Tower, Hubble Space Telescope (rushed by a faith-bought engineer.)
- 2 from faith, at the 1000 and 1500 levels. Didn't get enough faith to get near the next at 2500.
- 1 from the Spaceflight Pioneers tenet.
Then the spending:
- One into Radio, to get the ideology and Workers' Faculties. This was the first time I've bulbed that early, but I'm pretty sure it was indeed correct.
- One into Plastics, as usual.
- Three up to Rocketry. This was unusually many but felt necessary here and I think it was correct.
- Everything else after Apollo completed, to finish the tech tree.
The math went like this. I bought every research lab right away, and 8 turns later is when scientists reach their maximum bulb values, any more city growth beyond that is peanuts. Each endgame scientist would go for 10,500 beakers, so 105k total. The needed techs in the Information Era total 65k beakers, after ignoring one tech (Nanotechnology) that would be claimed by Oxford University. So I started bulbing when the remaining total in the Modern Era came down to 40k beakers, which happened right around as the Apollo Program finished.
In BNW, there is an extra bit of micromanagement needed to work around a new rule: science overflow is capped to 5 times your beaker production. So I bulbed a few turns earlier in order to spread them over several turns. I screwed this up once and lost about 5000 beakers, 3 turns of research. But that didn't hurt as all but one SS tech (Particle Physics) was already done, and that last part would be Engineer-rushed, so there was room on the schedule for that minor screwup. I completed everything perfectly in sync on the turn right after the last tech as you see here.
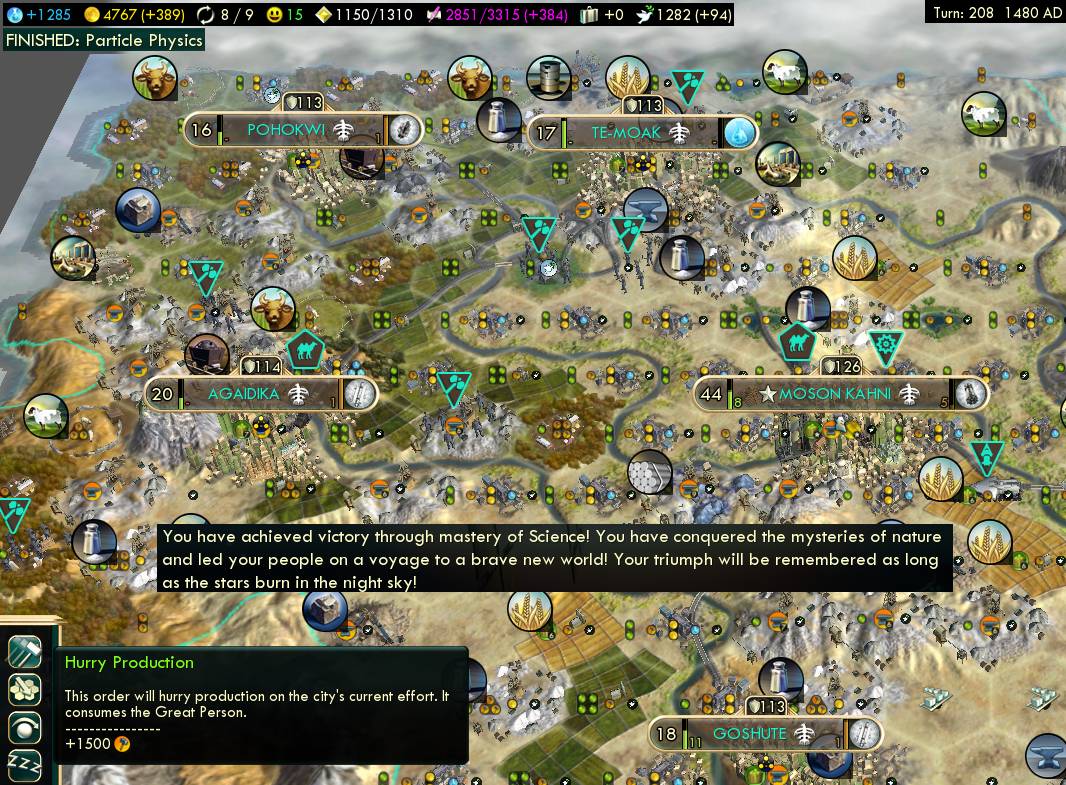
Science Victory on turn 209 1490 AD. Pretty good. My record in G&K was turn 171. BNW times aren't comparable, thanks to the nerf on research agreements, the added tech cost per city, and the nerf on early resource sales. 209 is a pretty good baseline, but I think I can still knock 15 or 20 turns off that.